From Martel’s own product gallery. Illustrative arrangement; room coverage depends on placement, acoustics and testing.
Choose conference microphones by the speaking positions you need to cover, then confirm the choice with a real room test. Four microphones can be a useful starting point for a compact table. A longer table, quieter participants or a more complicated seating arrangement may benefit from eight, twelve or sixteen pickup positions. The number of chairs helps frame the decision, but it does not settle it.
Martel’s Zoom Multiple Microphone Systems give organizations four package sizes to compare around that decision. This guide explains how to turn a room sketch into a practical equipment shortlist, how to compare the packages without confusing microphone count with recording tracks, and how to check whether remote attendees can actually follow the discussion.
A meeting room contains more than a table and a computer. It contains people who speak in different ways, turn in different directions and sit at different distances from potential microphone positions. Someone may speak clearly while looking at the camera. Another participant may read quietly from a document. A chairperson may turn toward the presenter and speak away from the center of the table.
Write down the conversation the system must carry before choosing a package. Include regular seats, a presenter’s position and any designated place for audience questions. If the room is used for both a six-person staff meeting and a much larger committee session, describe both. A system chosen around the easier meeting may disappoint when the room fills.
Also identify the listener. A remote attendee who must vote on a proposal needs to understand the discussion as it happens. A secretary preparing minutes later needs a usable recording. Those jobs overlap, but a successful live call does not prove that the saved recording contains every required voice. Your microphone choice belongs inside the complete meeting workflow.
Compare the four Martel package sizes
Martel currently offers these starting points in its multiple-microphone category. The suggested group sizes are planning guidance; the occupied room and the listening test determine whether a particular layout works.
Package
SKU
Suggested group size
Useful starting question
4 microphones
565
Up to 6 people
Can four positions serve the occupied speaking area?
8 microphones
598
7–11 people
Would additional positions bring pickup closer along the table?
12 microphones
587
12–20 people
Does the larger layout need more distributed pickup?
16 microphones
429
20+ people
Which speaking positions justify the largest package?
Use the table to begin a comparison, then work through the room questions below. Avoid treating the suggested group size as a seating certificate. Table shape, normal speaking level and room sound can change the practical requirement.
Make a seating map that includes the difficult voices
Draw a simple overhead view of the room. Exact architectural dimensions are helpful, but the first useful sketch can be a rectangle, the table and the occupied seats. Mark the chairperson, computer operator, presenter and regular quiet speakers. Add any equipment or furniture that prevents a microphone from being placed where you would otherwise put it.
Next, identify the positions most likely to be missed. These might be the far end of a long table, a participant beside a ventilation outlet or someone who usually faces a display. Mark them before placing microphones on the sketch. This reverses a common planning habit: filling the convenient places first and hoping the difficult positions will be acceptable.
Give each speaking position a short identifier. Use A1 through A6 for one side, for example, rather than relying on names that change at every meeting. The identifiers let you compare trials and tell support exactly where a problem occurs. Keep the seating map with the equipment instructions so the next operator can reproduce the arrangement.
Count useful pickup positions rather than drawing equal circles
A microphone position is useful when it improves the speech reaching the system without creating a bigger operating problem. It may serve two nearby seats well. Another position may need special attention because the speaker turns away or speaks softly. There is no universal rule that one microphone equals a fixed number of people in every room.
Avoid covering the sketch with identical circles and assuming the job is complete. Real speech changes with posture, direction and surrounding noise. A microphone beside a noisy laptop fan may hear the people around it differently from one on a clear part of the same table. Paper stacks, laptops and bags can also change the practical placement choices.
Instead, assign each proposed position a purpose: serve the chairperson, improve the distant seats, include the clerk or capture the presenter. After testing, retain the positions that solve actual problems. If two microphones occupy almost the same place and contribute no useful improvement, moving one may be more valuable than simply increasing the total count.
When the four-microphone package deserves a closer look
The four-microphone package is a sensible candidate when the occupied speaking area is compact and the conversation comes from a small number of nearby positions. It can be useful when an organization wants to move beyond relying on the laptop at one end of the table, while keeping the equipment arrangement easy to document and repeat.
The important phrase is occupied speaking area. Six people sitting close together at one end of a larger room present a different task from six people spread around a long boardroom table. The participant count is identical; the potential mouth-to-microphone distances are not. Put the room drawing beside the package comparison before deciding.
For a first trial, distribute the microphones according to the required voices, not the easiest cable route. Ask a remote listener to assess the quietest person and the most distant position. If those voices are useful without making nearby speech harsh or bringing up distracting room noise, the smaller package may fit the job well. If they remain consistently faint, investigate placement before assuming that higher sensitivity alone will solve the problem.
When eight microphones can make planning easier
An eight-microphone arrangement gives the planner more pickup positions to distribute across a medium-size occupied table. Its value comes from the additional placement choices: the ability to bring a microphone nearer to a difficult speaker or cover a portion of the table that a smaller arrangement leaves weak.
Consider how the meeting actually operates. If participants frequently turn to address people on the opposite side, test that behavior. If a clerk works from a separate desk, include that desk in the plan. If several microphones are available but all remain close to the computer, the room may still have the same distant-voice problem it had before.
The Martel eight-microphone package is worth comparing when you need more distributed pickup without jumping straight to the largest configuration. Ask whether the additional positions have identifiable jobs. A package earns its place in the shortlist when you can explain which voices it helps and how staff will set it up consistently.
When twelve microphones belong on the shortlist
Larger boardrooms often contain several distinct speaking areas. The central table may be only one of them. A presenter, clerk or side seating area may also need attention, and the room may be used differently from one session to the next. A twelve-microphone package offers additional positions to plan around that more varied arrangement.
More positions also require more discipline. The operator needs to know which microphone belongs where, how cables are routed and what a normal working setup looks like. Without that information, a larger package can become a collection of parts that people place wherever there is space. The hardware count grows while the repeatability of the room remains weak.
Shortlist the Martel twelve-microphone package when your seating map contains enough meaningful pickup locations to justify it. Keep the evaluation focused on intelligible speech and manageable setup. The goal is a useful meeting connection, not a table that looks more thoroughly equipped in a photograph.
When sixteen microphones need a deliberate layout
The largest package is especially relevant when the organization has a large occupied meeting area or several required speaking positions. It gives the designer more places to collect speech, but it does not remove the need to decide where those places should be. A large microphone count can conceal poor distribution if the microphones cluster around the most convenient furniture.
Begin with the most demanding session the room regularly hosts. Include the full seating arrangement and the routine movements of speakers. Identify which positions require dedicated attention and which can share a nearby pickup point. Check the supported connection plan for the exact package instead of improvising an expansion arrangement from connector appearance.
A Martel sixteen-microphone system should be considered as a complete operating arrangement. Assign responsibility for setup, testing and storage. If the room frequently changes, photograph the approved layout and label the equipment so staff can adapt it deliberately. Having the largest package is useful only when its extra placement options are turned into better coverage of the actual conversation.
Compare table shapes before comparing room dimensions
A long narrow table can be difficult even in a modest room because speakers are spread far apart. A wide table may create long cross-table distances. A U-shaped arrangement may include a presenter in the open center. A classroom layout may have rows of people whose questions come from outside the main table.
Use those shapes to guide the first layout proposal. For a long table, investigate distributed positions along the occupied length. For a U-shaped table, include the people at the ends and the person addressing the room. For separate tables, identify whether every table needs to contribute to the call or whether participants use a designated speaking location.
Do not assume that a package advertised for a larger group automatically fits every smaller group. Eight people around widely separated tables may be a harder pickup problem than twelve people seated close to useful microphone positions. The room sketch makes that distinction visible before you order, and the test recording makes it audible afterward.
Use an original six-person planning exercise
Imagine a small nonprofit committee with six members seated at a rectangular table. The meeting computer sits beside the secretary at one end. Remote members complain that the opposite end sounds faint. In this hypothetical example, the organization is considering a four-microphone package.
The first proposal places a microphone beside the secretary and distributes the remaining positions toward the middle and far end. Before making adjustments, each participant reads an unfamiliar sentence in a normal voice. A remote listener records which words were understood. The quietest member also reads while looking down at a paper, matching their usual meeting behavior.
Suppose the far-end speech improves but paper handling beside one microphone is distracting. The next change is to move that microphone away from the paperwork while keeping it near the intended voices. The committee repeats the same phrases and compares results. This exercise does not establish a universal four-microphone capacity. It demonstrates a purchasing method: choose a plausible arrangement, identify the failure and make a controlled improvement before changing package size.
Work through a ten-person long-table example
Now imagine a ten-person management meeting at a longer table. Two participants regularly speak quietly, and the chairperson turns toward a display while explaining reports. An eight-microphone package is being considered because a central microphone leaves several positions difficult for remote attendees.
The layout is built around those behaviors. The planner marks the quiet seats and the presentation direction, then assigns pickup positions along the occupied area. The test includes ordinary table noise, the normal computer and the ventilation system. Everyone speaks from the position they will actually use, rather than leaning toward a microphone for the demonstration.
Suppose most seats pass, but the chairperson becomes unclear while facing the screen. That observation calls for a placement or operating adjustment around that position. It does not immediately prove that every seat needs another microphone. The group can compare a different pickup location or a change in how the chairperson addresses the room, then repeat the test. A useful purchase decision identifies the voices being helped and the remaining limits of the arrangement.
Plan a larger board meeting without inventing fixed coverage
Consider a hypothetical boardroom with eighteen seated members, a clerk and a presenter. Some sessions include public questions. A twelve- or sixteen-microphone package may be worth comparing, but the first question is whether the public questions need pickup from any seat or from a designated location.
If questions come from a fixed speaking position, that position can be included explicitly in the plan. If anyone anywhere in the room may contribute, the requirement is broader. It should be described before selecting equipment because it changes both the placement problem and the test. A successful board-table sample does not prove that an audience member beside the doorway can be understood.
The planner then checks the clerk, chair and presenter separately, as well as normal discussion around the table. The final decision records which positions were tested and which behaviors require an operating rule. These examples are planning exercises rather than reports of tested Martel room capacities. Their purpose is to help an organization ask the right questions and compare supported configurations on equal terms.
Keep pickup, loudspeakers and recording separate in the plan
A microphone system brings local voices into an audio path. The room still needs an appropriate way to hear remote participants, and any required recording needs a verified route to the saved file. Treat those as connected parts of the meeting rather than assuming the microphone package supplies every function.
Write three short statements: remote attendees must hear these local positions; local participants must hear remote attendees through this playback arrangement; the saved recording must contain these sources. Those statements reveal gaps that a microphone count alone will miss. They also help separate a pickup problem from a playback or recording problem during troubleshooting.
For example, if remote attendees hear the table clearly but the saved file omits remote voices, adding microphones around the table does not address the missing route. If people in the room struggle to hear the remote presenter, investigate the playback path. Keep the microphone purchase focused on the task it performs while confirming that the rest of the arrangement supports the complete meeting.
Select the intended input in Zoom
Once the equipment is connected, confirm what Zoom is using. Zoom’s audio-testing guidance explains how to choose and test the microphone and speaker in the desktop application, including playback of a microphone sample. Use the available controls in your installed version rather than assuming the computer automatically selected the desired device.
A useful room procedure adds a seating test after that device check. Have someone at a difficult position speak normally while the operator watches the chosen input and a remote participant listens. Then compare with a nearby seat. This confirms that the room is being evaluated through the intended system rather than through a laptop microphone that happened to remain selected.
Keep a note of the working device name as it appears on that computer. The label may differ across equipment or operating systems, so document the observed name rather than printing a guessed one. Recheck it when the computer, USB connection or normal meeting setup changes. That small habit prevents a room from appearing connected while the application listens somewhere else.
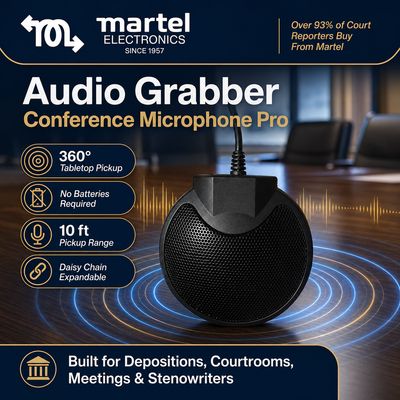
A closer look at Martel’s Audio Grabber tabletop microphone. Microphone placement and the complete connection path should be checked for your room.
Check shared-room settings in Microsoft Teams
Microsoft’s device-settings documentation describes selecting a microphone and speaker under Devices and using a test call where available. It also explains that Voice isolation is intended to isolate an individual voice from other voices. That purpose matters when several people intentionally share a room microphone.
For a shared-room test, confirm the selected input and review the processing options available in the actual Teams setup. If one person is clear while colleagues disappear, investigate whether an individual-speaker setting is affecting the result before buying additional microphones. The appropriate response depends on the observed symptom and the organization’s supported configuration.
Do not evaluate only the loudest voice beside the computer. Ask the remote listener to assess each required position, including natural turns toward the screen and normal reading from documents. Keep the useful result: which input was selected, which relevant settings were used and which positions were checked. That gives the organization a repeatable reference after future software or room changes.
Run a room test with a listener who was not there
People who attended a conversation can sometimes fill in unclear words because they know the subject. A listener who was not present has less context and can expose weaknesses that the room overlooks. Use that advantage during acceptance testing.
Prepare a set of short unfamiliar phrases containing names, numbers and ordinary conversational wording. Have each participant read one from their normal seat. Include a quiet passage and a stronger passage, then add a short unscripted exchange. Ask the listener to write what they heard rather than simply answer whether the sound was good.
A practical test record might include seat identifier, phrase, intelligibility, distracting noise and the next proposed change. Keep it short enough to use, but specific enough to compare. If the same seat repeatedly fails, investigate that position. If all seats change together, look at a shared stage of the system. Repeat the same material after each meaningful adjustment so an apparent improvement reflects the change rather than a louder speaker or an easier sentence.
Use the same five-step comparison for each candidate layout
Mark the microphone locations and occupied seats on the room sketch before starting.
Read this fictional sentence from each required position: “Jordan moved the review to May fourteen; please check reference R forty-seven before approving item six.”
Ask the remote listener to write the date, reference and item number without seeing the text.
Mark every missed detail beside the relevant seat, then change one placement or setting that addresses the observed problem.
Repeat the same sentence from the affected position and retain both results with the sketch.
The example is deliberately unfamiliar and contains details that cannot safely be guessed from the agenda. It is a practical comparison exercise, not a certified acoustic measurement. Follow it with ordinary conversation so the final decision reflects both isolated words and the flow of a real meeting.
Use a purchasing scorecard that rewards a working room
A useful scorecard reflects the organization’s real needs. Start with intelligibility at required positions, then add setup effort, supported connections, storage and the availability of help. Avoid allowing the microphone count to dominate the score before the listening exercise has been completed.
Decision area
Evidence to collect
Why it matters
Required voices
Listener notes from each position
Shows whether the conversation is usable
Setup repeatability
A second operator follows the instructions
Reveals hidden dependence on one person
Connection plan
Exact equipment and approved cables
Prevents an incomplete order
Hybrid playback
Remote speaker heard in the room
Checks the return side of the call
Saved recording
Required local and remote passages present
Verifies the output used later
Changed layout
A documented alternative arrangement
Helps rooms that serve several functions
Give any weighting to the people who use the room. A portable committee kit may value fast inventory and pack-down. A permanent boardroom may value repeatable installed positions. The best package is the one whose tested arrangement fits those priorities.
Recognize when more microphones are not the next change
A larger package can provide more useful pickup positions, but some faults point elsewhere. If every voice is distorted, check the shared signal path and levels. If a source is absent only in the recording, inspect the recording route. If the application is listening to the laptop instead of the intended USB system, correct the selection before judging the package.
Likewise, a microphone placed beside a persistent noise source may benefit from a move rather than another microphone nearby. A participant who speaks while walking outside the planned pickup area may need a different speaking arrangement. Those observations do not diminish the value of distributed microphones; they help ensure that additional equipment solves the actual problem.
Use the symptom to choose the next trial. Describe what is wrong, where it occurs and whether it changes when the speaker or position changes. That description is more useful to Martel than a general statement that the room needs more power. It also keeps the purchase decision tied to evidence rather than an assumption about the relationship between count and quality.
Prepare the details Martel needs for a recommendation
When asking Martel about a multiple-microphone package, include the seating map, typical attendance and the most demanding regular session. Describe the table shape, the computer used for meetings and whether the room uses Zoom, Teams or both. Include the presenter, clerk and any audience-question position in the description.
Explain what is already working and what is failing. “The far two seats are faint to remote listeners while the near seats are clear” is more actionable than “the sound is poor.” If you have a permitted test sample, keep it available through an appropriate support process. Note which microphone input and playback arrangement were selected during that sample.
Also state whether you need a live call, a saved file or a later transcript. Those goals affect the connection and review questions even when the microphone positions are similar. Use the Martel category comparison to identify likely package sizes, then use your room details to refine the shortlist. The conversation should end with a complete supported arrangement and a clear method for checking it.
Make the setup easy for the next operator
A room that sounds good once still needs a routine. Label the microphone positions in a way that matches the seating map. Keep a brief connection list, a photograph of the working table and a note of the selected application input. Store accessories where missing items are obvious during preparation.
Ask a second person to set up the equipment from those instructions. Watch where they hesitate. A connection that seems obvious to the original planner may be unclear to someone opening the case for the first time. Improve the instructions while the system is in front of both people, then run the short listening test again.
For changing rooms, keep separate approved layouts rather than one ambiguous photograph. A small staff session and a full committee session can each have a documented arrangement. Identify what changes between them and which quick checks must be repeated. This turns the microphone package into a room process that can survive staff absences, furniture changes and a busy schedule.
Compare the everyday layout with the exceptional meeting
A room can have one normal configuration and several occasional ones. The weekly leadership meeting may occupy a single table. The quarterly planning meeting may add two tables, place a facilitator at a whiteboard and bring in observers. If you specify microphones only for the average meeting, document which changes the exceptional meeting will require. Otherwise, the first sign of the mismatch may be a remote participant asking who just spoke.
Create two annotated room sketches. On the everyday sketch, mark the seats that are always occupied and the equipment that can stay in place. On the exceptional sketch, mark every added speaking position and every table that moves. Compare the difference in useful microphone locations. This is more informative than subtracting one attendance number from another because extra people may sit beside existing pickup positions or may create an entirely new speaking area.
Then decide how the larger meeting will operate. Will observers ask questions from their seats, or use an identified question position? Will the facilitator remain near a table microphone while speaking? Will the computer move with the furniture? These are practical meeting decisions with equipment consequences. Make them before assuming that a higher microphone count will accommodate every future arrangement without a new setup.
When considering a larger package for flexibility, ask Martel to confirm the supported configuration for both layouts. Keep the answer with the room plan. A purchasing decision is easier to defend when the additional positions have a documented purpose, even if the largest configuration is used less frequently.
Give accessibility and language needs a place in the plan
A usable meeting is judged by the people who need to follow it. Include participants who listen with headphones, depend on captions or work in a second language when defining the test. Avoid appointing only the most familiar colleague as the listener. Someone who already knows the names, acronyms and agenda can mentally repair unclear words that another attendee cannot.
Prepare a short, original test passage containing the details your organization actually exchanges: a date, a person's name, a short project code and an amount. Use fictional values so the rehearsal does not expose confidential information. Ask the remote listener to write down what they heard. Their answer provides a more specific result than “the audio seems okay,” particularly where one lost digit could change the meaning of a decision.
Microphone placement cannot resolve every accessibility need. Captions, interpretation, meeting pace and the way speakers identify themselves may require separate arrangements. The useful connection is operational: a clear speaking position and a pause between contributors can make the source easier to follow. Decide who will remind the room to use those positions and who will flag a problem from the remote side.
If a participant needs a different seat or speaking arrangement, include that change in the plan without asking them to perform as a test subject. Test the location with a colleague first, then invite feedback about the actual meeting experience. The goal is a room that supports participation with as little repeated troubleshooting as possible.
Write an acceptance sheet before placing the order
An acceptance sheet describes the result you expect to check after the equipment arrives. Keep it short enough to use at the table. Record the ordinary layout, the maximum planned layout, required applications, required recording workflow and the positions that must be intelligible. Add the person responsible for setting up the room and the person who will listen remotely during the check.
For each requirement, describe observable evidence. “Works for committee meetings” is broad. “A remote listener can repeat the test sentence from each designated speaking position during an occupied-room rehearsal” gives the team a practical task. If a recording is required, add a separate replay requirement. If the room must be portable, include a complete setup and pack-down rehearsal rather than testing only an installation that has already been assembled.
Avoid writing acceptance conditions around unsupported promises. Do not require perfect automatic speaker identification merely because there are multiple microphones. Do not assume that selecting a particular package supplies loudspeakers, room treatment or an independent recorded channel for every seat. Specify those needs separately and ask which parts of the proposed system address them.
Keep the completed sheet with the equipment inventory after the test. It becomes a reference when a later meeting sounds different. The team can compare table position, input selection and listening conditions with an established result instead of debating whether the system once sounded better. This turns a purchase into a maintained room capability.
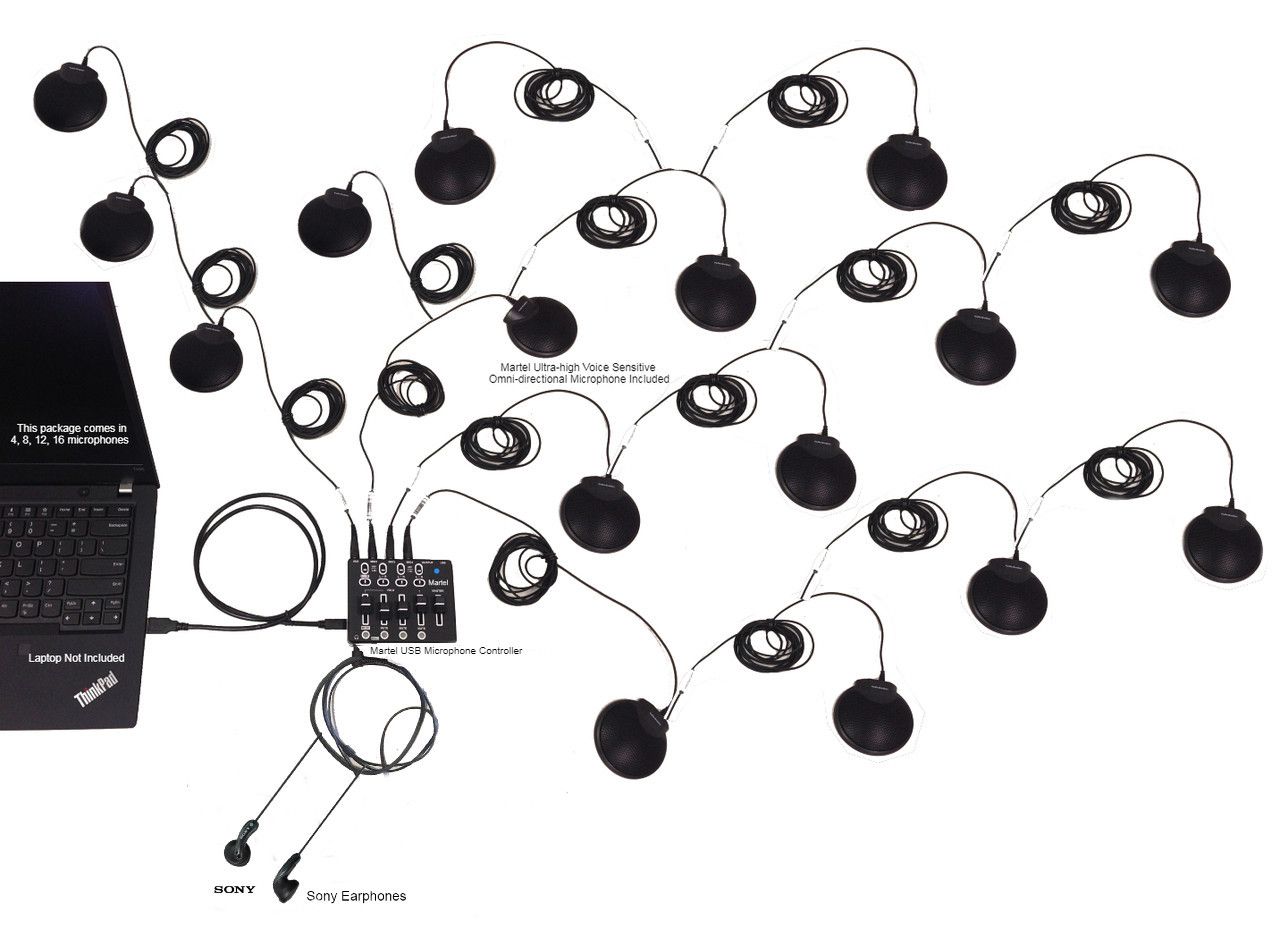
Meeting-room illustration from Martel’s gallery. It illustrates distributed microphone placement; it is not a measured coverage plan or an exact package inventory.
Budget for the work around the microphone count
The package is one part of the room's operating cost. Someone must unpack it, route the supported cables, check the input and return the system to a usable state. A permanent installation and a kit that travels between buildings may therefore deserve different purchasing discussions even when they serve similar attendance numbers.
Estimate the workflow in ordinary units: minutes to prepare, number of people who can set up confidently, time needed for a remote rehearsal and space needed for storage. These figures do not need to become an elaborate spreadsheet. Their purpose is to expose a hidden constraint. A room that is available only five minutes before a meeting needs a repeatable setup that fits those five minutes.
Cable labeling, a photographed layout and an inventory card can reduce avoidable work. Give each stored component an identifiable home and make the room sketch accessible to the operator. If several departments share the kit, designate who checks it back in and who reports missing parts. These modest habits protect the benefit of the microphone positions you selected.
Finally, keep the purchasing conversation focused on the complete requirement. Ask about the supplied configuration, supported cable arrangement and the practical steps for the proposed room. A larger microphone package can be a sensible choice when it serves a clear layout need. The strongest justification connects the equipment, the people who operate it and the conversation remote attendees must hear.
Frequently asked questions
Does each participant need a separate microphone?
Not necessarily. Several nearby speakers may be served by useful shared pickup positions. The right arrangement depends on the occupied layout and the listening result. Start with the important voices and test how they sound through the complete meeting path. Do not use a fixed one-person-per-microphone rule unless the specific task requires that arrangement.
Should I always buy the largest package I can afford?
Choose the package whose additional positions have useful jobs in your room. A larger package can help a distributed layout, but it also needs a clear setup plan. Compare the required voices, supported connections and operator routine. Spend around the work the system needs to perform rather than treating a higher number as a quality rating.
Will more microphones create a separate recording track for every person?
Microphone count and saved tracks describe different things. A system can combine several pickup positions into a computer input. Separate recorded sources require a channel arrangement supported by the interface and recording workflow. If individual tracks are essential, make that requirement explicit before ordering and verify it in an actual saved sample.
Can a four-microphone system cover a large room?
Room size alone does not answer the question. A small group occupying one end of a large room may present a compact task, while a few people spread around distant tables may be harder to capture. Compare the speaking positions, their distance from useful microphone locations and the remote listener’s assessment. Treat the package guidance as a starting point.
Will clearer pickup guarantee an accurate automatic transcript?
Clearer source speech can make review more workable, but a microphone package does not guarantee the words an automatic system produces. Review names, numbers, overlapping speech and speaker labels against the recording. Evaluate the saved audio and the draft transcript as separate outputs. A confident-looking paragraph still needs a source check when accuracy matters.
Can I use the same arrangement for Zoom and Teams?
Martel offers these systems for computer meeting workflows, including Zoom and Teams. Check the selected devices and relevant settings in each application, then test the actual room. A successful Zoom session is useful evidence about the hardware path, but it does not prove that a separate Teams setup has selected the same input or applied suitable processing.
What if the quiet seats improve but the room sounds noisy?
Listen for noise close to the microphones and compare placement before making broad sensitivity changes. Paper handling, keyboards and ventilation may affect the result. Keep the quiet speaker’s position in the test while moving a microphone or removing an avoidable noise source. Make one meaningful change at a time and listen to the same phrase again.
What should I check before the first important meeting?
Confirm equipment inventory, connections, power and the selected application input. Run a brief exchange with someone outside the room, including the difficult seats. If a recording is required, save and replay a sample containing the required sources. Keep the working layout and the operator’s responsibilities together so the meeting starts with a known arrangement.
Choose the package around a verified conversation
The practical choice between four, eight, twelve and sixteen conference microphones begins with the voices the room must carry. Map those voices, compare the useful pickup positions and test the complete path to the remote listener. Then document the arrangement so the next meeting starts from the same working plan.
Compare Martel’s Zoom Multiple Microphone Systems and open the package that fits your room sketch. Bring the table layout, typical attendance and the difficult speaking positions into the decision. A clear purchase requirement and a repeatable room test give the equipment its best opportunity to do the job you bought it for.
Martel gallery image of the 16-microphone system. See the product page for the supplied configuration.
Martel Electronics | 8 hours ago
How Many Conference Microphones Do You Need? 4 vs. 8 vs. 12 vs. 16
Compare 4, 8, 12 and 16 conference microphones. Plan table coverage, test Zoom and Teams audio, and choose a Martel system for your meeting room.