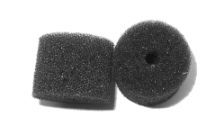
Which Ear Cushions Fit My Transcription Headset?
Match E99EC and EC50 foam to the headset model, calculate how many ten-pair packs to order, and resolve a mixed parts drawer before issuing replacements.
If you want to type while a recording plays on a handheld recorder, start by finding the socket that will receive the pedal. At a compatible Philips recorder dock, the pedal can send a command to the recorder in the cradle. Your fingers can stay on the keyboard even though the computer has no copy of the sound file. You can prove the arrangement with one recording made especially for practice. This guide walks through that first playback, a separate recording exercise for supported controls, and the details to collect before ordering equipment for another desk.
A useful first question is where the file will be when you press Play. Imagine an author leaving a recorder at a typing desk. The typist opens a blank document, listens directly from the docked recorder and types the letter. Now imagine the author taking the recorder away after delivering a copy of the file. At that point the player on the computer must have its own playback control. Both desks can produce the same finished letter. They use different equipment to get through a difficult sentence.
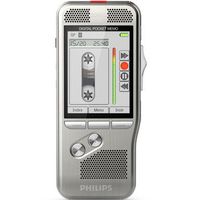
Write down three identifiers separately. Start with the actual model on the handheld unit. Add the cradle model from its label and the pedal model from the underside or original order. If the order says Court Reporter 5000, keep that name and include the model on your equipment. A bundle name can help Martel find your purchase, while the hardware label helps identify the applicable control instructions. A picture of the recorder sitting in the cradle usually hides the two labels that matter most.
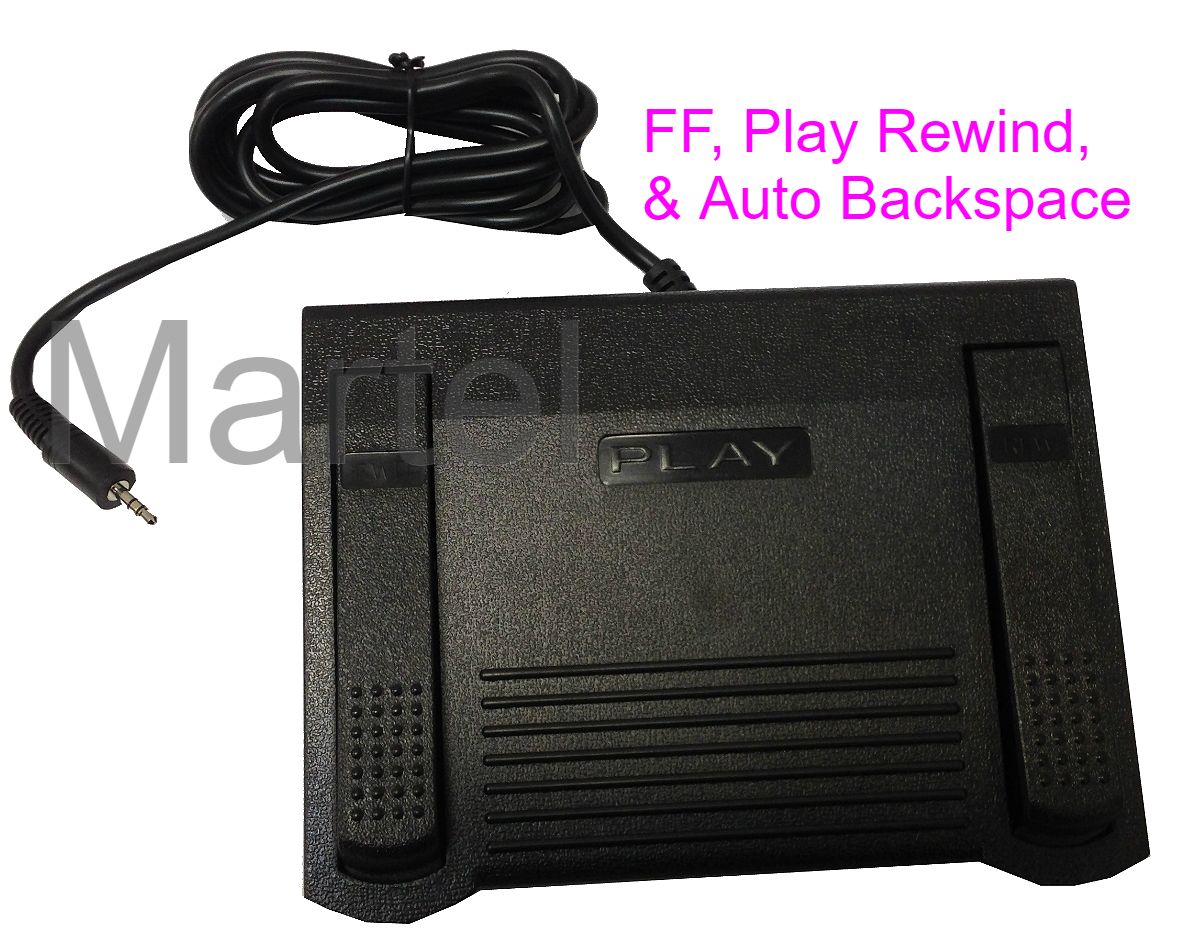
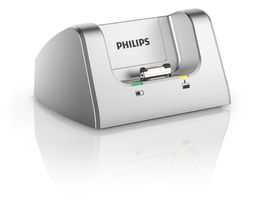
The Martel foot pedal for Philips recorder cradles connects to the cradle rather than directly to a computer. Its attached lead ends in a small round plug, and the wide center control in the Martel gallery is marked PLAY. The Philips docking cradle is listed separately. Check that both accessories support the exact recorder on your Martel order. A recorder can fit into the cradle for charging even when a particular foot control is not listed for that combination.
Look at the diagram that came with your foot control before assigning a button. Some instructions put playback on the right-hand control in Transcribe mode. On the Martel pedal pictured here, the center control is marked PLAY. Place the diagram next to the actual pedal. If those two positions differ, set the diagram aside and ask Martel for the directions that match your equipment. A similar plug is not enough to identify the controls.
Suppose a school has six identical cradles but two styles of foot control. A single laminated card that says “press the right side to play” could be correct for one part of the room and send the other part looking for a fault that does not exist. Give each distinct pedal its own card. Put the recorder model, pedal model and chosen recorder mode on the first line. Underneath, describe an action the person has actually confirmed with practice audio. Two different cards are easier to use than one card filled with exceptions.
Follow the route of the audio before following the pedal cable. Start with the file you plan to hear. If it is on the recorder, select a practice file on the recorder and identify the listening connection you normally use with it. The recorder’s elapsed time and its own sound are the clues to watch. On the typing computer, a word processor can stay open throughout. Typing a word there does not transfer the recording into that document, and a moving cursor in that document provides no evidence about playback.
If the file is already on a PC, identify the application that opens that copy and the type of foot control that application supports. A connector on the back of a cradle does not turn a recorder control into a general keyboard shortcut for every Windows program. Before buying, identify the program you intend to use, the version, the kind of recording, and whether you expect a press, a hold or a release to do the work. Martel’s transcription foot pedal category is a useful starting point when the computer is the intended player.
An office may need both workflows on different days. For example, a typist may take a visiting author’s recorder for half an hour on Tuesday and work on transferred recordings for the rest of the week. Label the two sources at the desk. An uncomplicated label is “recorder in cradle” or “file in PC player.” At the start of each session, ask the operator to point to the device holding the file and then to the connector carrying the pedal command. An answer involving the computer monitor tells you where the person looks. It does not yet tell you which player responds.
The fastest way to demonstrate this distinction is to put different, harmless phrases on the two devices. The recorder might say “green notebook, shelf four.” A local practice file might say “white envelope, shelf nine.” Hearing one of those phrases identifies the player immediately, even if two progress indicators look much alike. Keep the files out of folders used for real assignments. An author who later receives a real dictation should have no reason to wonder whether a practice file belongs to a client.
Charge the recorder as you normally would and leave time for a short trial. Select a harmless file you are allowed to replay. If you will exercise recording controls, make a new practice recording for that purpose. Leave a valuable original out of the exercise. A recorder’s record button can have different consequences depending on the current file position and configured recording behavior. Starting with your own expendable material makes questions about the controls easier to answer.
For a docked recorder whose supplied hands-free instructions call for standalone operation, disconnect the docking station’s USB data connection to the computer. If a transfer is currently running, allow it to finish and follow your normal removal procedure before changing the connection. A recorder that appears as an external drive is in a different state from one waiting for a hands-free playback instruction. Removing that ambiguity for the first trial is easier than diagnosing a pedal, a transfer and a desktop program simultaneously.
Locate the foot-control port on the back of the cradle using its marking or the diagram for the exact dock. Trace the lead back to the pedal before inserting it. A small round plug can look like one used for headphones or a microphone. What matters here is the function assigned to the socket. Seat the connector without twisting or forcing it. Place the recorder properly in the cradle, with the controls and display visible from your working position. Read any new symbol together with the current file name or file number.
Touch the recorder’s own playback control once and listen to the opening phrase of the practice file. Stop and return to the beginning. This brief hand-operated step establishes two useful facts before a foot touches the floor. The recorder has a file it can play, and the operator can hear it at the desk. If time advances on the recorder and the phrase is silent, settle the listening arrangement first. A spare pedal cannot make an inaudible playback path audible.
Place the foot control where your normal seated position lets you reach each intended surface without pulling the cord across the desk edge. Leave enough slack that moving a chair a small distance does not tug the plug. If a cable is hidden behind furniture, arrange it so the next person can check its destination by following it visually. An operator should be able to remove the recorder without catching a headphone cord or lifting the cradle by its pedal lead.
Start with a single request. On the practice file, can the intended control start playback, and can you predict what will happen when you release it? Say the intended action aloud or write it down. Then watch the elapsed time while you listen. The entry might read “center marked PLAY, file two, time moved past the word notebook.” Add what happened on release. A declaration such as “the pedal worked” leaves the next typist guessing whether a second tap is needed to stop.
With the recorder stopped, find the hands-free playback setting in its instructions. On equipment that offers separate Dictate and Transcribe modes, select Transcribe before playing your disposable sample. Use the control identified as Play on your own diagram. Press briefly, let go, and listen for whether playback stops or continues. If an underside switch offers hold and toggle positions, record which position was selected. Keep the recorder stopped while you change a setting.
On Martel’s pictured cradle pedal, begin the playback test with the labeled center control. Use a brief press on your disposable sample and observe the result during the press and after the release. For the side controls, identify their markings or obtain the instructions for that specific pedal. If a diagram assigns fast-forward to the center control, check it against the PLAY marking before using it. If there is no readable label for the pedal itself, a photo of the top, plug and underside can save several rounds of description.
Try moving back only after the file has advanced a little. At the start of a recording, a functioning rewind command has nowhere earlier to go. Likewise, a forward command at the very end may yield little visible change. Start the transport checks somewhere in the middle. Watch an actual time move down or up, release the control, and play a few words from that new position. This procedure lets you separate the direction of travel from the ability to restart playback.
Here is an original exercise for a typist and a helper. These are sample phrases and hypothetical observations. Create one short recording with three separated sentences. Say “Maple folder, copy seven.” Leave a space. Say “Silver tray, copy four.” Leave another space and finish with “Cedar box, copy nine.” During setup, play the file once using the recorder alone and write down the approximate positions of Maple, Silver and Cedar on this particular recording. The actual positions depend on your reading pace.
Hand the typist a blank sheet with four requests. Start at Maple and pause just after “seven.” Resume, then stop after “four.” Return to Silver without starting a new file. Finally, advance toward Cedar and write the last number heard. Do not put pedal directions on the sheet. The object is for the operator to achieve an outcome, using whichever layout is actually present. The helper watches the recorder time and listens for the reference words with the operator’s permission.
| Request | What to observe | What a mismatch suggests |
|---|---|---|
| Pause after seven | File identifier stays the same and time stops | If speech continues, check the expected press or hold behavior |
| Resume through four | The operator can recover the next full phrase | An earlier repeated word may be a configured replay interval |
| Return to Silver | Time moves backward and the expected phrase returns | A move toward Cedar points to a direction or button-label mix-up |
| Find Cedar and write its number | The same practice file yields the final word and nine | A clock at the end can hide whether forward navigation worked |
Consider a hypothetical run. The operator correctly pauses at Maple and hears Silver, but the button described as “back” moves from Silver toward Cedar. Playback itself has already been demonstrated. The first follow-up should concern which surface was used, what its label says and what mode the recorder displayed. Repeating the entire setup from the beginning would consume the evidence you just gathered. Keep the known file and position, test the opposite direction once, and update the card if the directions were transposed.
Score the four requests individually. Three completed requests out of four establish exactly which operation needs attention. They do not justify declaring that the setup is 75 percent reliable. One four-step rehearsal measures neither the durability of the hardware nor the probability of a fault on tomorrow’s job. Give the second typist a different set of phrases, such as colors and drawer numbers. If the problem follows the same command with unfamiliar audio, the instructions or control map merit another look.
Identify the recorder, cradle and foot control, test playback with a marked practice file, and distinguish recorder operation from a PC transcription pedal.
A typist sometimes wants a small amount of overlap after a pause. Hearing the end of the last sentence again can help bring the next phrase back into context. Some compatible recorders offer an Auto backspace setting. Check the playback menu described in your own instructions. When enabled and configured, the recorder can revisit a short portion when playback starts again. That is a separate behavior from intentionally holding a rewind control. Write down the setting actually in use if your team relies on this distinction.
To investigate, stop a practice file near an unmistakable word. Note the time at the stop and the first word heard on the next start. Repeat the operation once at another word, using only the verified Play control. If both restarts reproduce a short overlap, look at Auto backspace before replacing a pedal. If the displayed position continues moving backward for as long as a side control is depressed, you observed an active transport command. The same repeated sentence can arise through these different actions.
A useful typing trial uses a phrase with a repeated number. Dictate “send six copies to room six” and pause before the second “six.” An operator who restarts and hears the first “six” again might type it twice. Ask the typist to read the whole sentence back from the document alongside a continuous replay from the beginning. This exposes how the combination of listening, stopping and typing affects the finished wording. Simply proving the recorder started and stopped would miss the duplicated number.
When documenting a preference, describe the result you want. One author may request a return to the preceding word. Another may want the next unheard syllable. They can use the same equipment and still reasonably choose different playback settings. Change one setting at a time on an agreed practice setup. Record its previous value so that a shared desk can be returned to the arrangement expected by the next person.
Hands-free transcription and hands-free dictation are distinct tasks. For dictation, you need to establish when the recorder is ready, when it is actually capturing speech, how it pauses, and which file contains the result. Use a new disposable file and begin with the recorder stopped. Select the recording mode described for your particular recorder and foot control. The recorder display should be visible without requiring the person who is speaking to lean out of a comfortable position.
If your recorder and cradle support foot-operated dictation, locate the diagram for Dictate mode. The playback diagram may assign the same switches differently. Start a new, disposable recording and identify the standby indicator before pressing a pedal. Use the controls shown for record, pause and stop on your equipment. Write down what the display shows during each step, then replay the practice file. If the controls have no readable labels or the diagram does not match, ask Martel to identify the setup before recording anything you need to keep.
Try a two-part practice phrase. During the first recording interval say “oak drawer.” Pause. During the interval you believe is paused, say “test gap.” Resume and say “blue tag,” then stop. Replay the file from the start. Hearing “oak drawer” and “blue tag,” with the gap phrase absent, gives the operator a straightforward answer about the pause. If “test gap” is present, check the hold or toggle expectation. If either required phrase is missing, note whether the recorder was in standby at the moment the operator started talking.
Confirm the file identity after this test. A moving level indicator while speaking and a light on a cradle do not establish that the expected words ended up in the file you will hand over. Listen through the point where you paused. Report the opening words and final words from the saved file. If your workplace separately uses an end-of-letter or lock function, give that function its own practice file and consult the exact model instructions. A discussion about stopping a sentence should stay separate from a command that finishes a dictation and starts a new file.
A cradle can occupy the same spot on a desk for two different jobs. In the morning it can support hands-free listening from the recorder. Later it can connect the recorder to the computer for transfer. From across the desk both arrangements can look identical. Describe the transition by the change you expect to see. When you mean to transfer, confirm the recorder is recognized for transfer by the intended computer or software. When you mean to resume direct recorder control, confirm the recorder is in the intended hands-free mode and the sample still plays there.
For a first transfer rehearsal, keep the test short and identifiable. Establish the sample’s opening and closing phrases, then transfer it using the established procedure for that workstation. Open the destination copy from the intended folder and listen to both phrases. A file appearing in a recent-items list tells you little about where it lives. A copy that can be opened from its expected location gives the receiving person a repeatable route to it. The original on the recorder can remain available while you confirm the handoff.
In a two-desk office, document which desk owns each step. An author may stop the recording, a clerk may handle the transfer, and a typist may review the destination copy. Each person needs a small piece of information from the previous step. The clerk needs to identify the intended recording. The typist needs the agreed destination and a way to recognize the correct item. Neither needs a promise that every future transfer will work merely because one docking station charged the battery. Check the copy that is actually being handed over. If a second desk needs a compatible cradle for the physical setup, compare the dictation recorder docking cradles.
If a user says a foot pedal stopped working as soon as a cable was plugged in, reconstruct the sequence in words. Ask what appeared on the recorder and whether a computer program opened. Check where the file was playing before the connection changed. Finish any active transfer normally. Return to the known standalone arrangement and try the same sample. That comparison narrows the problem without changing a Windows installation or ordering a new recorder.
Create a small desk record with five entries. Identify the recorder, cradle and foot control. State whether the file is on the recorder or in the PC player. Name the recorder mode, then write one tested control action in ordinary words. Finish with the sample identifier and the date of the check. If you use a detachable listening device, note which output you used for the trial. A plug left in an unexpected listening socket can create a silent demonstration even when the control mapping is correct.
For a practical handoff, have the first operator set up the trial and leave the desk. Ask a second operator to start at the recorded reference, replay one sentence, type three words and stop. Have that person describe what they did before reading the instructions back to them. A card that says “toggle” may be perfectly clear to its author. If a new operator interprets it as holding a pedal while toggling a switch underneath, change the wording to the physical action the person should take.
Use the second operator’s observations when ordering another station. A buyer needs to know whether the office already owns the recorder and cradle, whether there is a matching local pedal, and whether the intended user actually plays computer copies. Count the parts physically available for each working station. One spare cradle shared between rooms is one physical cradle. Listing it under both desks in an inventory does not give two people simultaneous use of it.
If you need help from Martel, give the combination of model names, the intended file location and one reproducible observation. For example, “The practice phrase plays from the recorder by hand. With the recorder docked in Transcribe mode, the time does not move when I press the control labeled PLAY.” Include what happened after the release and whether a computer data lead was connected. That is enough context to distinguish a compatibility question from an audio output question in the first exchange.
Find out whether your desk already has the Philips docking cradle and whether its socket accepts the Martel cradle foot pedal. Mention the product name on your Martel order and which pieces are already on the desk. A photo of the cradle connector can resolve a question that a description such as “my Philips pedal” leaves open. Also say whether the recording will play on the handheld or in a computer application.
Check the foot control and cradle as separate items. A cradle can support charging for several recorders while a foot pedal supports hands-free operation on a smaller set. Tell Martel which recorder you own, which cradle you use and whether you need playback or recording. Keep the original order description or a photograph handy. A confirmed charging connection answers a different purchasing question from access to play, rewind or record at your desk.
Photograph the handheld unit’s identification label, the cradle from the rear, and the pedal identification, if readable. You can keep case names and file lists off the pictures. Include the order description so Martel can connect the equipment to its package. If the recorder has been replaced since the original purchase, mention that. The contents of the box when new may differ from the combination sitting on the desk today.
First establish where the recording is open. If a Windows player is playing the emailed copy, the playback control must work with that application. The cradle foot pedal operates at the recorder dock. Buying it solely because it has a familiar footboard shape leaves the computer compatibility question unresolved. Send Martel the player name and the job you want to perform. Include whether you want only play and pause or also independent backward and forward movement.
Look for the model label on the underside and compare the actual connector and top layout with the original order photo. Avoid drawing permanent arrows until you have tested direction using expendable audio. A removable desk card is easier to correct. If the hardware model remains in doubt, send clear pictures of the top, underside and plug to Martel. With the recorder in a confirmed playback mode, the elapsed-time test can document an observed action for that station.
On foot controls with a hold-or-toggle switch, the underside setting can determine whether playback continues after release. Other foot controls can have their own layout or fewer choices. Record the behavior for each actual model. Put the same practice phrase at both desks, have each operator describe the press and release, and observe when the clock stops. A copied instruction card can make two functioning stations appear to disagree.
Make a longer disposable recording with a word at the beginning, middle and end. Give yourself room on either side of the middle word. Start playback there, use a short backward action, and then replay the result. Returning to the opening word on a very short file can make a brief rewind and a much longer one sound identical. More space between references lets you hear the difference without relying on an estimate of foot pressure.
Use the same practice file, listening device and output connection with the recorder operated by hand. Check the playback level at a comfortable setting and confirm which socket or speaker is supposed to carry sound. If the same silence occurs when you use the recorder’s own control, start with the listening route. If hand playback is consistently audible and foot playback is not, compare the file identifier, time position and mode for the two trials before changing equipment.
The compatible standalone cradle arrangement can provide recorder playback while the typist enters text in a document. A program that merely receives typed text does not need to operate the recorder for this arrangement. Desktop transcription software becomes relevant if the typist needs to control files on the PC, manage a work queue, or use features specific to that application. List those requirements individually. They are different purchasing questions from whether the recorder can play hands-free on the desk.
Yes. Use different practice phrases for the two sources. Have the typist type the last three words heard without looking away from the document. Have the helper watch the recorder display and, separately, the PC player time. Record which clock moved during the phrase. The typed words give a listening result, and the clocks make the source identifiable. Repeat with the other source only if it is part of the desk’s intended workflow.
Make the distinction with sample material. A pause is intended to allow a later part of the same dictation to continue. An end-of-letter or finish action can mark the item complete and create a different working item on supported setups. Say an identifying word before and after the test action. When you review, check the number of files and the opening and closing words in each. A quiet stretch in one file and a new file are different results.
Check whether the computer or its dictation software is currently transferring files. Let that operation finish and follow the ordinary device-removal procedure for the system in use. If the purpose was to deliver audio, open the intended destination copy and identify it while the source is still available. A record of its name and a brief confirmed playback are more useful to the next operator than a note saying the recorder spent ten minutes in the cradle.
It is one possibility worth isolating. Create a new practice file and have a helper observe when the recorder leaves standby and begins recording. Speak a unique opening phrase after that change, then compare it with a second trial using the recorder’s own controls. If both lose the same word, the evidence calls for a wider recording-path check. If only the foot-operated trial loses it, investigate the actual sequence used to prepare and start recording.
A cable change alone does not describe a recording edit. The important questions are which file was selected and whether the recorder entered a recording or editing state. If you need to experiment with controls that can record, use your own newly created practice file. For an existing assignment, follow your established copy and retention procedure before making changes. Replay the selected file from the beginning so that a different playback position is not mistaken for a changed opening.
Report the source device, elapsed time where the stop happened, exact pedal action, and what happened when the foot was released. Note whether the behavior followed chair movement or movement of the cable. Include whether playback also stopped at that position when you used the recorder by hand. A repeat at one time in one file leads to a different next test from random stops that occur only when the operator moves a foot.
Set up the same chair, sample file, listening level and control mode for both trials. Place the pedal where the preferred foot can reach the intended surfaces without twisting the cord. Ask the typist to recover a middle phrase and stop after a specified word from each position. Record accidental presses separately from missed words. Choose a comfortable stable position the operator can reproduce. Changing the footboard location does not rename the controls or alter their electrical assignments.
Start with sample files and change only the handheld recorder. Keep the cradle, pedal, cable route and listening device the same. Compare the model details, selected hands-free mode, switch position on the foot control and current playback position. Where you can, compare the configured replay interval as well. If the difference follows one recorder after the shared hardware and trial conditions have been matched, report those observations along with the file used on each unit.
Count simultaneous working positions. Two people using the same compatible recorder station on different shifts can evaluate one complete working arrangement and any spare the office elects to hold. Two people operating independent recorder stations at the same time need working equipment for both positions. Also account for where the actual audio goes. If the second person only receives computer copies, that desk may need a compatible computer-playback solution in place of another recorder dock.
A new practice file is a better place to learn what each control does. A locked dictation has a different state and may trigger different behavior or tempt an operator to change the lock solely to complete a test. Leave the completed work in its intended state and create a few spoken reference words expressly for the rehearsal. There is no need to introduce a real client recording into the training or send its contents with a support question.
Ask for a short demonstration at the actual desk. The operator should identify the sound source, play the correct sample, stop at a named word, return to a previous phrase, and leave the selected file and recorder in the agreed state. If the station will also record, have the operator demonstrate one separate saved practice dictation with a pause. Record which actions succeeded, which model combination was present and what remains to be corrected before the station is used for that job.