
Body Cameras for Security Guards: Buying Guide
Evaluate body camera equipment for security teams. Plan mounting, audio tests, charging, downloads, local storage and staff recording routines.
Match an external microphone to a voice recorder. Understand input connections, power, placement, levels and saved-file checks with Martel equipment.
Match an external microphone to a voice recorder. Understand input connections, power, placement, levels and saved-file checks with Martel equipment.
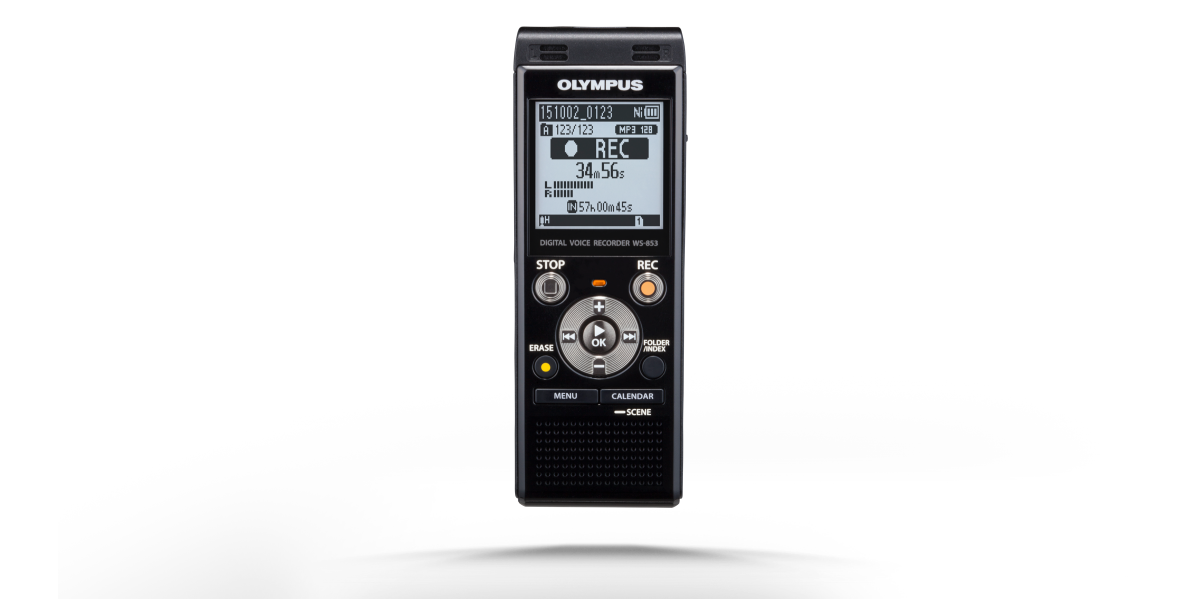
A voice recorder with an external microphone can place the sound pickup where it is most useful while keeping the recorder somewhere convenient to operate. That separation can help with interviews, lectures, meetings and professional backup recording. It also introduces a compatibility question: the microphone, cable, recorder input and power arrangement must work together. A plug that fits physically is only the beginning of that check.
Before buying accessories, write down the exact recorder and microphone models. Identify the input you intend to use and the kind of source it accepts. A microphone input, a line input and a headphone output serve different functions. Some products offer a combined or selectable input, but the available modes must be confirmed in the instructions for that model. Do not infer them from another recorder in the same brand family.
This guide explains how to plan and test the connection using Martel's current recorder and microphone offerings as references. The troubleshooting exercises are original illustrations, not claims of testing a customer's equipment. Use current product information for specifications and ask Martel to confirm an unfamiliar combination. The goal is a clear, repeatable recording path whose saved files you can review confidently.
An external microphone is most useful when it solves a defined problem. Perhaps the recorder must stay beside the operator while the speaker sits farther down a table. Perhaps a built-in microphone is picking up handling noise because the recorder is moved frequently. Perhaps the event needs several pickup positions. Describe the problem before selecting a microphone, cable or splitter.
Separate a placement requirement from a channel requirement. Moving a microphone closer to a speaker changes where sound is received. Recording speakers on independent channels changes how the resulting audio can be reviewed. A product may provide one capability without the other. If independent channels matter, state that requirement explicitly rather than assuming several connected microphones automatically produce separate tracks.
Also identify the recording destination. A microphone intended for a laptop USB input is not automatically a direct accessory for a handheld recorder's analog microphone jack. A recorder's USB connection may serve file transfer or charging rather than hosting a USB microphone. Confirm the supported function instead of choosing a cable that merely connects the two sockets.
An illustrative purchase question is: “I need the microphone at the center of a conference table, the recorder beside me, and a file I can review in my Windows 11 transcription setup.” That question establishes placement, operation and review needs. It is more informative than asking for a long microphone cable without saying what it connects or what result is required.
Look for the recorder's printed labels and the corresponding manual section. A microphone input receives a microphone-level source suitable for that input. A line input receives a different kind of signal. A headphone or earphone connection sends audio out for listening. These functions can use similar-looking connectors, so appearance alone cannot establish which socket belongs in the recording path.
Shure's educational explanation of microphone and line levels describes why mismatching those signal types can produce an extremely quiet or overloaded result. The practical lesson is to match the source and input before trying to compensate with large level adjustments. Turning a control to its maximum does not establish that two electrically different devices have become a correct match.
If an input can switch between modes, record the selected mode in your setup note. Keep that note with the cable and microphone information. A connection that worked last month may behave differently if the input was later used for another source. The correct equipment can still produce a poor result when the recorder remains in the wrong input mode.
Do not use a speaker output as an improvised recorder feed. When recording from an installed sound system or another powered device, ask the responsible technician to identify an appropriate output and the equipment needed to match it. This guide is about making a supported recording connection, not experimenting with unidentified electrical outputs until something is audible.
A connector's diameter tells you only part of the story. Plugs can have different contact arrangements and wiring, while devices with similar sockets may expect different signals. Stereo, mono and headset connections should not be treated as interchangeable labels. Use the specifications for both ends of the proposed connection and ask about any adapter between them.
An adapter can change a physical connection without performing every electrical conversion a setup might require. Describe its actual purpose rather than calling it universal. If the seller cannot explain whether it addresses wiring, level or another requirement, obtain clarification before depending on it. A pile of adapters can make troubleshooting harder because it becomes unclear which connection each one is intended to solve.
Keep the signal route simple during the first test. Connect the confirmed microphone to the confirmed recorder input using the recommended cable arrangement. Leave optional extensions and splitters out until the basic path is understood. Once it works, introduce the needed accessories one at a time and make a fresh sample after each change.
For example, suppose a microphone works directly but becomes silent through an adapter. The observation directs attention to that adapter path. It does not prove that the microphone suddenly failed or that the recorder's storage card is defective. Preserve the direct and adapted samples, identify the parts and ask support about the specific difference. A controlled comparison is more useful than replacing several components at once.
Some microphones use their own battery, some receive power from compatible equipment and others use a different supported power arrangement. Read the microphone and recorder instructions together. A recorder input's available power should not be assumed from the brand name or connector size. The right question is whether the selected microphone's requirement is supported by the exact input configuration.
Do not treat plug-in power and phantom power as interchangeable terms. If either appears in the specifications, confirm what the product requires and what the receiving device supplies. An adapter that changes the plug does not automatically provide the correct power. When the combination is unclear, ask the seller for a complete connection recommendation rather than improvising a powered arrangement.
For a battery-powered microphone, include the battery in the preparation routine. Confirm its condition and learn how the microphone indicates power. A recorder can show ample battery while an independently powered microphone is unavailable. These are separate power sources with separate checks. Keep the microphone's operating instructions with the equipment so another user can understand the setup.
If a package is advertised as not requiring individual microphone batteries, keep that claim tied to the specified package. Do not extend it to every microphone that looks similar. Likewise, do not promise that a microphone works without any power simply because there is no battery compartment. A supported equipment combination and a saved test recording should establish the intended arrangement.
Connecting an external microphone can change which source the recorder uses. The behavior depends on the model and its settings. Do not assume that the built-in microphones continue recording alongside the external source, or that each source automatically receives its own channel. Read the manual and verify the actual saved result.
Create a simple source-identification test. Speak a short phrase near the intended external microphone, then another from the recorder's location at a suitable distance. Use words that identify the location. Listen to the saved file and compare it with the selected input settings. This exercise helps confirm the practical pickup path without relying only on the presence of a plug.
If your project requires both room sound and a separate personal microphone, describe those as distinct recording paths. A voice-writing setup, for example, may have a recognition input and an independent room recording. The equipment and routing should be planned deliberately. Combining connections without understanding their purpose can leave you monitoring one source while expecting another to be saved.
Keep the test nonconfidential and avoid tapping or striking microphones. Speech is a better reference for the task you are trying to accomplish. The point is not to produce a dramatic response on a meter; it is to establish which source captures understandable words from the positions that matter to the work.
Choose the pickup position first, within the room's safety and permission limits, then plan how the cable reaches the recorder. A microphone placed beside the operator solely because the cable is short may not hear the intended speaker well. Conversely, a useful pickup location is not acceptable if reaching it creates a walking hazard or places equipment where people cannot work normally.
Identify nearby noise sources. Paper handling, keyboards, ventilation, table movement and objects touching the cable can all influence the recording. A microphone that receives these sounds strongly may seem less clear even when the connection is correct. Make a practice recording with the ordinary activity expected during the event, not only with everyone sitting silently for a demonstration.
For an interview, compare the balance between interviewer and interviewee. For a meeting, test the near, middle and far seats. For a lecture, include the speaker's likely movement positions where access allows. Use different spoken identifiers at each location so playback tells you which arrangement produced each result. Keep the voices natural rather than testing only unusually loud speech.
An original exercise uses two proposed table positions and the same three sentences. At the first position, the microphone is next to papers handled repeatedly. At the second, it is clear of those objects and nearer the main speakers. Compare the complete saved samples. The result can guide placement without inventing a universal distance at which every room will sound clear.
After confirming the connection and input mode, set levels using speech similar to the actual event. Include normal volume and a realistic louder passage. Watch the recorder's available level indication and listen to the saved sample. The aim is understandable audio without overload, rather than pushing every ordinary sentence to the highest possible display level.
If the recording is very quiet, revisit the source and input match before making extreme adjustments. A microphone connected to an unsuitable input may remain weak despite a high setting. If the audio is harsh or distorted, reduce the relevant level and confirm that the source is appropriate for the input. Turning playback down does not repair distortion already present in the recorded file.
Automatic level functions can be useful, but their behavior should be tested with the actual room and source. Do not infer that a setting with “auto” in its name will make every distant speaker equally clear. Listen to transitions between loud and quiet speech and note whether background sounds become distracting. Use the selected recorder's documentation to understand the available controls.
Record the successful settings in a short equipment note. Include the microphone, cable, input mode and recording mode. If a control has no precise numerical display, describe its position clearly enough to begin the next setup. The note is a starting point for verification, not a promise that the same setting will be ideal in every different room.
An extension cable is useful when it places the microphone appropriately while keeping recorder controls accessible. Confirm that the cable is suitable for the intended microphone connection. A headphone extension or general adapter should not be assumed to preserve every microphone arrangement correctly. Keep the recommended cable type and connection information with the equipment.
Test the full working length before the event. Connect the extension as planned, route it safely and make a sample from the intended microphone position. Listen for speech clarity, interruptions and unwanted noise. A direct connection that works on the desk is an important baseline, but it does not complete the test of a longer arrangement used in the room.
Secure cables so ordinary movement does not pull the microphone or recorder. Leave appropriate slack at connectors and avoid pinching the cable under furniture or equipment. Do not force a plug into a socket or use tension to hold a loose connection in place. A physically unstable arrangement deserves correction before it becomes part of an important recording path.
Label extensions when several similar cables are packed together. Include enough information to distinguish microphone, headphone, charging and data cables. This makes setup and support easier, particularly for shared equipment. A simple label can prevent a later user from rebuilding a previously tested arrangement with a different accessory that merely looks familiar.
Several microphone positions can help bring pickup closer to a distributed group. The recorder and combining arrangement must support that use. A splitter is not automatically a microphone mixer, and connecting more microphone heads does not create more independently recorded channels by itself. Confirm the package's intended connection path before adding or rearranging parts.
Martel's Philips Simple Meeting Recorder with four microphones is a current package reference for a designed multi-microphone arrangement. Its product page identifies the included recorder, microphones and connecting accessories. Use that specified configuration as the starting point. Ask Martel before substituting unrelated splitters, microphones or extensions because a different arrangement may need a different compatibility check.
Test every microphone position. Give each pickup point a number and speak that number followed by a short phrase. Reopen the saved file and verify that each position contributes understandable speech. Then test the actual seating arrangement, including quiet speakers. A connected microphone that has never been checked should not be assumed to contribute correctly simply because another microphone in the package works.
Avoid multiplying pickup points without a reason. Additional microphones can also receive more room sound and handling noise. Place them to address real speaker positions and keep them clear of obstructions. The useful result is better coverage of the people you need to hear, rather than the largest possible number of microphones connected to one recorder.
If the recorder provides a supported monitoring function, use it according to the manual to listen during preparation. Monitoring can help identify obvious silence or unwanted noise. It does not replace reopening a saved file. The live path and the saved recording are related, but a clear sound in headphones does not alone establish that the intended file is complete and stored where you expect.
Stop the practice recording normally, locate it and play it back through a known listening method at a comfortable level. Listen for the spoken identifiers and the beginning and end of the sample. Confirm the file duration is plausible for the exercise. If there are several test files, name or log them so one successful older sample is not mistaken for the latest connection test.
Check the playback output before judging silence. A file may be playing through headphones or another connected output that you are not listening to. Conversely, a loud playback setting can make a weak recording seem acceptable in one room while hiding the fact that it needs attention. Use the same review method when comparing samples so the listening arrangement does not change the apparent result.
Keep a successful reference sample with your setup note. When the equipment is packed, transported and reassembled, repeat the same phrase and compare it. This helps identify a changed cable, input mode or microphone position. The reference is not a performance certificate; it is a practical reminder of how a previously working arrangement behaved.
For silence, begin with the simplest confirmed connection. Check microphone power where required, the recorder's input selection, mute controls if present and the recording state. Make a new sample rather than judging only from the screen. If the setup includes an extension or splitter, compare it with the direct supported arrangement during preparation.
If the direct path works, add one accessory and repeat the same phrase. Continue only as needed to identify the change that affects the result. Keep the samples and part names together. A fault that appears only after one adapter is added should be reported that way. It does not justify an unsupported conclusion about every other component in the system.
For one-sided audio, check the expected mono or stereo arrangement and the actual file rather than assuming a broken microphone. The intended channel layout depends on the equipment. Do not convert or combine channels blindly if a project relies on their separation. Ask support how the selected recorder and microphone combination should appear in playback.
For intermittent audio, note whether the interruption follows ordinary cable movement, a power change or a control operation. Reproduce the condition with a harmless practice recording. Do not damage equipment by bending connectors or forcing repeated movement. A clear description of a repeatable symptom helps support choose the next useful check without unnecessary replacement purchases.
Once the recording path works, connect the recorder to the Windows 11 computer using its supported transfer procedure. Copy the intended sample into a clearly named folder and open it in the playback software you plan to use. This tests the whole workflow, rather than stopping at a successful recorder screen or a file visible only on the device.
Keep the original recording separate from edited or converted copies. If your project requires a particular output format, test that process before a long event and identify any derivative copy clearly. A format conversion cannot restore speech that was missing or overloaded at capture. Fix the recording path when possible instead of assuming later software will reconstruct the intended words.
For manual transcription, Martel's All N One kit provides a relevant listening and typing option for supported audio. A foot pedal changes how you control playback; it does not establish that text is generated automatically. Check the current product requirements and use a representative file. The recorder, saved format, playback software and document workflow should be evaluated together.
You can review the Olympus recorder with external microphone input, compare the Philips four-microphone package and explore Martel's transcription kits. Provide the exact models and intended connection when asking for help so the recommendation addresses your equipment rather than an assumed generic setup.
Devices with similar-looking sockets can use different wiring, input levels and power arrangements. Identify the exact recorder input and microphone requirements, including any adapter between them. A connector that fits does not prove the electrical match. Use current instructions and a saved recording test to confirm the practical setup before relying on it for important work.
Only if the recorder explicitly supports that function and the microphone is compatible with it. A USB socket may be intended for charging or file transfer rather than hosting a USB audio device. Do not infer support from the connector alone. Ask about the exact models and required connection instead of buying a cable and assuming it provides the missing capability.
A microphone input receives an appropriate external source for recording. A headphone connection sends sound out for listening. Similar connector shapes can make them easy to confuse, so read the labels and manual. Plugging a microphone into an output does not create the intended recording path. Identify the correct function before changing volume or recording settings.
The source and input levels may not be matched. Shure's educational guidance explains that a microphone-level signal can be too weak for a line-level input. Confirm the supported input mode and connection before applying extreme gain. A quiet result is evidence to investigate the match, rather than proof that the microphone needs to be replaced immediately.
An unsuitable source level can produce distortion or overload. Use the recorder's documented input options and obtain an appropriate connection recommendation for the source. Do not assume that turning a playback control down repairs an overloaded saved recording. Identify the source and receiving input correctly, then test with representative audio before the actual event.
The behavior depends on the recorder and settings. Read the manual and make a source-identification sample. Speak distinct phrases from the external microphone and recorder locations, then check the saved result. Do not assume that both sources continue together or receive separate channels merely because the recorder has built-in microphones and an external input.
No. Power arrangements differ. Some microphones use their own battery, while others require compatible equipment power or another specified arrangement. Confirm both the microphone's requirement and the recorder's capability. A package described as needing no individual microphone batteries should not be generalized to unrelated products. Keep the power check specific to the actual equipment combination.
Do not treat them as interchangeable. They refer to different microphone power arrangements, and the selected devices must be matched appropriately. A physical adapter does not automatically supply the right power. If those terms appear in your specifications and the combination is unclear, ask the seller to identify a supported connection before using powered accessories.
Yes, establish a simple supported baseline when practical. Once that works, add the required extension and repeat the same spoken sample. If the result changes, you have narrowed the investigation to the added path. Testing everything at once makes it harder to know whether silence or noise comes from the microphone, recorder, extension or another accessory.
No. Confirm the cable's intended wiring and compatibility with the microphone arrangement. Similar appearance is not enough. Use a recommended extension and test the full working length before the event. Keep the cable identified in your equipment kit so another user does not substitute a different lead that happens to have familiar-looking connectors.
Not by itself. The recorder and combining arrangement determine how sources are recorded. A splitter can be part of a specified package without creating independently reviewable tracks. If channel separation is essential, ask for that capability explicitly and test the saved files. Microphone count, connector count and channel count should not be used as interchangeable specifications.
Check the specified connections, then identify each microphone position with a spoken number and phrase. Reopen the saved file to verify every pickup point. After that, test the actual seating arrangement with normal and quiet voices. One working microphone does not establish that all four positions contribute correctly or that every seat will be equally understandable.
The answer depends on room layout, the package design and the recording requirement. Plan pickup positions around the people whose speech matters and test the result. More microphone heads do not automatically improve every room. They can also receive additional room and handling noise. Choose the arrangement for practical speech coverage rather than the largest possible accessory count.
The microphone or connection path may be receiving handling movement from the cable or nearby surfaces. Arrange the cable so normal activity does not pull or rub against the microphone setup, then compare a practice sample. Describe when the noise occurs. A physical handling sound calls for a different response from a permissions or file-format problem.
Choose a stable, permitted position that captures both the needed questions and answers clearly, then test the actual seating. Keep the microphone away from repeatedly handled objects and identify any difference between the speakers' levels. There is no single placement distance that guarantees the same result in every room. Use saved comparison samples to guide the arrangement.
It can make the mixture louder without improving the balance between speech and nearby noise. Compare placement when voices sound distant or unclear. Use representative speech and listen to the saved file before making large level changes. The useful target is intelligibility, not simply a high meter reading or a louder recording of the room.
The recording may have been overloaded during capture. Reducing playback volume changes how loudly you hear it but does not repair distortion already stored in the file. Check source compatibility and recording levels, then make a fresh sample with realistic louder speech. Use the selected recorder's instructions to understand its available level controls.
No. Monitoring helps you hear an available input path, but the saved recording still needs to be checked. Stop the sample normally, locate it and reopen it. Listen for the beginning and end and confirm its identity. This verifies capture, storage and review together rather than relying only on a sound heard through headphones during preparation.
Check the expected mono or stereo arrangement for the exact equipment and examine the saved file using an appropriate playback method. Do not assume a fault or combine channels without understanding the intended layout. If separation matters to the project, preserve the original and ask support how the recorder and microphone combination should be configured and reviewed.
Label the microphone, cable and required adapters, and keep a short setup note. Include input mode and the location of a successful reference sample. After reassembly, repeat the same practice phrase and compare the saved result. This makes changes easier to identify when portable equipment is packed, borrowed or combined with accessories from another kit.
Choose a supported length that meets the placement and safety requirements of the room. Extra cable can add packing and routing complications without solving a recording need. Test the complete arrangement and keep connectors protected from tension. Ask the seller about the intended extension rather than assuming every long cable preserves every microphone setup in the same way.
Have the responsible technician identify an appropriate output and the connection needed for the recorder. A microphone input and a system output may require level matching or other equipment. Do not experiment with unidentified speaker outputs. Confirm the complete route and make a harmless practice recording before relying on a feed for an important session.
Preserve that comparison and identify the accessory accurately. Repeat the same phrase with the direct and accessory paths during preparation. Report the observed difference to support without assuming an electrical cause the test has not established. This narrows the next step and can prevent unnecessary changes to equipment that already works in the baseline arrangement.
It can improve the pickup position when used appropriately, but it does not remove every limitation of the room. Nearby noise, reflection and overlapping speakers still matter. Evaluate the actual arrangement with normal activity and realistic voices. Avoid treating a range claim or a single close sample as a guarantee of complete clarity under all conditions.
Write the exact models, cable arrangement, input mode, recording mode and successful test filename. Add a simple diagram or plain description of pickup positions if useful. Keep the note understandable to the next operator. The record should help recreate the tested starting point while reminding users to verify the new room rather than assuming every event is identical.
Storage readiness and microphone compatibility are different checks. A recorder needs a suitable destination with space available, but a larger card does not solve the wrong input or an unpowered microphone. Check the connection and then confirm a saved file. Treat the complete recording path as several related parts rather than expecting one accessory to fix every possible symptom.
Consider it when listening and typing from supported recordings is a regular task. A compatible pedal and software can help control replay while your hands stay on the keyboard. Test a representative recorder file and confirm the current product requirements. Manual playback assistance should be described separately from automatic speech recognition and from the recorder's capture functions.
The original remains the reference for checking speech, channels and timing. Edited or converted copies can serve particular purposes, but identify them clearly and retain the source as required by your work. Conversion cannot recreate words that were missing at capture. Keeping the distinction clear helps prevent a derivative file from being mistaken for the complete original recording.
Give the exact recorder, microphone, input, cable and adapter models where known, plus the room and recording destination. State whether you need several pickup points or independent channels. Explain the first test that fails if you already own the equipment. These details support a specific recommendation instead of a guess based only on a product category or connector size.
Use the current product pages and supplied manuals for equipment-specific details. Shure's educational material explains microphone and line-level distinctions and recording placement principles. The exercises here are original ways to compare your own supported arrangements. If a specification or screen differs, follow the current instructions for the actual model and ask for clarification before making an unfamiliar connection.