
Body Cameras for Security Guards: Buying Guide
Evaluate body camera equipment for security teams. Plan mounting, audio tests, charging, downloads, local storage and staff recording routines.
Plan focus group recording with multiple microphones, a speaker map, practical room tests and a clear recording-to-transcript workflow.
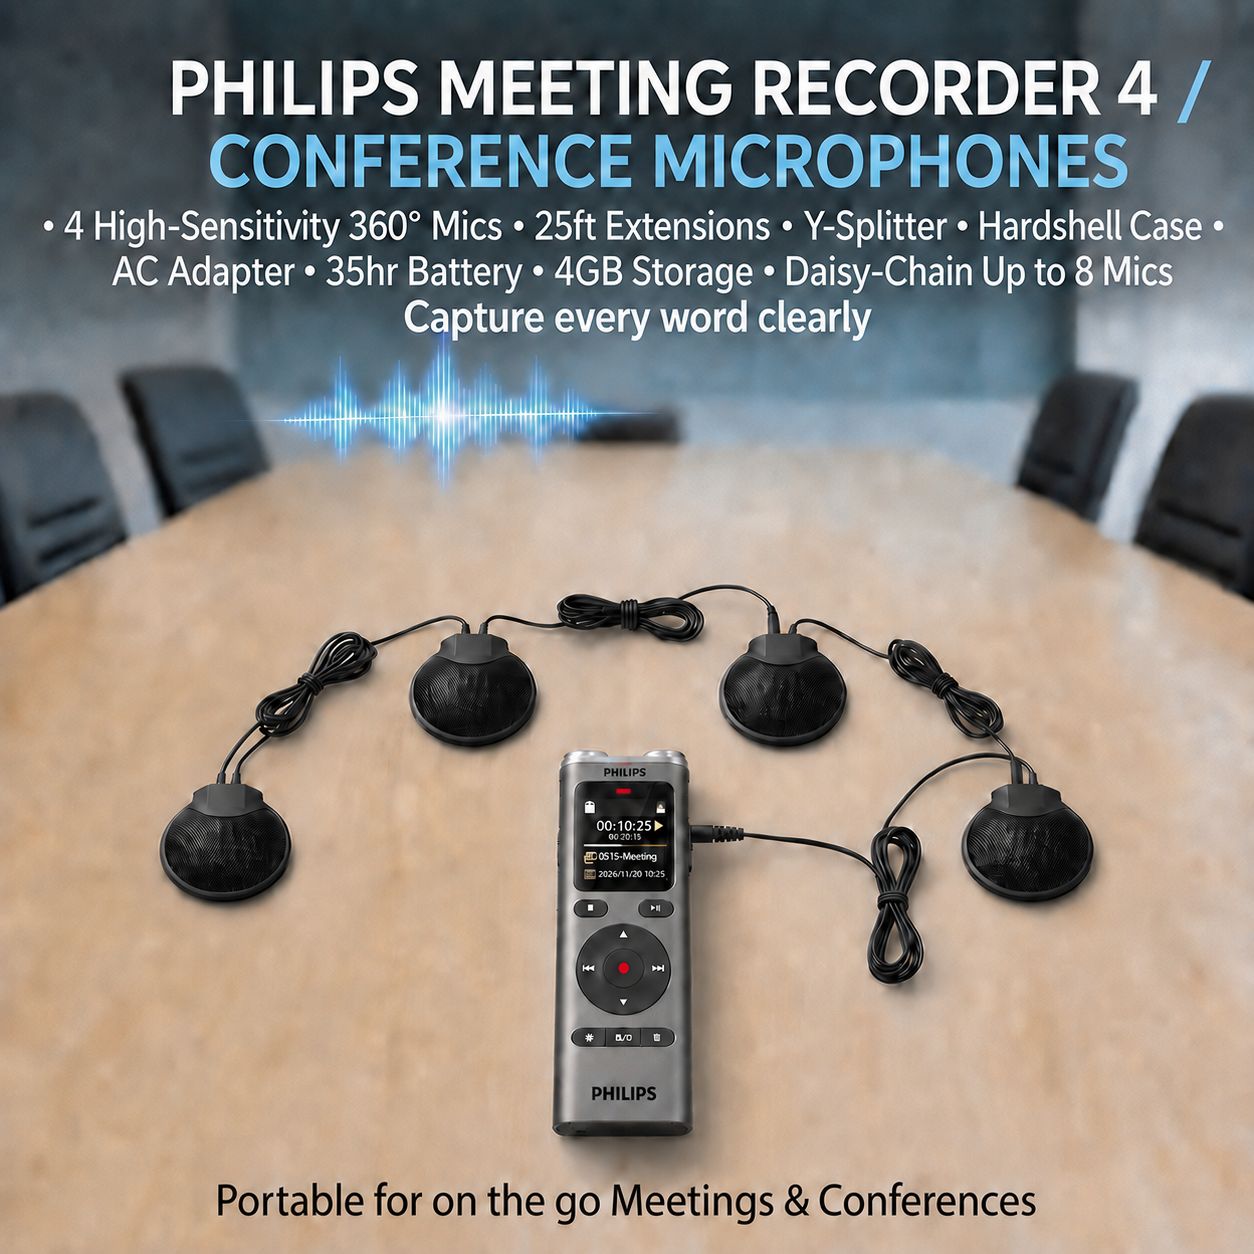
A focus group recording needs to preserve more than the moderator's questions. Participants respond to one another, change direction, speak softly, and sometimes begin together. The useful equipment plan gives each required speaking area a reasonable path to the recorder while keeping the room comfortable for discussion. Several microphones can help with that placement problem, but they do not automatically produce separate voices or an accurate transcript.
Start with the intended analysis. If the team needs to identify who made each comment, speaker attribution must be planned alongside sound capture. If interaction and disagreement are important, overlapping speech and pauses may need explicit treatment in the transcript. Those requirements affect the room layout, moderator's routine, recording notes, and review equipment—not only the number of microphone heads.
This guide develops an original focus-group workflow using Martel's four-microphone meeting recorder as the main equipment example. It separates verified package contents from proposed room arrangements and illustrative exercises. Manufacturer education and research-data guidance are linked at the end. The sample group described below is invented for explanation; it is not a reported customer test or research finding.
Write down the session's output requirements: audio recording, transcript, speaker labels, time references, and any approved observation notes. Identify whether the group includes a moderator, interpreter, observer, or remote participant whose voice must also be captured. A participant count alone can omit people whose contributions are necessary to interpret the discussion.
Decide whether the final recording needs independent tracks or a combined conversation. Multiple microphones may feed a combined input, a stereo recording, or separate channels depending on the system. These arrangements have different review possibilities. If independent adjustment of each microphone after recording is essential, specify that requirement before selecting a package.
Agree on the handling process before the session. Follow the study's approved recording, consent, access, and retention requirements. The presence of a recorder does not settle those decisions. The research lead should know who can access the original audio, who prepares the transcript, and how any participant identifiers are handled.
Keep the equipment brief short enough to share. A useful example might describe eight seated participants, one moderator, a rectangular table, a single-room audio recording, and a transcript with consistent participant labels. It should also state what is not yet known, such as whether the room's ventilation can be reduced or whether a second session will use the same layout.
The Philips Simple Meeting Recorder with four microphones combines a Philips recorder with four Martel Audio Grabber microphones, four 25-foot microphone extension cables, a Y-cable splitter, charging equipment, and a hardshell carrying case. The product page lists MP3 and PCM/WAV recording and transfer to a Windows computer through USB-C.
The practical benefit for a focus group is the ability to place pickup points around the table instead of depending on one physical recorder position. The recorder can remain where the operator can reach it while the microphones serve different speaking areas. Cable length gives placement options, but the final routes still need to be safe and orderly.
Do not translate four microphones into four isolated speaker tracks. The current package description establishes multiple pickup positions, not automatic separation of every participant or automatic speaker identification. Ask Martel to confirm the exact recorded channel arrangement if the study depends on it. A correct purchase starts with this distinction.
The listing's meeting-size guidance is a planning reference, not a guarantee for every room. Focus groups vary in speaker level, table shape, surface noise, and interaction. Evaluate the actual seats and normal speaking behavior. The package should be judged by whether the saved recording supports the intended review task in the proposed environment.
Walk around the table and listen from each side. Notice air outlets, door traffic, street noise, and equipment that starts intermittently. A room that seems quiet during setup can become noisy once a projector or ventilation cycle begins. Include ordinary operating conditions in the trial rather than testing only the quietest moment.
Look at hard surfaces and the distance between participants. A bare room with reflective walls can make speech less distinct, especially when microphones are far from the speakers. When practical, choose a more suitable room or a more compact seating arrangement. Adding microphones cannot guarantee that an unsuitable acoustic environment becomes clear.
Reserve a stable control position for the operator. It should allow a recording-state check without reaching across participants or pulling cables. The moderator may also operate the recorder, but a separate observer can take that responsibility if the study permits. Define the role so the moderator can concentrate on discussion rather than repeatedly checking equipment.
Make room for documents, refreshments, and ordinary movement. A microphone placed where participants will stack handouts is unlikely to remain unobstructed. A cable across a chair's movement path invites strain. Plan the occupied room, not an empty-table photograph that changes as soon as the group arrives.
Begin by assigning each microphone a purpose. One may serve the participants at the near end, another the far end, and the others the two side areas. The exact arrangement depends on table shape and seating. Avoid clustering every microphone beside the moderator simply because the recorder is there.
For the illustrative eight-participant group, a first trial could place four microphones around a rectangular table so each serves a nearby pair of seats. This is a starting layout to evaluate, not a universal formula. The microphone design, actual distances, and room sound determine whether the result is useful.
Keep pickup areas understandable rather than maximizing overlap. Manufacturer microphone education describes how multiple microphones capturing the same source can interact. General spacing rules are useful background, but a specific table system should follow its own connection and placement guidance. Do not apply a studio rule mechanically without considering the supplied microphones and combined signal.
After laying out the microphones, sit in every required position and record ordinary speech. Include participants facing the moderator and turning toward one another. The saved sample should establish the balance among the seats. If one area remains weak, adjust its pickup position and repeat the relevant comparison before adding more hardware.
Simple labels such as A, B, C, and D can connect microphone positions to the seating note. Use the same labels on the relevant cables or connectors when appropriate. The purpose is to make setup repeatable and troubleshooting understandable. A tangle of visually identical cables makes a small problem harder to locate.
Connect the system according to the supplied instructions. Do not substitute an unverified splitter or add an extra chain because the plugs fit. Signal levels, wiring, and microphone power must remain compatible. If the planned layout requires an accessory beyond the package, confirm it with Martel before the session.
Protect connectors from strain and route cables away from foot traffic. Leave enough slack for normal use without creating loops where chairs move. The best theoretical microphone position is not useful if it creates a hazard or gets pulled out when a participant stands. Physical practicality is part of recording reliability.
Photograph the equipment layout only if the project permits and the image does not expose unnecessary participant information. A simple diagram or written seating note may be sufficient. Record any change after the trial so the final configuration can be distinguished from the one originally tested.
A seat-by-seat check establishes whether each location can be heard. Ask each person, or a permitted stand-in, to say a short sentence at a natural level. Use varied material with a name, number, and brief correction. Do not accept a test performed with every speaker leaning forward toward a microphone if that will not be their normal posture.
Then test interaction. Have one speaker respond to another across the table, allow a short pause, and include a natural turn toward a neighbor. These movements reveal different pickup conditions from a formal round of introductions. The purpose is to understand the recording's limits before the research conversation begins.
Include a brief overlapping exchange as a diagnostic exercise. Do not expect the equipment to separate it automatically. Listen to how much can be understood and decide what moderation or notation practice is needed. If the study requires analysis of simultaneous speech in detail, the recording design may need a more specialized arrangement.
Stop and listen to the saved file. Live meters and headphone monitoring, where supported, are useful checks but do not replace the stored result. Record which seats were clear, which were weak, and what changed. A small written observation is more informative than a general statement that the system “worked.”
A microphone is a pickup device. A recording channel is a stored signal path. A speaker label is a human or software interpretation of who spoke. These three concepts are related, but one does not automatically provide the others. Four microphones can capture eight people into a combined recording without preserving eight independently controllable voices.
If the recorder saves a stereo file, inspect what each channel contains. Stereo does not necessarily mean that the left side of the table is isolated from the right side. Microphone pickup can overlap, and the connection arrangement determines how signals are combined. Confirm the actual behavior with a permitted sample.
Speaker identity requires evidence. A seating map, introductions, moderator references, and authorized observation notes can help the transcriber. Voice familiarity can improve during review, but uncertainty should remain visible when the source does not support a confident assignment. Do not create a tidy transcript by guessing who probably made a remark.
This distinction also helps when buying. Tell Martel whether the need is broader room coverage, separate channels, or easier manual review. Those are different requirements. A package that is well suited to multiple pickup positions should not be rejected or praised for an unrelated capability that was never established.
Assign participant labels according to the study's approved plan. A set such as P01 through P08 can connect the seating note, audio log, and transcript. Keep any identity key in the authorized location rather than copying personal details into every working document. The label system should remain stable across the session.
At the start, record a permitted introduction or other agreed voice reference. The moderator can use participant labels or names as the project allows. Avoid creating an awkward ritual that changes the discussion unnecessarily, but give the later reviewer enough context to distinguish voices where possible.
Record seat changes and late arrivals in the observation notes. A map that was correct at the beginning can become misleading after a break. If the participant at one microphone position changes, the transcriber should not infer identity solely from apparent location or level in the recording.
Keep observation and interpretation separate. A note that P03 moved to the far chair is an observation. A note that a participant sounded reluctant is an interpretation that may need a different role in the analysis. The recording log should support source navigation without silently turning the operator's impressions into transcribed speech.
The moderator's first responsibility is the study's conversation, but a few habits also support recording. Explain that participants should avoid unnecessary simultaneous speech and speak from their normal seated position. Invite a quiet participant to repeat a missed response when appropriate. These are conversational practices, not promises that all overlap can be eliminated.
When several people react together, the moderator can ask for one person's explanation at a time after the initial response. This may preserve the group's natural reaction while making the substance easier to review. The research design determines how much intervention is appropriate, so equipment advice should not override the study's method.
Avoid passing the recorder around during ordinary discussion unless that is the deliberate plan. Handling noise and changing distances can make the source inconsistent. A distributed microphone layout is intended to let participants remain in place while the conversation moves among them.
If the moderator needs to consult notes, keep paper handling away from the nearest microphone. Use a stable position for handouts and objects. A quiet participant's answer can be obscured by a nearby page turn even when the rest of the recording is clear. Small room habits can protect the value of the equipment already in place.
Some focus groups include sorting cards, examining products, or moving between stations. Plan the recording around those activities in advance. A seated discussion test does not verify speech while participants stand across the room or turn toward a display. Identify which moments require audio and whether the equipment can remain in a useful position.
Give objects stable identifiers in the notes. A statement such as “this version is easier” may be impossible to interpret later without knowing which item was being handled. The moderator can clarify references naturally, while an observer records the item identifier and approximate source position where appropriate.
Keep object noise in the trial. Packaging, pens, cards, and table contact can become prominent near microphones. Rearranging the activity surface or moving a pickup point may be more useful than increasing gain. The solution should preserve both participant comfort and the study's intended interaction.
If the activity requires a change in recording arrangement, make that transition explicit. Note when the group moved, which microphone positions changed, and whether recording paused. A clear transition record helps the transcriber distinguish an activity-related change from an unexplained equipment problem.
A room microphone records sound reaching it in the room. It does not automatically establish that a remote participant's digital audio is saved correctly. Playing remote speech through a loudspeaker may create an acoustic path, but that path can introduce echo, imbalance, or feedback. The complete hybrid routing needs its own supported design.
Test local and remote voices separately and then together. Confirm which application or recorder saves each source. A meeting participant hearing both sides does not prove that the intended recording contains both. Keep the test focused on saved playback, especially when several computers or audio devices are involved.
Do not assume the Philips standalone package is a USB conferencing interface merely because it transfers files by USB-C. File transfer and live computer input are different functions. If the group requires Zoom or Teams participation, explain that requirement to Martel and ask about the appropriate meeting microphone system and recording arrangement.
For a purely in-person group, keep the setup simple. Introducing a conferencing application that the study does not need adds settings and possible failure points. Choose the capture path around the actual participants and approved workflow rather than adding technology because it is familiar from another meeting.
Estimate the total capture period, including introductions, activities, and discussion that runs beyond the planned ending. Check storage at the selected recording format and power under the intended settings. The current Philips package lists a rechargeable battery and an estimated maximum runtime, but actual use depends on conditions and configuration.
Continuous recording is generally easier to relate to the group's sequence than a sound-triggered file that may omit quiet intervals. If the study needs pauses and timing, confirm the recording mode accordingly. Do not use a memory-saving feature without considering how it changes the source available for later analysis.
Plan a clear break procedure. The operator should know whether capture continues, pauses, or stops under the study's agreement. After a restart, confirm the active state and identify the new segment where appropriate. A recording that stops correctly but is never resumed can leave the most substantive discussion missing.
If backup capture is required, test it independently. Its microphone position and power may differ from the main system. Keep the backup files labeled and document their time relationship as needed. A second recorder is not automatically a synchronized or complete replacement for the primary source.
Copy the audio through the supported transfer method and check the expected files before clearing the recorder. Keep the original source separate from any working copy. Include a session identifier, file sequence, speaker-label key as authorized, notation instructions, and a record of breaks or equipment changes.
Provide only the personal information the transcriber is authorized to receive. A useful source package does not require sending the entire participant recruitment folder. Follow the research team's approved access and transfer process. The equipment supplier's technical support role should also remain separate from access to confidential study content.
Agree on the transcript style before work begins. Decide how overlap, pauses, laughter, uncertain words, and unidentified speakers should appear. A broad request for “verbatim” can mean different things to different people. A short approved sample and written convention key can prevent inconsistent decisions across a large collection.
The qualitative research transcription guide develops the review and documentation process in more detail. Its purpose is different from microphone planning: a good recording supplies the source, while a good transcription process explains how that source was represented in text.
Focus-group transcripts often require replaying short passages to distinguish voices and follow interrupted turns. A foot pedal can make those playback actions easier while the hands remain available for typing. The All N One Transcription Kit combines supported audio playback software, a USB pedal, a headset, and Martel setup assistance.
The listener still prepares and checks the transcript. The kit does not automatically identify speakers, separate overlapping voices, or produce a finished research dataset. Its role is to support manual control of the source. Keep that capability clear when budgeting time for transcription and review.
Before assigning the full session, test a representative non-sensitive file on the Windows 11 workstation. Confirm playback, the pedal's controls, the preferred back-step, and the document application. Use a comfortable listening level and schedule review in manageable portions so difficult passages receive attention without turning fatigue into false confidence.
Track unresolved passages in a separate query list with source positions. A second reviewer should be able to open the right file and understand the question without repeating the entire first pass. Consistent references make review more efficient while preserving uncertainty where the audio remains ambiguous.
After the first session, compare the saved recording with the original requirements. Did every required seat remain usable? Were activity transitions understandable? Did the speaker map survive seat changes? Could the transcriber navigate the files and identify unresolved passages? These questions reveal whether the complete process supported the research.
Record improvements as specific changes. Move one microphone away from the handout area, alter one cable route, or add a clearer restart note. Recheck the affected condition before the next group. Avoid describing a broad redesign when a small, verified adjustment solves the observed problem.
For recurring studies, keep a configuration sheet with package contents, microphone labels, seating layout, recording format, power arrangement, and review instructions. The sheet should help another trained colleague reproduce the setup. It should not include participant identities that belong in a restricted project record.
When asking Martel for equipment, provide the table shape, required speaking positions, expected duration, and whether the session is in person or hybrid. State whether you need distributed pickup or independent tracks. That makes the conversation concrete and helps match the four-microphone recorder or another suitable system to the actual study.
There is no reliable answer based only on head count. Consider the table shape, distances, voices, room sound, and required coverage. Assign each microphone a useful pickup area, then test every seat. The four-microphone Martel package offers several placement points, but its suitability should be evaluated in the actual arrangement.
It may work for a compact group in a suitable room, but it can favor some voices and leave others distant. Test the farthest and quietest ordinary positions. If one location cannot serve the required seats, consider distributed pickup instead of assuming that extra gain will solve the imbalance.
The current Martel listing describes the recorder, four Audio Grabber microphones, four 25-foot extensions, a Y-cable splitter, charging equipment, and a hardshell case. Review the current page before ordering. Confirm any additional accessory and the recorded channel arrangement when those details are essential to the study.
Martel's current package page states that the included Audio Grabber microphones do not require individual batteries. The recorder still needs its own power preparation. Follow the supplied connection instructions and evaluate the complete system rather than treating microphone power and recorder runtime as the same issue.
That capability is not established by the four-microphone description. Microphone count, recorded channels, and participant count are different things. If independent tracks are required, ask Martel to confirm the appropriate system and routing before purchase. Do not infer isolation from the number of visible microphone heads.
Do not assume automatic identification. A speaker map, permitted introductions, moderator references, and review help a human transcriber assign labels. Uncertain voices should remain marked as uncertain. A clean-looking transcript is not more accurate if its speaker assignments were guessed to remove ambiguity.
That can be an illustrative starting layout for eight participants and four pickup points, but it is not a universal rule. Microphone design, distances, and room sound affect coverage. Test the intended seating and adjust the arrangement according to the saved audio rather than a fixed participant ratio.
No. Several microphones picking up the same source can interact, and unnecessary overlap may add room sound without improving the difficult seat. Give each pickup position a purpose and follow the system's guidance. Judge the complete recording rather than assuming that more active microphones must be better.
Include ordinary questions, a quieter follow-up, and normal movement toward notes or participants. The moderator's position can differ from the group's, and their questions provide context. Check their balance with the participants so the recording does not alternate between very strong questions and weak answers.
A meter indicates signal at a monitored point, not necessarily successful capture in the intended file. Saved playback checks the actual result. Confirm that each voice is understandable and that the expected channel and file arrangement appears before depending on the system for the research session.
Reconsider the nearby pickup position and avoidable room noise, then repeat the relevant test. Do not require the person to shout throughout the discussion. Check the louder neighboring voices after any adjustment. A useful arrangement balances the group instead of optimizing only the easiest speaker.
Not simply because there are several of them. The channel arrangement and acoustic overlap matter, and mixed speech may remain difficult to understand. Plan appropriate moderation and notation. If detailed simultaneous-speech analysis is central to the study, specify that recording requirement before choosing equipment.
Usually a planned stable layout is easier to interpret than repeated handling, unless microphone passing is the deliberate method. Movement can introduce noise and change relative levels. Explain the arrangement at the start and give each speaking area useful coverage without requiring constant equipment interaction.
Record the participant label, new position, and approximate source location through the approved observation process. Update the seating map. A transcriber should not assume that a voice near one pickup point belongs to the same participant throughout the session when the seating has changed.
Use the study's approved identifier system. Stable participant labels may be more appropriate for working recordings and transcripts, with the identity key kept separately under the required access controls. Avoid multiplying personal information across files that do not need it to support recording or review.
Include the activity in the equipment trial. Handling noise, movement, and references such as “this one” can affect later interpretation. Keep pickup points clear, assign object identifiers where useful, and note activity transitions. A seated speech test does not verify every later exercise in the session.
Do not infer that from USB file-transfer capability. Live computer input is a separate function that must be supported by the device and connection. Tell Martel when remote participation is required so the complete routing and recording arrangement can be selected and checked appropriately.
Plan focus group recording with multiple microphones, a speaker map, practical room tests and a clear recording-to-transcript workflow.
Check local and remote speech in the saved recording, separately and together. Verify which system captures each source and inspect for echo or imbalance. Hearing both sides during the meeting is not enough to establish that the intended recording contains both correctly.
It is generally easier to relate to the full sequence when pauses and interaction matter. Follow the study's plan and the recorder's documented behavior. Sound-triggered capture may change the saved timeline, so it should be chosen deliberately rather than enabled only to save storage.
Use the study's agreed recording process and confirm the device state. After restarting, check that capture has resumed and note the new segment when needed. The operator should have a clear responsibility for this step; a break is a common point where an otherwise working session can lose continuity.
Not necessarily, but its own placement must capture the required conversation usefully. Test it independently and document its relationship to the primary files. Avoid assuming that a second device beside the operator hears the whole table simply because the main system has several microphones.
Provide the authorized session identifier, file order, speaker-label information, notation rules, and relevant interruption notes. Send only material they are permitted to access through the approved method. A focused source package is more useful than an unorganized collection of unrelated participant records.
Use an agreed notation that fits the analysis. Identify words and speakers only when the source supports them, and mark unresolved overlap clearly. A sample convention should be established before a large batch begins so different transcribers do not represent the same kind of exchange inconsistently.
Only according to the study's transcription rules. Those features may matter to the analysis or may be represented more selectively in another project. Decide the treatment in advance and explain it. Editing for readability should not silently remove interaction that the research intended to examine.
It places common playback controls under the feet while the hands remain available for typing. This can make repeated listening easier to manage. It does not decide who spoke or repair unclear audio. Test the software, pedal, source format, and typing application together on the intended workstation.
Any draft used in the project should be checked according to the research plan, especially for speaker labels, overlap, negatives, and specialized terms. Tool use must also follow the study's handling rules. The Martel playback kit described here supports manual review rather than guaranteeing an automatically completed transcript.
Describe the specific limitation: weak seat, noisy activity, unexpected interruption, or unresolved speaker assignment. Link it to the relevant source position where possible. A precise observation supports later review and equipment adjustment better than a general statement that the entire recording was poor.
Check the setup before each session and repeat affected tests when the room, seating, equipment, or recording configuration changes. A previous success does not verify a new arrangement. Keep the preparation proportionate, but ensure the required voices and controls still behave as expected.
Provide a clear configuration sheet, labeled components, and a short supervised practice routine. Include the seating arrangement, recording settings, start and break procedure, and file-transfer location. Keep participant information out of the general equipment instructions unless the colleague is authorized and needs it for the task.
Describe the table, required speaking areas, session length, in-person or hybrid format, and review requirements. State whether you need combined capture or independent tracks. Ask about the confirmed package and accessories that meet those needs, then evaluate a representative recording before standardizing the study setup.
The sources below support microphone-planning principles and documented research transcription. The seating scenario, trial design, and operational examples in this guide are original. The package description is based on Martel's current product page.