
Body Cameras for Security Guards: Buying Guide
Evaluate body camera equipment for security teams. Plan mounting, audio tests, charging, downloads, local storage and staff recording routines.
Plan an oral history recording from the first equipment test through interviews, transcripts and organized files using Martel recording products.
An oral history recording is more than a collection of answers. It preserves a person's way of telling a story: the pace, uncertainty, humor, emphasis, and relationships between memories. The equipment should make that conversation easier to preserve without becoming the center of the visit. A recorder that is simple to operate, well placed, and paired with an organized file routine can be more useful than a complicated setup nobody feels confident using.
Start by imagining a future listener who was not in the room. That person will need to hear the narrator clearly, understand the interviewer's questions, and identify the recording. They may also need to know which photograph was being discussed or why the session paused. Good planning connects sound capture with those small pieces of context.
This guide follows an oral history project from preparation through recording, indexing, transcription, and delivery. It includes original examples for family, community, and organizational projects, alongside links to Martel equipment. The Oral History Association and Library of Congress resources at the end provide professional reference points. Their institutional requirements are not identical, so use the receiving repository's current instructions when a collection is intended for deposit.
A family keepsake, a community archive, and a research collection can have different delivery requirements. Before purchasing equipment, identify who will receive the files and how they will be used. A repository may specify formats, documentation, releases, or transfer methods. A family may need a simpler listening copy alongside a preserved original. The destination helps define the equipment requirements.
Avoid recording first and asking about acceptance afterward. A format that plays conveniently on one laptop may not match an archive's intake rules. Similarly, a transcript does not replace the sound recording if the project intends to preserve the narrator's voice. Keep the original capture and plan any smaller listening copies as separate derivatives.
Write a short project description in ordinary language. For example: “Record conversations with former members of a neighborhood workshop, preserve the original audio, and prepare a topic index for the community collection.” This is an illustrative project, not a customer case study. Its description already suggests that clear speech, stable filenames, and relationships between recordings and indexes matter.
Agree on responsibilities early. Name the person who operates the recorder, the person who checks copied files, and the person who handles access requests. In a small family project, one person may hold all three roles. Stating them still helps prevent a recording from becoming an unlabeled file on a device that nobody remembers to copy.
Explain the project's purpose before the microphone is switched on. Discuss who may hear the interview, whether excerpts may be published, how the narrator can raise concerns, and what review process is planned. Recording permission and permission for later public use are related decisions, but they should not be treated as automatically identical.
The Oral History Association emphasizes planning, informed consent, preservation, and access. Apply the receiving organization's approved forms and process rather than treating a generic internet form as sufficient for every situation. If a project involves an institution, follow its requirements for documentation and handling of sensitive material.
Comfort also affects the equipment arrangement. Show the narrator the recorder and describe what its indicators mean. Explain how a break will work. Avoid placing the device where the person feels they must stare at it or lean toward it continuously. A calm explanation can make the equipment a predictable part of the room instead of an unexplained object on the table.
If the narrator asks to pause, respond through the agreed process and make the recording state clear. After resuming, identify the new segment when appropriate. Do not secretly continue recording because a story sounds valuable. The goal is a usable collection built around the project's agreement with the people who contributed to it.
Useful recorder features begin with controls you can recognize without searching through menus. Practice starting, pausing if supported, stopping, and opening a saved file. Check whether the display is readable in the intended room and whether a control lock can protect a running recording. A feature list matters less if the operator cannot tell whether audio is being saved.
Next, consider microphone and headphone connections. An external microphone input can allow a pickup point near the narrator while the recorder remains within the interviewer's reach. A headphone output can support listening checks, subject to the model's monitoring behavior. Confirm these functions separately; a headphone jack does not establish exactly when live monitoring is available.
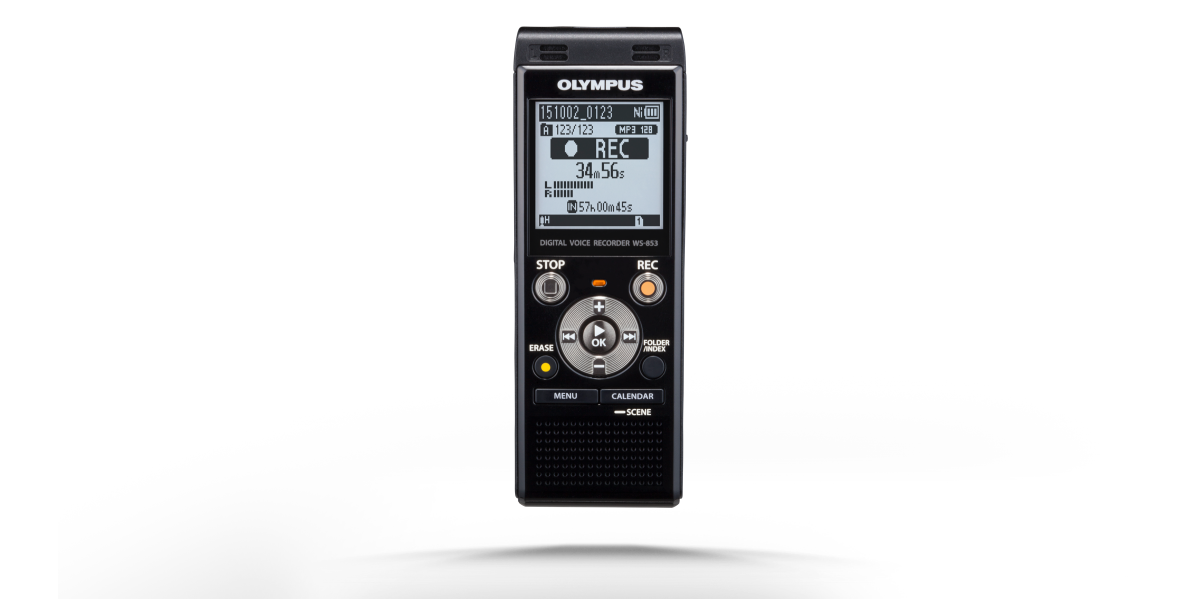
The Martel Olympus recorder package is a compact option to discuss for spoken interviews. The current listing includes a recorder, 32GB memory card, AC adapter, and Martel telephone support, and it lists an external microphone input. Ask Martel to confirm the exact supplied model and the format required by your project.
Treat capacity and battery claims as setting-dependent. An impressive maximum recording-hour figure does not describe every recording quality or power arrangement. Establish the expected session length, the active storage destination, and the selected format. If the intended collection has technical requirements, give those requirements to Martel before ordering.
Choose a room where the narrator can sit comfortably and where avoidable noise can be reduced. Listen before setting up. A refrigerator, ventilation outlet, open window, ticking clock, or nearby television may be easy to ignore in conversation but obvious in a recording. Move away from the source when practical instead of expecting software to erase it afterward.
The narrator and interviewer may speak at very different levels. Position the pickup so the softer voice remains useful without making the louder voice excessive. If the recorder must sit closer to one person, include both voices in the test. Hearing the narrator clearly is essential, but a future listener also needs the question that prompted the answer.
Keep the microphone clear of ordinary table activity. A recorder beside a stack of photographs may capture every shuffle. A mug set down next to it can create a sudden impact. Separate the place where objects are handled from the pickup area, and provide a stable position that will not change whenever someone reaches for a document.
Do not impose an uncomfortable posture in pursuit of a perfect diagram. The narrator should be able to breathe, turn naturally, and settle into the conversation. Test the likely movements, then adjust the equipment. If a person repeatedly turns toward a companion, that companion's position and the pickup arrangement deserve attention before the main interview starts.
A quiet conversation between two people may be manageable with the recorder's built-in microphones. A shared reminiscence around a long table is a different problem. The farthest participant may sound distant even while the nearest person is clear. The number and arrangement of speaking positions should guide the microphone decision.
An external microphone can move the pickup closer to a difficult seat. Confirm the microphone's wiring, power needs, and compatibility with the recorder input. A connector that fits physically does not establish that the system will work properly. Use the supplied or confirmed cable arrangement and check a saved recording before relying on it.
For several participants, the Philips Simple Meeting Recorder with four Martel microphones provides multiple pickup positions and long extension cables in a portable package. It is an option for group interviews where table coverage matters. Four microphone heads should not be described as four isolated recording tracks unless the actual recording arrangement confirms that capability.
More microphones also mean more setup responsibilities. Label their positions, protect cable routes, and keep the final layout understandable. If a microphone is moved midway through the discussion, note the change. The objective is useful, balanced speech capture—not filling the table with hardware simply because the package contains several microphones.
Record a brief introduction from each person at their normal speaking volume. Include the narrator looking toward the interviewer, glancing at a photograph, and speaking a little more softly. Ask an ordinary practice question that encourages a full sentence. Counting can check basic operation, but it does not represent the range of natural interview speech.
Stop and listen to the saved sample. Check whether both voices are understandable, whether the room dominates the words, and whether table handling is intrusive. Confirm that the file opens through the intended review method. The operator should know what successful capture sounds like before an irreplaceable story begins.
Change the most relevant part of the arrangement first. If the narrator is weak, consider placement. If impacts are prominent, separate the microphone from the object-handling area. If sound is distorted, inspect input level and connection suitability. Changing every setting simultaneously makes it harder to understand which adjustment helped.
Explain the test as a normal part of preserving the interview. It need not become a performance exercise for the narrator. Once the setup is acceptable, stop rehearsing and allow the conversation to begin. Keep a brief configuration note so the same arrangement can be recreated for a second session or a later interview in the same room.
Oral history often depends on the rhythm of remembering. A person may pause before correcting a date, searching for a name, or deciding how to explain an event. Continuous recording is generally easier to interpret when those intervals matter. Sound-triggered capture may shorten quiet periods or miss weak openings, depending on the device and setting.
This does not make voice activation universally unsuitable. It means the decision should follow the project's purpose. For an oral history intended to preserve the conversation's sequence, do not select a mode solely because it promises longer storage. The voice-activated versus continuous recording guide explains how to compare the behavior with practice material.
Plan breaks around the narrator's comfort and the equipment's limits. Stop through the normal control, confirm the state, and identify the restart when appropriate. If a conversation continues while recording is paused, do not later imply that the missing passage was captured. Ask whether the narrator wants to restate relevant material after recording resumes.
When the device creates multiple files, retain their sequence. A later listener should be able to tell whether one file follows another immediately or begins after a break. A short session note can provide that context without interrupting the narrator repeatedly during the conversation.
An interview guide is useful as a reminder of themes, not a script that must be read regardless of the answers. Prepare questions about places, routines, relationships, and changes over time. Listen for details that deserve a follow-up. Equipment planning supports the conversation, but it cannot replace attentive interviewing.
For the illustrative neighborhood-workshop project, a broad opening might ask how the narrator first became involved. A follow-up could ask what a typical workday looked like or who taught a particular skill. These prompts invite concrete recollections without supplying the answer inside the question. They are original examples, not quotations from an interview manual.
Avoid speaking over the end of an answer merely to show attention. A nod may serve better than repeated verbal agreement when the narrator is still talking. At the same time, do not turn the conversation into an unnatural silence test. The aim is a comfortable exchange with enough separation that later listeners can follow it.
When a statement is unclear, ask for clarification in the moment if appropriate. A question such as “Which building do you mean?” may be more useful than trying to infer the reference during transcription. Keep factual corrections and additional context distinguishable from the narrator's original account instead of silently rewriting the story afterward.
Objects can prompt rich memories, but spoken references such as “this one” become ambiguous without the picture. Assign simple identifiers to photographs or documents before the interview where practical. Keep those identifiers with the files and use them in the session notes. The future listener should not have to guess which object caused a story to begin.
For example, a photograph labeled Workshop-Photo-04 could be noted at the point where the narrator discusses the building's entrance. The audio might include a brief spoken reference to the identifier, while the written log records the approximate playback position. This is a proposed organization method, not a required archival standard.
Handle the original objects carefully and follow the owner's instructions. Keep paper movement away from the microphone. If a digital image is created for the project, record its relationship to the physical item and any access restrictions. Recording a conversation about an object does not automatically establish permission to publish a reproduction of that object.
Do not overload the interview with cataloging questions. Capture enough context to connect the materials, then complete detailed descriptions in a separate step. A short list of object identifiers beside the interviewer can reduce interruptions and help the narrator remain focused on the story rather than the filing system.
Use filenames that identify the project, interview, session, and part without exposing unnecessary personal information. A pattern such as Workshop_OH07_S02_P01 can remain stable even if the public title changes. Record the narrator's identity and any restricted details in the authorized project documentation rather than putting everything in a widely shared filename.
Keep original filenames in a transfer log if you rename copies for organization. This makes it possible to trace a working file back to the recorder's output. Do not give two different recordings the same new name in different folders and assume everyone will remember the distinction. A unique identifier is useful precisely because memories fade.
Store the original recording separately from edited excerpts and listening copies. An excerpt may be shorter, compressed differently, or rearranged for presentation. It should have its own name and a note linking it to the source. The original remains the reference when someone needs to examine context or verify a quoted passage.
Add a small text record with the interview date, general location if appropriate, participants' roles, recorder model, selected format, and known interruptions. Follow the project's privacy and repository rules. The information should help interpret the recording, not collect personal details that the project has no reason to retain.
After the session, stop recording normally and allow the file to finish saving before disconnecting power or storage. Use the supported transfer connection to copy the files. Check that the expected parts are present and that each opens. An interview is not safely preserved merely because a folder with a familiar name exists on a computer.
Listen to the beginning and ending of each part as an initial check, then follow the project's full review requirements. Compare expected duration with the session notes. A surprisingly short file deserves investigation before the recorder is cleared. Keep the device's source files until the verified copies and retention process make removal appropriate.
Create independent backups in approved locations. Two folders on the same drive can both be lost in one device failure. The specific backup method depends on the organization and sensitivity of the material, but the person responsible should know where the copies are and how to restore them. A backup that nobody can locate is difficult to use.
For a formal collection, ask whether the repository expects checksums or other transfer verification. A checksum can help detect a change in file bytes; it does not prove that the original interview was complete or correctly recorded. Technical integrity and content review complement each other, and neither should be described as a substitute for the other.
A topic index can make an interview useful while a transcript is still being prepared. It identifies major subjects and approximate positions in the recording. The Library of Congress Veterans History Project distinguishes an index from a full transcript and provides recording-log resources. Use the receiving collection's preferred format when one exists.
For the workshop example, entries might point to the narrator's first visit, the layout of the building, a change in equipment, and a story about training new members. These are descriptions of topics, not invented quotations. Keep each entry short enough to scan and specific enough to help a listener decide where to begin.
Use elapsed positions from the named source file. If a session has several parts, include the part identifier with every time reference. A bare “12:40” is ambiguous when three files each run longer than thirteen minutes. The timestamp guide explains how to establish a consistent time basis.
Do not let an index quietly become an interpretation presented as fact. Describe the topic in the narrator's terms when possible, and separate your research notes from the access aid. If a name or date is uncertain, record that uncertainty instead of resolving it from memory while preparing the log.
A full transcript takes more than typing quickly. The transcriber needs to revisit names, distinguish speakers, check corrections, and decide how to represent pauses or unclear passages under the project's rules. A foot pedal can keep common playback actions under the feet while the hands remain available for writing.
The Martel All N One Transcription Kit brings together supported audio playback software, a USB foot pedal, a headset, installation assistance, and technical support. It is a manual transcription workflow: the listener prepares the text in a separate document application. It does not automatically create a finished oral history transcript.
Set up a short trial using a non-sensitive recording before assigning a large collection. Check file compatibility, playback speed, back-step behavior, and the preferred typing application on the Windows 11 computer. A comfortable workstation can make sustained review more manageable, but it does not remove the need to listen and make editorial decisions carefully.
Keep a notation key with the transcript. State how speakers are labeled, how uncertainty is marked, and whether fillers or repeated words are retained. The verbatim and edited transcription guide compares these choices. Do not silently polish a narrator's wording into a different voice while still calling the result an exact transcript.
Names and local terminology often need special attention. Prepare an authorized reference list of places, organizations, and people mentioned in the project. Use it to check spelling after listening, not to replace the recording with what you expected to hear. A familiar name on the list can still be the wrong name in a particular passage.
If the narrator reviews the transcript, explain what kind of corrections are being requested. Fixing a misspelled place name differs from adding a new memory or changing the account of an event. Keep additions and substantive revisions distinguishable according to the project's agreed process. This preserves the relationship between the recording and the reviewed text.
Separate transcription uncertainty from historical uncertainty. The words may be clear even when the narrator is unsure of a date. In that case, preserve the uncertainty in the account. Conversely, a date may be historically documented but difficult to hear in the audio. Do not label a research-based insertion as if it were confidently transcribed speech.
Review excerpts in context before public use. A short passage can sound different when its preceding question or following correction is omitted. Follow the publication agreement and identify edited excerpts accurately. Good equipment helps capture the source; responsible selection and description determine how faithfully the source is represented afterward.
List capture, review, and preservation needs separately. Capture may require the recorder, a compatible external microphone, power, and a carrying case. Review may require a computer, headset, foot pedal, and document software. Preservation may require approved storage, backup capacity, and time for file checks and documentation.
Start with what the project already owns and can verify. A working computer does not automatically establish compatibility with every recording format or pedal. An unused microphone does not automatically match the recorder input. Give Martel the exact models when asking whether existing equipment can be retained in the proposed setup.
Allow time as well as equipment cost. Preparing narrators, arranging a quiet room, checking files, indexing topics, and reviewing transcripts all take work. A cheaper capture device can become expensive if the recording is difficult to review. Conversely, extra features may add little value if the project needs only a dependable two-person interview arrangement.
For a straightforward starting conversation, send Martel the number of participants, the room arrangement, the longest planned session, the repository's format requirements, and whether full transcripts will be produced. Compare the compact recorder package, the four-microphone meeting system when several seats need coverage, and the transcription kit when close review is part of the project.
It includes the recording, but the project's purpose, context, agreements, and preservation plan also matter. A future listener needs to understand who is speaking and how the material may be used. Plan those relationships alongside the equipment rather than treating them as paperwork to reconstruct afterward.
Yes, when the collection is intended for that archive. Its current intake requirements may affect the recorder, file format, documentation, and transfer method. Give those requirements to Martel so the proposed package can be evaluated against the actual destination instead of a generic assumption about archival audio.
Possibly, especially for a quiet conversation with useful placement. Record both voices and listen to the saved sample. If one person is distant or the recorder must remain elsewhere, a compatible external microphone may help. Choose from the test and room arrangement rather than the microphone count alone.
There is no single distance that fits every microphone, room, and voice. Start with a stable, comfortable position and compare ordinary speech. Avoid forcing the narrator into an unnatural posture. The saved sample should show a useful balance between the narrator, interviewer, and surrounding sound.
Yes, if they provide context for the answers. A clear response can still be confusing when the question is missing or indistinct. Include both people in the listening test and consider their different speaking levels. The future listener should not have to infer what prompted each answer.
Consider a closer permitted pickup position and reduce avoidable room noise. Test natural speech without asking the person to shout throughout the interview. Check input level if available, but remember that more gain also raises unwanted sound already reaching the microphone. Recheck the louder voice afterward.
They can provide useful pickup positions around a table, especially when participants are spread out. Confirm the complete connection arrangement and recorded channel structure. More microphone heads do not automatically create isolated tracks or solve overlapping speech. A facilitator still needs to help the conversation remain understandable.
Keep active handling away from the pickup when practical. Paper movement and objects contacting the table can compete with speech. Assign photograph identifiers and note when they are discussed. This connects the visual material to the interview without requiring repeated shuffling immediately beside the recorder.
Consider whether the project needs pauses and the full sequence. Sound-triggered recording can alter the relationship between saved duration and the conversation, depending on implementation. Continuous capture is generally easier to interpret for oral history. Plan adequate storage instead of assuming that omitted silence is always desirable.
Use the project's approved identification practice. A session identifier, date, participants' roles, and a brief purpose may be useful. Avoid announcing private information that should not be in a broadly accessible file. The opening should help organize the recording without replacing the separate consent and documentation process.
Follow the agreed process and make the recording state clear. A requested pause is not an invitation to capture informal remarks secretly. After resuming, identify the segment when appropriate and ask whether relevant material should be restated. Document the break so later listeners can interpret the sequence.
Keep every part and identify their order. Check the boundaries during review and note whether any gap occurred. Do not assume that a file ending means the interview ended. A session log connecting the parts makes the collection easier to navigate and preserves the context of successive recordings.
No. A topic index can provide an access aid while a transcript is being prepared. It should identify the source and approximate positions of major subjects. A summary, index, and transcript serve different purposes, so label each accurately rather than presenting one as a substitute for another.
Plan an oral history recording from the first equipment test through interviews, transcripts and organized files using Martel recording products.
An index points readers toward topics in the recording. A transcript represents the spoken content under stated conventions. The index can be much shorter and faster to scan, but it does not preserve every answer. Keep both connected to the same stable recording identifier when both are produced.
Yes, if it supports the source and provides sufficient controls. A dedicated transcription kit can make repeated stop, replay, and back-step actions more convenient with a foot pedal. Evaluate the workflow on a representative file and consider the amount of close listening the project will require.
The All N One kit described here supports manual transcription. It controls playback while the person types and reviews the text in a separate application. Its pedal and headset support that listening work. Do not treat the package as automatic speech recognition or an automatic archival transcription service.
Use the project's stated transcription conventions. Some access transcripts reduce selected fillers, while other projects preserve detailed speech features. Explain the treatment and apply it consistently. A polished publication excerpt should remain distinguishable from a transcript intended to represent the narrator's actual wording.
Replay the passage in context, consult authorized reference material, and retain an uncertainty mark if it remains unresolved. Do not substitute a familiar name simply because it fits the story. If the narrator later clarifies the name, document the correction according to the project's review process.
Keep the recording when the project intends to preserve the voice and conversation. A transcript cannot convey every vocal quality or timing detail. It is a valuable access tool and companion record, but its existence does not by itself justify discarding the source recording or ignoring retention requirements.
Use the project's naming and privacy rules. A stable interview identifier may be more suitable for working files, with personal identity kept in authorized documentation. Whatever system is chosen, make each file unique and maintain a record linking renamed copies to the original recorder output.
It is another copy, but both folders share the drive's failure risks. Plan independent backups in approved locations and make restoration responsibilities clear. The right arrangement depends on the project, but it should survive a realistic failure rather than relying on two nearby copies with the same weakness.
It can help detect whether file bytes changed between checks or transfers. It does not prove that the microphone captured every word, that the narrator was correctly identified, or that the session was uninterrupted. Use technical verification alongside listening checks and accurate project documentation.
Beginning and ending checks are useful initial steps, but they are not a full content review. Follow the project's required coverage and inspect known interruptions or equipment concerns. If the deliverable requires complete source verification, schedule enough time to listen through the entire relevant recording.
Use the review process agreed for the project. Explain whether the review concerns transcription corrections, clarifications, restrictions, or proposed additions. Keep substantial changes distinguishable from the recorded account. This makes the reviewed text easier to interpret without erasing the history of how it was prepared.
Follow the interview's publication agreement and the organization's process. Review the excerpt in context and identify editing accurately. A short passage may omit a qualifying question or correction. Permission to make a recording should not be assumed to settle every later use of that recording.
Give the images stable identifiers and record their relationship to the relevant audio passages. A simple log can note which item was discussed at which source position. Keep reproduction permissions and object descriptions with the project records instead of relying on a vague spoken reference such as “this picture.”
Distinguish what was said from later research or clarification. The narrator may clearly express uncertainty, and that uncertainty belongs to the account. Apply the project's editorial conventions for added context. Do not silently replace the recorded statement with a date found elsewhere while calling it exact speech.
Use the repository's current instructions. Typically, the collection needs enough documentation to identify the recordings, relate their parts, and explain access conditions. Include required forms through the approved process. Confirm the receiving contact and transfer method instead of sending sensitive material to an unverified destination.
Describe the number of speakers, room arrangement, expected session length, required recording format, and whether transcripts will be prepared. Include existing equipment models and any repository requirements. Those details help match a recorder, microphone arrangement, and playback kit to one coherent project.
Clear audio, stable identifiers, understandable documentation, verified copies, and an access plan all contribute. The future user needs more than a file that happens to play. Preserve the relationships among the narrator, session, objects, transcript, and permitted uses so the recording remains interpretable over time.
These references support the distinction between recording, consent planning, access aids, and preservation. The workshop scenario and practical organization examples are original. Follow each receiving institution's current requirements for its own collections.