
Body Cameras for Security Guards: Buying Guide
Evaluate body camera equipment for security teams. Plan mounting, audio tests, charging, downloads, local storage and staff recording routines.
Choose a lecture recorder around speaker distance, room sound, recording controls and study habits. Explore Martel recorder packages and practical audio tests.
Choose a lecture recorder around speaker distance, room sound, recording controls and study habits. Explore Martel recorder packages and practical audio tests.
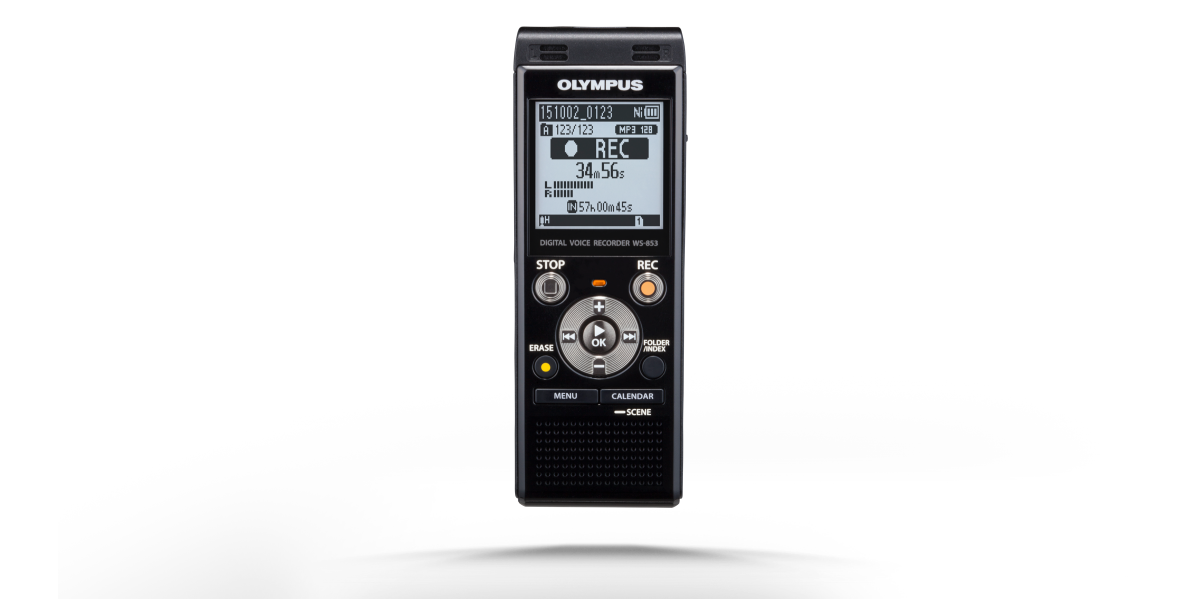
A lecture recorder should help you return to a class explanation and understand what was said. That makes the buying decision more practical than comparing the longest advertised recording time. Consider the lecturer's distance, room sound, seating position, recording permissions, controls you can operate confidently and the way you will use the saved audio afterward. The right arrangement is the one that supports your actual study routine.
Begin with the situation you face most often. A small seminar around a table is different from a lecture hall with an instructor moving across a stage. A training session that includes audience questions adds another requirement. Write down whose speech matters, where those people will be and whether you can place equipment closer to them. This turns a vague search for the best lecture recorder into a useful equipment discussion.
This guide uses current Martel recorder packages as product references and develops original planning exercises for lecture capture and review. The examples are illustrative rather than claims of classroom testing. Product specifications, accessories and availability should be checked on the linked pages before purchase. Recording a class also requires following the instructor's and institution's rules; owning a recorder does not decide that permission question.
Decide whether you need a personal study reference, an organized archive of training sessions or source audio for a transcript. A personal reference may be used to revisit a difficult explanation alongside your notes. A transcript project requires a more deliberate plan for speaker identification, uncertain passages and review. Equipment choices become clearer when you know which result you need to produce.
For personal study, think about how you normally lose information. You may write too slowly during examples, miss an unfamiliar term or need to replay a sequence after class. A recorder can support those tasks, but it does not make every sound in the room equally clear. Plan how your notes will point back to the saved file instead of collecting recordings with no practical method for finding the useful passages.
For a training archive, add naming and storage responsibilities. Decide who receives the files, who checks that they open and how the session date and subject will be recorded. A recorder with generous capacity still needs someone to organize its contents. The recording and the information describing it should remain connected so another person can identify the correct session later.
For transcription, test the complete path before a long series begins. Capture a short representative explanation, transfer it and open it in the intended playback software. Check the file format against that software's requirements. A successful purchase should fit both recording and review, rather than leaving you to discover at the end of a semester that the files do not work in your chosen transcription arrangement.
A microphone receives the sound that reaches its position. If the lecturer is far away while nearby chairs, papers and conversations are close, the recording may emphasize the wrong sounds. Increasing recording level can make the whole mixture louder without making the lecturer more distinct. A buying guide should therefore consider placement and room conditions alongside the recorder's specifications.
Ask where you are permitted to position the recorder. A stable location near the speaking area may be more useful than keeping it inside a bag beside your chair. The equipment should remain visible, secure and clear of walkways. If you need permission to use a lectern or front table, arrange that before class rather than trying to negotiate placement while the lecture is beginning.
Listen for the room's character during a practice visit. Does a sentence trail into a long echo? Is ventilation loud at the proposed recording position? Will a projector fan sit beside the microphone? You do not need a formal acoustic measurement to identify an obviously poor position. A short saved sample from the intended location can reveal more than a generic claim about maximum pickup distance.
Consider an illustrative comparison. One recorder sits next to a student's typing hands at the back of the room; another permitted position is on a quiet front table. Use the same spoken practice material at both locations and compare the saved audio. The useful result is which position preserves the explanation clearly under the real conditions, not which recording produces the largest meter movement.
A lecture can contain several sound sources with different importance. The instructor may speak from a podium, walk to a board and answer a quiet question from the audience. Decide whether your recording needs the full exchange or mainly the instructor's explanation. A setup selected only for a stationary speaker may struggle with a discussion distributed around the room.
If audience questions matter, ask whether the instructor can repeat a question before answering. That is a classroom practice decision, not a guaranteed recorder feature. It can make the audio easier to study when the original question comes from a distant seat. Keep your own notes clear about whether a passage contains the original participant's words or the instructor's restatement.
Movement creates another test. During preparation, ask a volunteer to speak from the positions the lecturer is likely to use. Compare the podium, board and demonstration table where permission and access allow it. You may find that a modest placement adjustment improves consistency. You may also find that the room needs a different recording arrangement than one unattended device in a fixed location.
Do not assume that adding microphones automatically separates speakers into independent tracks. A multi-microphone package can provide several pickup positions while producing a mixed recording, depending on the recorder and connections. If independent channels are essential, confirm that requirement explicitly. The number of microphone heads and the number of separately reviewable channels are different specifications.
Built-in microphones keep a recorder compact and quick to place. They are useful when the allowed recording position is suitable and you want fewer accessories to connect. Test the recorder where it will actually sit. A clear sample at arm's length does not establish that the same device will deliver equally understandable speech from the back of a large room.
An external microphone can place the pickup point somewhere other than the recorder's body. That may help when you need to keep controls nearby while locating the microphone closer to the intended speech. The connection must match the recorder's input and the microphone's requirements. Do not choose an adapter solely by appearance or assume that a headphone socket is a microphone input.
Martel's Olympus recorder package selected for this guide lists an external microphone connection and includes a memory card and AC adapter. Its current page is the product reference for those details. If you plan to connect an external microphone, describe the exact microphone and recorder combination to Martel. A confirmed match is more useful than a general statement that both items have small round plugs.
For a larger class discussion or training table, a meeting recorder package may be more relevant than a bare handheld recorder. Martel's Philips four-microphone package is one example to compare. Treat it as an equipment option for several pickup locations, then test the intended seating pattern. It should not be described as automatic speaker identification or a promise that every room will sound the same.
The controls should be understandable under ordinary classroom conditions. Learn the difference between power, recording, pause and stop on the selected model. Check the screen's recording indication and the procedure for starting a new file. Practice this sequence before a lecture so that you are not trying to learn the device while also following new material.
A physical control can still be pressed incorrectly when the recorder is packed tightly, covered by papers or handled in a hurry. Place the device where you can confirm its status without repeatedly picking it up. If it has a control-lock function, learn exactly what that function locks and how to unlock it. Do not assume that a lock begins recording or protects every possible operation.
Keep a deliberate start routine. Confirm power and available storage, start recording, say a brief session identifier where appropriate, then check the indication. At the end, stop the recording and verify that a file exists. These actions should be practiced with your actual model. A routine that depends on memorizing an unfamiliar menu sequence at the last moment is harder to use consistently.
An original practice exercise is to set up the recorder as if class were beginning, capture a minute of speech, pack it and then locate that file again. This tests the whole handling process. If you cannot find the sample after packing, resolve the file organization or control question before relying on the device for an important lecture.
Continuous recording captures the session while the recorder remains in its recording state. Sound-triggered features respond to an activation level or another model-specific condition. These modes can serve different purposes. When complete lecture context matters, think carefully before choosing a mode that may omit quiet intervals or react differently to soft speech.
The useful question is what should happen during a long pause, a quiet aside or the first words after silence. Test those situations using the selected model's manual. Record a normal sentence, pause, speak softly and then return to normal speech. Reopen the file and listen to the transitions. The exercise is more informative than assuming that a setting called voice activation always preserves every beginning and ending.
Do not confuse storage capacity with completeness. Saving a smaller file is not an improvement if a needed question or quiet explanation was never captured. Conversely, continuous recording may include long pauses that you later skip during review. Choose the compromise deliberately according to the class, recording rules and how important the uninterrupted timeline is to your study method.
Ask Martel to confirm the selected recorder's available modes rather than assuming all Olympus or Philips packages use the same controls. Product lines and revisions can differ. Keep a note of the chosen recording mode with your setup information. If a recording unexpectedly has missing intervals, that note gives you a useful starting point for understanding what happened.
Read the supported recording formats on the current product page and in the supplied manual. WAV and MP3 are common choices, but the available settings depend on the recorder. Decide what your playback and storage workflow requires before changing formats. The file extension is one part of compatibility; a representative-file test is still useful when a project depends on particular software.
Keep the original recorded file when transferring and reviewing it. If you create a separate copy for editing, sharing or conversion, identify that copy clearly. Converting a compressed recording to another format does not recreate information that was never captured. Avoid describing a format change as an automatic improvement in the clarity of a distant or noisy voice.
For a course with many sessions, estimate storage from a sample made in the settings you intend to use. Note the sample's duration and file size, then scale the estimate for your planned recording hours. Keep room for variation and additional sessions. This gives you a practical planning figure without treating the recorder's longest advertised time as the result for every quality setting.
Use the same settings consistently when that suits the project, and record any intentional changes. If the first half of a course uses one mode and later sessions use another, include that fact in your file notes. It can help explain differences in file size or playback behavior. Consistency is useful, but a documented change is better than an unexplained assumption.
Battery life and recording capacity are different limits. A memory card may have plenty of space while the power source is depleted. An advertised maximum runtime depends on the conditions and settings used to obtain it. Check the supplied instructions and plan a margin appropriate to your class schedule, rather than assuming every feature combination produces the longest listed runtime.
Start with the length of the class, the number of classes before you can recharge and the time needed for file transfer. Include travel and unexpected delays where relevant. If you plan to use AC power, confirm that the recorder supports the intended powered recording arrangement and that the outlet location is safe. Keep cables away from walking routes and other people's work areas.
Before a long training day, make a practice recording using the same power arrangement and settings. Watch for the relevant low-power indication and learn the procedure for stopping and saving normally. Do not improvise with unfamiliar batteries, chargers or adapters. The manufacturer's instructions and the actual package contents should guide those choices.
For storage, check which location the recorder uses: internal memory, removable card or another supported destination. Know how to identify a nearly full device before class. Copy completed recordings to the appropriate computer location and verify them before removing material from the recorder under your retention plan. “Transferred” should mean the file was checked, not merely that a copy command was started.
An acceptance test answers whether the proposed arrangement supports the result you need. Write down a few representative conditions: ordinary explanation, a quiet sentence, a pause, movement and an audience question if relevant. Keep the exercise respectful and nonconfidential. If you cannot access the real room, test a comparable setting and recognize that the actual classroom still needs a final check.
Give each test phrase a clear identifier. For example, “front-table explanation,” “board position” and “question from the middle row.” On playback, you can then connect each result with its source. A recording of random conversation is harder to evaluate because you may not know where the person was or whether the difficult passage was spoken softly in the first place.
Listen through the method you will use for study. Check that normal speech is understandable at a comfortable volume. Note passages that need repeated replay or remain uncertain. You are evaluating practical usefulness, not producing a laboratory measurement. Do not turn one successful exercise into a promise that every future speaker, room or seating arrangement will produce the same result.
If the test fails, change one factor and repeat the relevant passage. Move the microphone, simplify a connection or choose another permitted position. Preserve the comparison files so you can explain the problem to support. The result should tell you what to improve, rather than encouraging a long sequence of unrelated setting changes with no clear record of their effects.
Audio is easier to review when your notes provide a route into it. Write the session date, course and a short subject description in a consistent place. During the lecture, note the approximate point where an important example begins or a difficult term is explained. These notes do not need to be a full transcript; they need to help you locate the passage you want to study.
Distinguish an approximate note from a checked timestamp. If you write “around twenty minutes,” keep that wording until you verify the player's position during review. A guessed precise timestamp can send you to the wrong passage. Once checked, use a consistent time format and identify the recording file so the reference remains useful after files are moved or shared appropriately.
Review difficult portions soon enough that your written notes still make sense. Add a short explanation of why a passage matters, using your own study method. Avoid creating a large collection of recordings that you never organize or revisit. The recorder's value comes from supporting understanding and review, rather than from maximizing the number of hours stored without a retrieval plan.
An illustrative study exercise is to choose three points after class: one concept to restate in your own words, one term to check and one worked example to replay. Use the recording to resolve those specific questions. This keeps the review focused and lets you judge whether the audio quality and navigation tools actually support the learning task you bought the recorder to address.
Follow the recorder's instructions for connecting it to a Windows 11 computer and locating the saved audio. Use the supplied or recommended connection. Copy the intended files into a clearly named course or training folder. Keep the original filenames when they are useful for identifying the source, or maintain a simple record connecting renamed copies with the original files.
Open several points in the transferred recording, including the beginning and end. Confirm that the duration is plausible for the session and that the speech is present. If there are several files because of breaks or device behavior, identify the order. A folder containing files is not enough information by itself; you should know which session each file represents and whether the expected segments arrived.
Keep private class material in the storage location permitted by the institution or instructor. Personal study permission may not include public posting or broad redistribution. Ask about those uses before sharing a recording or transcript. This guide does not supply a universal legal rule for classroom recording because the applicable permission, policy and intended use need to be resolved for the actual class.
For important material, use a backup arrangement suited to your needs and permissions. The recorder, computer copy and independent backup should be understandable parts of the same system. Check that you can locate and open the backup when needed. A backup that is never verified can create confidence without establishing that the intended recording is actually available.
If you regularly type from lecture recordings, a compatible transcription kit can place playback controls under your foot while your hands remain on the keyboard. Martel's All N One audio kit is a manual listening and typing option. Review supported formats and test a representative file before making it part of a large transcription project.
Decide how much text you need. A full verbatim transcript, a checked quotation and a personal study summary are different deliverables. Label them accurately. If you summarize an explanation, do not present the summary as the lecturer's exact words. If you create a transcript, mark uncertain words and check important terminology against the recording and permitted reference materials.
Speech recognition is another workflow with its own source requirements. Do not assume that a distant, multi-speaker classroom recording will automatically become accurate, attributed text. Human review remains important. A playback kit helps with that review, but its presence does not establish automated transcription or automatic timestamp insertion. Confirm any required feature on the current product page.
You can review the Olympus recorder package, compare Martel's meeting recorder options and explore the All N One Transcription Kit. Tell Martel about the room, permitted placement and review task so the recommendation fits the whole process.
Start with the lecturer's distance, room sound, permitted equipment placement and how you will use the saved file. Controls, power, storage and playback compatibility also matter. The longest advertised recording time is only one specification. A short test from the intended position gives you practical evidence about whether the setup captures understandable explanations in your actual situation.
Do not assume that it can. Distance, reflected sound, nearby noise and the lecturer's movement all affect the recording. Seek a better permitted position when possible and test the real arrangement. A successful close-range demonstration does not establish back-row performance. Describe the hall and placement limits when asking Martel for equipment advice.
A bag can obstruct the microphones and introduce handling or rubbing sounds. Use a stable, permitted location where the microphones receive the intended speech and the recorder does not create a distraction or hazard. Test that location before relying on it. Make recording visible and consistent with the class's rules rather than choosing concealment as an equipment strategy.
It may make the recording louder, but it can also raise surrounding noise and reflected sound. Compare placement before assuming level is the only problem. Use normal speech in matched practice samples and listen to the saved files. The useful outcome is understandable explanation, rather than a meter that moves strongly while the voice remains difficult to separate from the room.
Not necessarily. Built-in microphones may be suitable when the permitted recorder position and room conditions support clear speech. An external microphone is useful when it lets you place the pickup point more effectively or meet another specific requirement. Confirm the connection and test the combination. Choose it for a demonstrated need, rather than assuming more accessories always improve the result.
No. Matching plug size does not establish compatible input type, wiring or power requirements. Identify the recorder's microphone input and the microphone's specifications. Ask Martel about the exact combination if you are unsure. A supported match and a saved practice sample are better evidence than the fact that a connector can be inserted physically.
That depends on room layout, speaker distance and the importance of the original questions. Test the positions that matter. If policy and teaching practice allow it, an instructor may repeat a distant question before answering. If the discussion itself must be captured clearly, a different microphone arrangement may be needed. Do not infer full audience coverage from a clear instructor-only sample.
No. Microphone count and separately recorded channel count are different characteristics. A package can provide several pickup positions while producing a mixed file. If independent channels are required for later review, confirm the recorder and package capabilities explicitly. Do not describe a multi-microphone meeting kit as a multitrack system without verified product information supporting that claim.
Consider whether quiet speech, pauses and an uninterrupted timeline matter to your purpose. Test the selected model's activation behavior using soft sentences and speech after silence. Continuous recording may be more appropriate when completeness is important, subject to the class's rules and the equipment's capabilities. Saving storage should not be the only reason to accept missing context.
Make a practice recording with a pause followed by a softly spoken sentence. Repeat it at a normal level and listen to the transitions in the saved file. Use the same mode intended for class. This directly tests the situation of concern instead of assuming that an indicator light proves that every beginning and ending has been retained.
Choose a format supported by the recorder and suitable for your review, storage and project requirements. WAV and MP3 serve different practical needs, and settings vary by device. Test the intended file in your playback software. Keep the original recording and do not claim that converting a noisy or compressed file automatically restores clarity that was not captured.
Make a sample in the recording settings you plan to use, note its duration and file size, then estimate the total for the expected class hours. Allow room for additional sessions and variation. This is more useful than applying a maximum-capacity claim to every recording quality. Keep the estimate with your course plan and update it when settings change.
Treat it as a specification tied to stated conditions, not a promise for every use. Recording mode, accessories and operating conditions can affect practical runtime. Follow the manual, plan an appropriate margin and test the intended power arrangement before a long day. Storage space and power are separate limits, so check both before class.
Choose a routine that fits the class, recorder and review needs. If you create separate files, identify their order and session context. If you continue through breaks, account for that material during storage and review. Practice the controls so a planned break does not become an accidental failure to restart. The important point is a deliberate, documented sequence.
Use nonconfidential phrases that identify the position or condition being tested. Include normal speech, a quiet sentence, a short pause and relevant movement if possible. A phrase such as “board position test” helps connect the playback result with the arrangement. Random conversation is harder to compare because you may not remember who spoke from which position.
Record the session date, subject and source filename, then note approximate points for important explanations. Verify precise timestamps during review before presenting them as exact references. A small index of concepts and checked time locations can be more useful than a long unorganized list of recordings. Keep summaries distinct from exact quotations or transcripts.
Do not assume that it does. A recorder captures audio; transcription requires a separate supported workflow, whether manual typing, recognition software or another process. Martel's manual transcription kits provide playback controls while a person listens and types. Confirm any automatic-text feature explicitly instead of inferring it from a product's general connection with transcription.
It is most relevant when you regularly type from recordings or repeatedly replay short passages while editing text. A compatible pedal can reduce the need to move a hand to playback controls. Check the software and file requirements before purchase. For occasional listening without typing, your needs may be simpler, so describe the actual review task to the seller.
Check the instructor's and institution's rules for the particular class and intended use. Permission to record for personal study does not automatically establish permission to distribute or publish the recording. Resolve that question before sharing files or transcripts. Keep private material in the appropriate storage location and follow any restrictions attached to the recording permission.
Open the transferred audio, check that its duration is plausible and listen at several points, including the beginning and end. Confirm the session identity and the order of any multiple files. A completed copy action does not by itself establish that the intended lecture arrived in usable form. Verify before removing the source copy under your retention routine.
The original remains a reference for checking what was captured. Edited, renamed or converted versions may serve useful study and sharing purposes, but they should be identifiable as different files. Keep a clear connection between them. This helps prevent a shortened study excerpt from being mistaken for the complete lecture recording later.
Compare the complete workflows under the same permitted room conditions, including controls, interruptions, file transfer, power and playback. Do not decide solely from a device category. A dedicated recorder can serve a focused recording role, while other devices have their own practical considerations. Use representative saved samples and handling exercises to evaluate the arrangement you intend to use.
Test the likely movement positions during preparation when access allows it. A fixed microphone may receive speech differently as the speaker moves. Seek a better permitted placement or ask about an appropriate alternative recording arrangement. Do not promise consistent coverage across an entire room from one successful stationary sample near the recorder.
Use a comfortable, appropriate listening method that lets you judge speech clearly. Follow the recorder's instructions for monitoring and playback, because available functions differ by model. Remember that hearing a live input is different from confirming a saved file. Reopen the recording after the test so you know the capture and review path both work.
Check the recorder's mode, file sequence, power and storage observations before deciding what happened. Look for additional files that may contain the remaining segment. Keep your explanation factual and preserve the existing material. Do not invent missing speech from notes or context. A future acceptance test should reproduce the suspected condition using harmless practice material.
Keep the microphones away from objects handled repeatedly and arrange cables so they do not rub against the recording position. Compare a quiet sample with ordinary class activity. A microphone beside typing hands may capture those nearby sounds strongly. Placement changes can be more useful than expecting software to remove every interruption after recording.
Describe the room, lecturer distance, allowed recorder location, audience participation, class length and intended review method. Mention whether you need an external microphone or transcription playback. These details let the recommendation address the actual work. A request for the best recorder without room or workflow information leaves important equipment decisions unresolved.
Repeat it when the room, seating arrangement, microphone position, recording mode or equipment changes in a way that could affect capture. A quick session check is also useful before important material. You do not need an elaborate test every day, but you should not assume that a result from a different room proves the current arrangement is suitable.
Use an arrangement appropriate to the material, permissions and consequences of losing it. Keep verified copies in suitable locations and know how to retrieve them. If you use an independent recorder, test it as its own capture path. A second filename on the same failing storage device is not the same protection as an accessible independent copy.
Use the current Martel product pages for package-specific information and the supplied recorder manual for exact controls. Manufacturer educational material can explain microphone placement and room sound. Combine those references with your own permitted practice recordings. The goal is to make an informed equipment choice and verify it under the conditions in which you will actually study.