HGM-2 Battery Microphone vs. HGMUSB: Choosing a Court Reporter Recording Path
Compare the Martel HGM-2 battery microphone and HGMUSB microphone. Choose a recording path, check inputs and power, and test the saved sound.
Connect a writer, microphone and playback pedal to a court reporter laptop. Plan USB ports, the four-port adapter, device setup and a saved-file test.
Martel equipment guide · Laptop connections
Plan the ports, understand what each device does, and build a working connection routine for realtime writing, audio recording, and foot-pedal review.
A writer, a microphone, and a foot pedal may all connect through USB, but they do different work. The writer sends input to the reporting program. The microphone supplies audio to a recording path. The pedal sends commands to compatible playback software. Connecting all three successfully means checking those three functions, then checking how they behave together during the tasks you actually perform.
This guide uses the Martel Elite court reporter laptop, SKU 1978, and the Martel four-port USB adapter, SKU 240, as the starting points for a practical workstation plan. It does not assume a fixed port count or connector layout for every laptop configuration. Confirm the actual computer and accessory combination on your order, especially when replacing a machine you have used for years.
The examples concern Windows 11 reporting and review. They do not imply that every writer, pedal, or older software edition works with a new computer. Identify the exact models and applications first. With that information, you can arrange the physical connections, install the supported software, and verify each job without confusing one device's problem with another's.
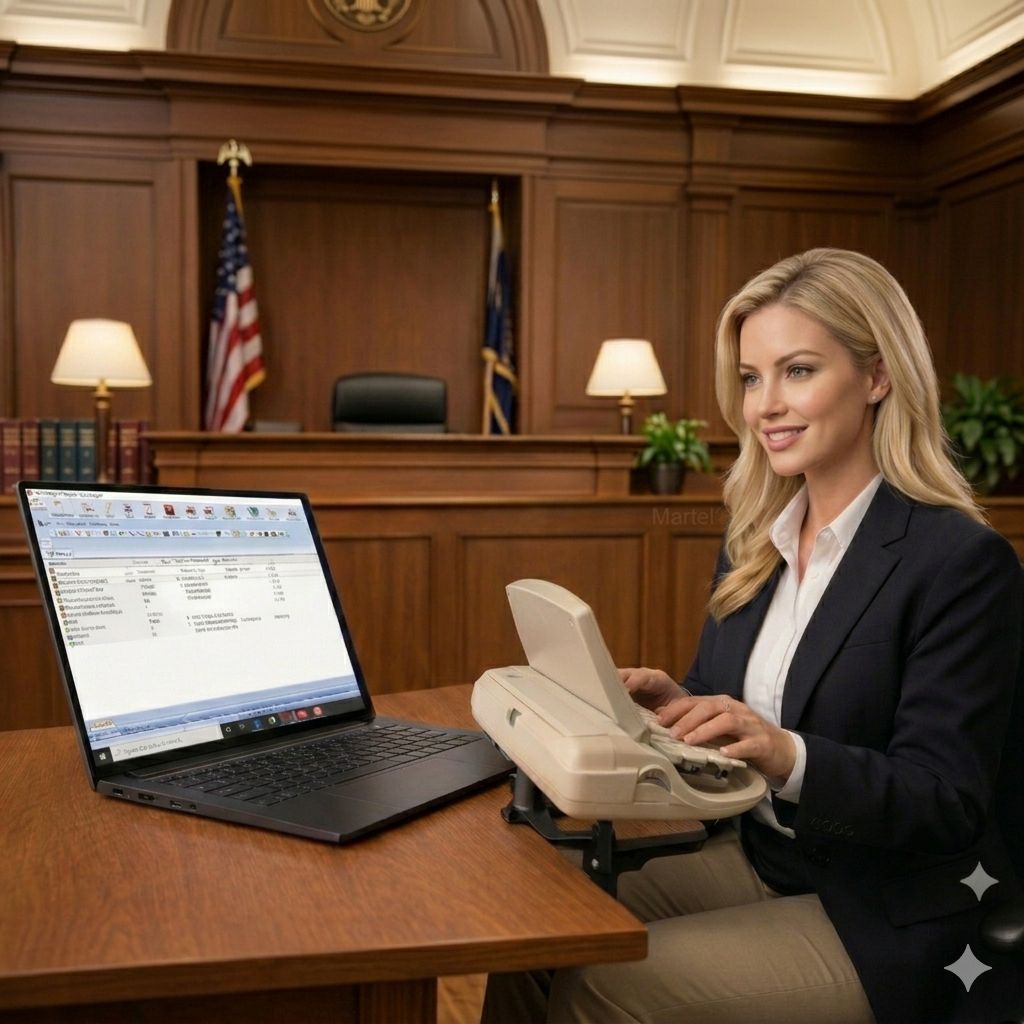
The writer connection should be judged by what reaches the CAT program. A power light on the writer or a Windows connection sound does not establish that realtime input has arrived. You need to open an appropriate practice job, use the configured writer source, and see your test strokes appear as expected. Keep that test focused on the writer before introducing a microphone or pedal problem into the discussion.
The microphone connection should be judged by a recording. Windows may recognize a USB audio device while the reporting application still uses the built-in microphone. A microphone can also be selected correctly while recording is disabled in the job. Check the chosen source, record a short passage, finish the recording, and listen to it from the location where you will normally review your work.
The pedal connection should be judged inside the playback application. A transcription pedal does not inherently control every program that plays sound. The application must support the pedal and the desired commands. Test play or pause, backward movement, forward movement, and release behavior according to that software's settings. A pedal used for reviewing a file has a different role from a pedal intended to mute a meeting microphone.
These distinctions give you a better support vocabulary. Instead of saying that the laptop connections do not work, you can say that realtime strokes arrive, the audio file records, but the pedal is not recognized in the selected player. That description narrows the problem and helps preserve the parts of the workstation that already operate correctly.
Lay out everything you expect to connect during an ordinary assignment. Include the writer cable, microphone or audio interface, pedal, mouse receiver if used, external storage, and any required meeting accessory. Also note the laptop's charging connection. Count the devices used at the same time rather than adding every object in the equipment case. A drive used for a later backup may not need to occupy a port throughout the proceeding.
Divide your work into three stages: taking the assignment, reviewing the recording, and transferring or backing up files. Write which devices belong in each stage. A reporter who reviews audio during breaks may need the pedal attached during the assignment; another reporter may connect it only at home. The inventory should reflect your real habits, because unnecessary disconnection can be more disruptive than one carefully chosen additional accessory.
Inspect the actual plugs at both ends of each cable. USB-A and USB-C describe different connector shapes, and the writer end may use another connector. A cable that charges a device is not automatically the correct data cable for its reporting function. Use the writer and accessory makers' recommended cable or adapter. Keep an uncertain cable out of the daily kit until its role is established.
Now compare the inventory with the exact laptop configuration. Do not infer port availability from a promotional photograph or another model in the same family. List the native connections and any planned hub. A one-page map of simultaneous devices is a more useful buying document than a request for a laptop with lots of ports.
| Device | Primary job | When connected | Proof it works |
|---|---|---|---|
| Steno writer | Realtime input | Assignment and practice | Expected strokes reach the practice job |
| Room microphone | Audio capture | Authorized recording | Recorded speech plays from the intended job |
| Transcription pedal | Playback commands | Review, including breaks if needed | Configured controls work in the supported player |
| External storage | File transfer or backup | According to the backup routine | Required files can be located and opened |
| USB adapter | Additional connections | Whenever its attached devices are needed | The complete planned combination works together |
Add a column on your own copy for the physical connection. Use labels you can recognize while seated, such as left-side front port or hub socket two. Avoid relying solely on color, which may be hard to distinguish in low light. A short written description and matching cable label can make the arrangement easier to restore after packing.
The worksheet should also distinguish what you own from what you still need. A microphone may require a particular interface; a pedal may require supported playback software. Listing only the physical device can hide those dependencies. Bring the full worksheet to the laptop purchase discussion so software, connectors, and accessories can be addressed together.
The Martel four-port USB adapter provides a way to connect several USB accessories through one host connection. It addresses a shortage of available sockets. It does not add software support for an otherwise unsupported writer or pedal, and it does not turn an ordinary audio jack into a USB microphone input. Those functions require their own appropriate hardware and software.
Count the occupied laptop port in your plan. Connecting a four-port hub to one available laptop port gives you four downstream sockets while using that host port. If the laptop originally had two unused suitable ports, one remains free after attaching the hub. This simple arithmetic prevents a plan that counts both the hub's upstream connection and the occupied laptop socket as separate available places for accessories.
Power requirements still matter. Microsoft distinguishes hubs powered by the computer connection from hubs using an external supply in its USB terminology. Identify the power arrangement of the exact hub and devices being supplied. This guide does not assign an unverified power rating, charging capability, or data speed to the Martel adapter. Ask about the particular combination you intend to run.
Try the intended arrangement during a practice session that includes writing and recording together. If a device's manufacturer recommends a direct connection, include that recommendation in the port plan. A direct connection can also be useful during troubleshooting because it removes the hub and its cable from the immediate path. Adopt the final layout only after the complete work routine has been checked.
Place the laptop, writer, and pedal in comfortable working positions before deciding where every cable will go. The writer should not have to sit awkwardly simply to reach an arbitrary socket. The pedal should remain reachable without pulling its cable tight when you reposition your chair. Leave enough slack for normal movement while keeping loops away from chair wheels and walking paths.
Put a hub where you can inspect it without moving the laptop during a session. A hub hanging from a short cable may place unwanted strain on the host connection. A stable surface and supported cable route make it easier to see whether an accessory is still attached. Do not cover ventilation openings or place cables where the laptop lid will pinch them.
Use labels for function: writer, room audio, pedal, and storage. A label describing the device's job is often more helpful than one naming only the cable type. If two plugs look alike, that functional label can prevent you from disconnecting the recording path when you intended to remove the review pedal.
Keep a suitable spare cable only after it has been checked with the intended device. A spare that has never been used may create another uncertainty when time is short. Store it separately from the normal connection set and identify its purpose. The daily arrangement should be simple enough that another authorized person can describe it from the worksheet.
Follow the writer maker's supported installation process on the new laptop. For a Stenograph USB writer used with CATalyst, Stenograph's realtime instructions identify the USB writer drivers and the configured writer source as part of setup. Use the current instructions for your model and software. Do not treat instructions for a different connection method as interchangeable just because both methods eventually produce text.
Begin with the writer alone in the planned connection. Open a practice job with nonconfidential material and write a short passage. Check that strokes arrive, the expected layout is selected, and the job can be saved and reopened. If your work uses realtime output to another system, treat that as an additional task with its own configuration. Receiving strokes from the writer does not establish the separate delivery path.
If the writer is not recognized, inspect its power state, the cable, and the configured input method before changing audio settings. Write down any message exactly. An error about the writer connection should not lead you to reinstall unrelated microphone software. A focused investigation protects the rest of the setup from unnecessary changes.
Once this stage works, note the port and settings you confirmed. You can then add the next device with a clear reference point. If the later addition causes a problem, you know which combination changed rather than having to reconstruct an entire untested workstation.
Connect the supported microphone or interface and identify its Windows audio input. Microsoft's microphone testing guidance describes selecting the device under Windows Sound settings and testing ordinary speech. Use that as a device check, then move to the reporting program. Select the intended audio source and recording method according to the program's own instructions.
Make a practice job that includes both writing and speaking. Use a few recognizable spoken phrases while writing their rough content or a harmless marker. Finish the recording through the normal application process. Reopen the job, play the audio, and confirm that you can find the expected sections. The point is to check the combination of writer input, audio capture, storage, and review, rather than a microphone meter alone.
If the microphone works in Windows but not in the reporting application, examine application settings and permissions. Microsoft's microphone troubleshooting page includes checking microphone access and the selected input. Keep the test small and reversible. Avoid installing multiple audio utilities or applying a long list of unrelated changes before identifying the actual failure.
For a voice writer, distinguish the recognition microphone from room audio. For a hybrid assignment, distinguish local speech from remote participant audio. The workstation may need more than one source, but those sources must have a supported route to the right application. A USB hub adds connection capacity; it does not perform that routing decision for you.
Identify the pedal model and the program you intend to control. Martel's current foot-pedal discussions should be based on the Infinity IN-USB-3 where that is the product being purchased, not an older pedal assumed to be equivalent. Ask about the actual application and the commands you need. Compatibility belongs to the pedal-and-software combination, rather than to USB in the abstract.
Open a harmless practice recording in the supported player. Follow that program's instructions for selecting or configuring the pedal. Check each control deliberately. Press, hold, and release it as you would during ordinary review, and observe whether playback behaves as expected. Some settings concern a held action and others a toggle; understand the behavior you have selected before working on a real job.
Arrange the pedal under the desk after the software test, then repeat the commands from your normal seated position. A technically working pedal can still be inconvenient if it slides, catches a cable, or requires an awkward reach. Keep its route clear of the writer stand and chair. Adjust the physical placement without pulling on the USB connection.
Test what happens when you switch between the player and the document you are editing. Use the application's documented behavior rather than assuming commands always reach the same window. If another program also uses a pedal, clarify how the two are managed. A playback pedal and a meeting mute pedal should not be treated as one interchangeable control just because both sit on the floor.
After each device passes its own check, assemble the final planned configuration, including the hub if one is needed. Run a longer practice session that resembles your work: write, record speech, save the job, review a portion with the pedal, and resume the tasks your software supports. Use the actual accessories you intend to carry, not a simplified setup that leaves the difficult combination untested.
Include ordinary interruptions that you expect to manage. A practice break can show whether you remember the correct recording controls and whether the pedal is still available when review begins. If you normally connect an external drive after the job, rehearse that step after saving. Keep the exercise within the software's supported procedure; do not deliberately disconnect an active recording device to create a failure.
Check the result after closing the application. Find the practice job from its saved location, reopen it, and verify that the required text and audio remain available. A familiar desktop and successful live display are useful observations, but they do not establish that the entire file-handling routine is correct.
Keep a concise acceptance note: writer works through this connection; audio comes from this named input; pedal works in this application; files are saved here. If one part remains unresolved, name it specifically. That makes the transition to a new laptop manageable without overstating readiness.
Begin with the symptom and the last meaningful change. Did the writer stop sending strokes, did a recording become silent, or did the pedal stop controlling playback? Was a hub added, a cable moved, or a different application opened? The chronology helps you choose a small test. It does not prove the newest accessory is defective, but it gives the investigation a sensible starting point.
If one device fails through a hub, check it with the supported direct connection during a safe practice session. If the device then works, investigate the hub arrangement, connection, power requirements, and simultaneous devices. If it still fails directly, focus on the device, its cable, driver, and application configuration. Keep the working configuration documented while you test.
If several devices disappear together, inspect their shared connection. A single upstream cable or host port may be common to all of them. This is a different pattern from a pedal that fails only in one player while the writer and microphone continue normally. Describing the pattern prevents a broad reinstall from becoming the default response to every symptom.
Record what you changed and whether it altered the result. A useful note might say that the microphone test succeeds on a direct port but fails when a particular unpowered accessory is attached to the same hub. Provide the exact models to support rather than generalizing that all hubs are unreliable. Keep any confidential work out of diagnostic samples unless sharing is properly authorized.
Before replacing the computer, record your existing successful arrangement. Note the writer model, software edition, microphone, pedal, cables, and any adapters. Capture the relevant settings through the application's normal controls if permitted, or write them down. The objective is to preserve information needed for the transition, not to assume every old setting should be copied unchanged onto new hardware.
Check the software provider's current requirements. Stenograph's CATalyst requirements, for example, identify Windows 11, supported processor families, and writer-port considerations. Match requirements to your actual applications and editions. A laptop's connector shape alone does not answer questions about drivers, processor support, licenses, or the software features you use.
Discuss the complete setup with Martel when considering the Elite laptop. Explain what must transfer and which accessories you expect to reuse. Confirm the delivered configuration and included services on the order. Hardware specifications and software licenses are separate parts of the purchase, and neither should be inferred from an informal description of a complete system.
Retain access to the old working files until the new setup and backup process have been checked appropriately. Follow the software provider's licensing rules when deciding which installation remains active. A successful practice job on the new computer is a concrete milestone; it is more useful than retiring the old setup solely because the new computer turns on.
Imagine a reporter whose assignment setup uses a USB writer and a USB room microphone, while home review adds a transcription pedal and an external drive for an approved backup routine. The initial inventory has four accessories, but the drive is used after recording has finished. The reporter can therefore plan the live configuration and the review configuration separately instead of treating every accessory as continuously connected.
The reporter checks the exact laptop ports and asks whether the selected four-port adapter is appropriate for the intended combination. The writer is installed and tested first, then the microphone, then the pedal in the review player. After those individual checks, the final layout is rehearsed with writing and recording active. The backup drive is introduced only at the appropriate stage. The written plan records the actual working arrangement, including which devices remain on the hub.
This example does not prescribe the same socket for every reporter. Its value is the sequence. Each addition has a clear purpose and a recognizable result. If the pedal later fails in a different player, the reporter can investigate player support without disturbing the verified writer and microphone paths. If several hub-connected devices disappear together, the common connection becomes the first place to inspect.
Now imagine a reporter who uses the same laptop at two desks. At the office, there is more space for a hub and review tools. In the courtroom, the writer stand, cable route, and permitted power location impose tighter limits. The reporter creates a small map for each location using the same device names. A cable labelled room audio has the same purpose even if its physical route changes.
At each location, the reporter confirms the application selections after reconnecting. The maps do not replace this check; they make it faster to understand what should be present. Before the first real assignment in the new room, the reporter completes a practice job from beginning to saved review. The exercise includes moving the chair normally and checking that the pedal cable does not pull the hub or cross a walking route.
When a configuration changes, update only the relevant map. For example, replacing a microphone with a different supported USB interface changes the audio device name and perhaps its power requirements. The writer and pedal may remain exactly as they were. Keeping the device jobs separate avoids turning a modest accessory change into a confusing rebuild of the entire workstation.
At the end of an assignment, finish the recording and save the job using the reporting application's normal procedure before unplugging devices. Confirm where the required files are stored and complete the authorized backup routine. If removable storage is involved, follow Windows and the device's instructions for removal. Do not make the packing sequence faster by interrupting a file operation.
Collect the writer cable, microphone connection, and pedal deliberately. Check for strain or damage at the points that bend most often. Put the hub and its cable in an identifiable place so you can confirm the kit is complete at the next venue. A functional label helps distinguish a tested spare from an unverified cable that has accumulated in the bag.
Use the next practice session to resolve small uncertainties discovered during packing. If two adapters look identical but only one has been tested, label them before they become an emergency choice. If a cable is too short for the normal desk, arrange a supported replacement and test it. Small preparation decisions can reduce the number of variables you face during an actual proceeding.
They can be part of one workstation when the particular hardware, software, and connection arrangement support their jobs. Verify the writer in the reporting program, the microphone in the recorded job, and the pedal in its supported player. Then rehearse the complete combination. The shared laptop does not make these three functions interchangeable or remove their individual configuration requirements.
That depends on how you work. A writer and room microphone may remain connected throughout authorized recording, while a pedal may be needed only for review. Some reporters review during breaks and prefer it attached. Build the port inventory around those actual stages, including any device that must remain available, instead of counting everything in the equipment bag as continuously connected.
No. USB describes the connection, while drivers and application support depend on the device. A writer may require its maker's driver and a configured writer source. A pedal may need selection inside a supported player. Check the official instructions for each model and avoid assuming that a successful Windows connection sound completes the setup.
Provide the writer model, CAT program and edition, microphone or interface, pedal model, playback program, and other simultaneous accessories. Explain whether the work is in person, remote, or a mixture. Describe required transfers and current difficulties. Those details allow the exact laptop configuration, adapters, and setup services to be discussed as one practical order.
The hub offers four downstream sockets while occupying one host connection on the laptop. Count the occupied host port when planning the remaining available connections. Also account for the types of connectors and supported power arrangement. A useful port map shows both the hub's upstream connection and which accessories will use its downstream sockets.
Its role is USB connection expansion. It does not by itself convert an analog microphone signal into a USB audio device, mix microphone channels, or route meeting audio into a reporting program. If a microphone needs an audio interface, that is a separate part of the setup. Identify the microphone's required receiving connection before choosing an adapter.
A hub adds a physical connection; it does not add pedal support to an application. Check whether the selected player supports the actual pedal and desired commands. Use a practice file to verify operation. If the pedal works in one supported program but not another, focus on the second program's capabilities and configuration before replacing the hub.
Follow the writer maker's recommendation and the tested configuration supplied for your workstation. A direct connection is also useful when isolating a problem because it removes the hub from that path. Avoid turning one successful arrangement into a universal rule for every writer. Document the exact model, cable, and port configuration you have verified.
Use the writer's specified data cable or a confirmed suitable replacement. A cable's ability to charge a device does not establish its suitability for realtime data. Check the connectors and supported function at both ends. Test a replacement during practice before treating it as a dependable spare for an assignment.
Establish one core function at a time, beginning with the writer for a stenographic workflow. Open a harmless practice job and confirm that expected input reaches the CAT program. Save and reopen it. That gives you a known starting point before adding audio capture and pedal review, making later changes easier to understand.
Power alone does not confirm the data path. Inspect the correct cable, supported driver, configured writer source, and practice-job state using the writer and CAT instructions. Record any message precisely. Avoid changing microphone settings in response to a writer-only symptom, because those settings address a different function.
The writer connection brings your writing into the reporting program. Realtime output sends the program's text to another authorized receiving system. Each path has its own configuration and verification. Seeing strokes arrive does not prove the receiving courtroom or client system gets the text. Include both tasks in acceptance testing when both are required.
Open Sound settings and inspect the Input selection after connecting the microphone or interface. Test normal speech through that named device, then select the supported source in your recording application. Note the name you verified. A laptop can have several audio inputs, including its built-in microphone, so physical connection alone is not enough.
The reporting application may use a different source, lack permission, or have recording disabled. Check the program's recording controls and Windows microphone access using official guidance. Create a small practice recording after each relevant correction. Keep the successful Windows test as information, while recognizing that the application's saved audio is a separate result to verify.
Do not assume those jobs have the same source or configuration. Voice recognition may use a dedicated microphone or Stenomask, while room recording needs the participants' speech. Describe the complete workflow to the software provider and Martel. Select and test each required path so a microphone intended for your voice is not mistaken for the room source.
No audio-routing function follows from adding USB sockets. Local microphone speech and remote participant audio need a supported route into the intended recording. Verify those sources separately and together using the software's instructions. A clear meeting in your headphones does not establish that the reporting file contains the same audio.
For Martel's current transcription-pedal offering, identify the Infinity IN-USB-3 and name the software you plan to control. Do not rely on a general request for a USB pedal or assume an older model behaves identically. Confirm the supported pairing and required commands before ordering, especially when the pedal will be used with more than one application.
No shared function should be assumed. A transcription pedal sends playback commands in supported review software. A mute pedal is intended to control a meeting microphone according to its supported setup. Specify the task you want and test the actual product. Similar appearance and floor placement do not establish interchangeable commands.
Check every assigned control in a harmless file, including press, hold, and release behavior. Then test from your normal seated position and while moving between the player and editing document as the software permits. Confirm that the expected application receives the command. Keep the resulting settings recorded so you can restore them later.
Follow the backup and recording procedures supported by your applications and equipment. Your port plan should identify whether that drive is needed during the assignment or only after the job is finished. Do not introduce a new transfer routine during a live proceeding. Rehearse the approved sequence in practice and confirm the required files at the destination.
The connector shape does not establish the complete device, cable, driver, and application combination. Check the laptop's documented capabilities and the accessory's supported connection. A suitable adapter may be required for a different plug. Confirm the exact arrangement during setup instead of assuming that a physically fitting connector settles compatibility.
During a safe test, try that device through its supported direct connection. Compare the result without changing unrelated settings. If it works directly, investigate the hub path and simultaneous devices. If it still fails, focus on the device, cable, driver, and application. This comparison narrows the problem without declaring the hub defective prematurely.
Look for a shared connection or power path, such as the hub's upstream cable or host port. Note which devices disappeared and which continued working. The pattern is useful evidence for support. It does not establish a cause by itself, but it directs attention toward common components before you troubleshoot each accessory independently.
Avoid making broad changes without a specific diagnosis or manufacturer guidance. First identify the actual symptom and the tested connection arrangement. If a power-management setting is relevant, change it through the supported procedure and verify the result. Keeping a record of targeted changes is more useful than applying a collection of unrelated fixes.
Label devices by function and keep a small map of the native ports and hub sockets used. Include enough slack for normal chair and writer movement. Photograph permitted equipment only if appropriate, or use a sketch. A repeatable physical arrangement makes it easier to notice a missing cable or a connection that differs from the tested setup.
Yes. A known working replacement is more useful than an unidentified cable that merely fits. Check it with the intended device during practice, label its role, and store it where it is easy to find. If you later replace a component, review whether that spare still belongs to the current arrangement.
Keep the required job files, dictionaries, settings information, software-license details, and a record of the working accessories and connections. Follow the software provider's supported transfer process. Confirm the new practice and backup routines before retiring access to the old material. A new computer does not automatically preserve every part of the previous reporting environment.
Read the actual order and included-services description. Hardware, installation assistance, transfer work, and third-party licenses can be separate items. Identify the applications and editions you need before purchase. Ask Martel to clarify what is included so the receiving test corresponds to the agreed setup rather than an assumption about a package name.
Name the failed task, device model, application, connection route, and any recent change. Explain what still works. For example, writer input and recorded audio may be fine while pedal commands fail in one player. Provide exact messages and harmless practice examples where useful. That description helps support investigate a focused problem.
Finish the recording, save the job, and complete the relevant file operations before disconnecting the equipment involved. Follow application and removable-storage instructions. Packing should come after confirming that the required work is retained. A familiar disconnect sequence reduces the chance of removing the wrong device while it is still needed.
You have demonstrated the actual tasks on the intended configuration: writer input reaches the job, the selected audio records and reopens, the pedal controls the supported player, and the required files are retained. Include the hub and other simultaneous accessories in that demonstration. Keep any unresolved item specific rather than treating power-on as a complete acceptance check.
Start with the Elite court reporter laptop page and the four-port USB adapter page linked below. Bring your device worksheet to the discussion. The best configuration for your work follows the writer, audio source, review software, simultaneous accessories, and support needs you actually have. Confirm the current offer and contents before placing the order.
