
Body Cameras for Security Guards: Buying Guide
Evaluate body camera equipment for security teams. Plan mounting, audio tests, charging, downloads, local storage and staff recording routines.
Fix USB microphone problems in Windows 11 with input selection, permission checks, saved recordings and practical tests for Martel microphones.
Fix USB microphone problems in Windows 11 with input selection, permission checks, saved recordings and practical tests for Martel microphones.
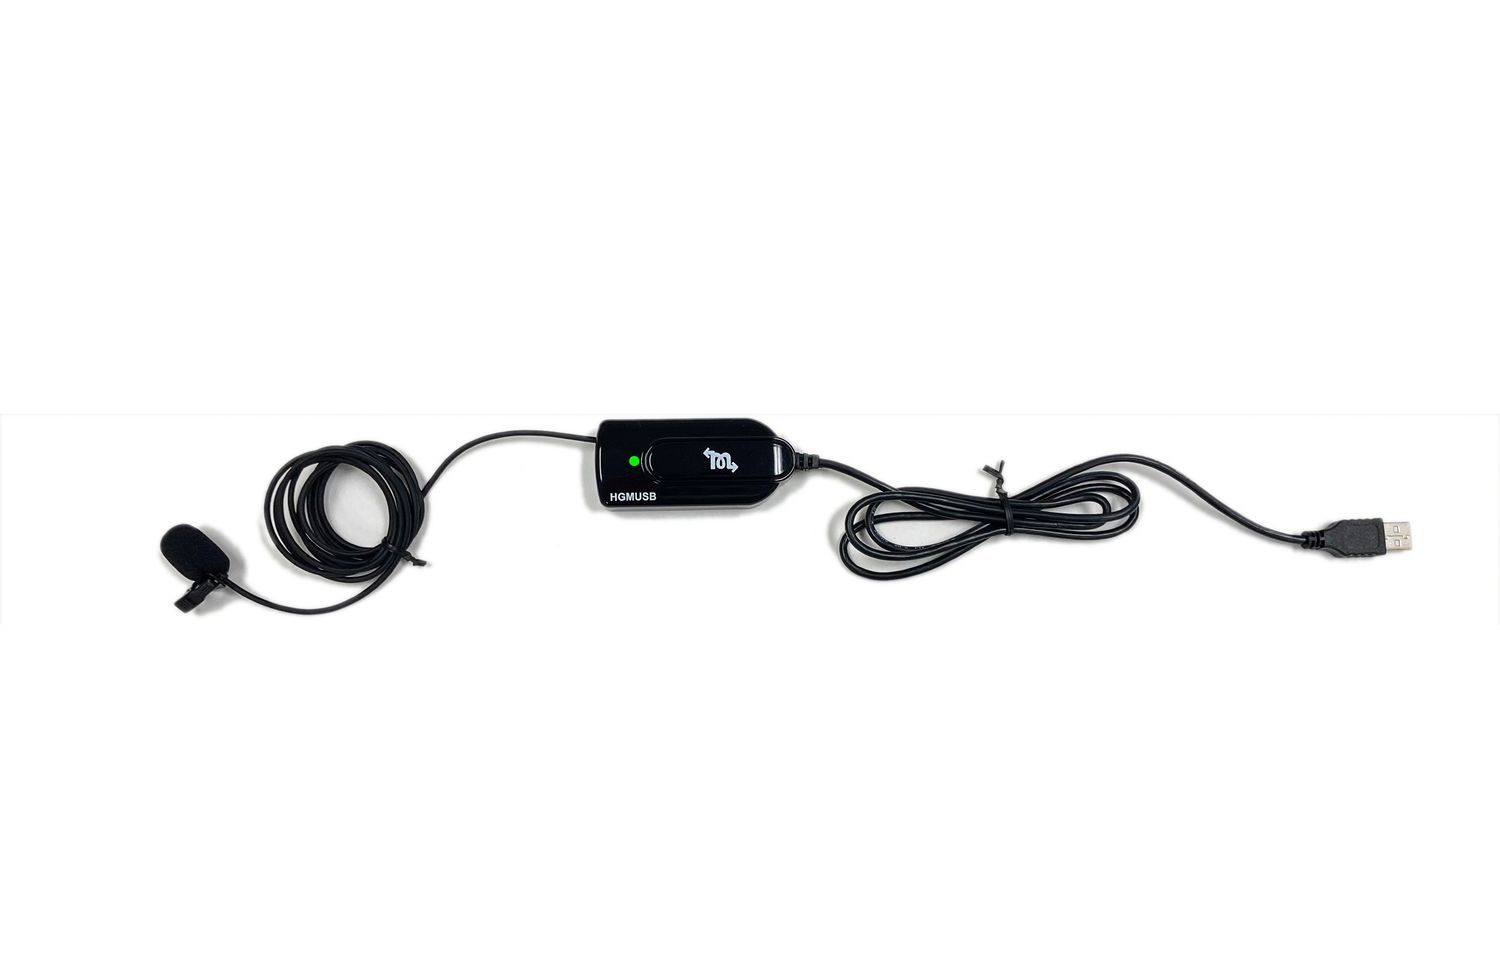
A USB microphone can be connected to a Windows 11 computer and still produce silence in the application you need. The cable connection, Windows input selection, microphone permissions, application settings, recording controls and playback output are separate parts of the job. A useful diagnosis identifies the first part that fails. Changing every setting at once can hide that answer and leave a working setup difficult to reproduce.
Begin by writing a short description of the problem. Does Windows show the microphone? Does an input meter respond? Can you save a short recording? Does the saved recording contain your voice? Does the difficulty occur in one program or every program? Those questions sound similar, but each describes a different failure. A device that never appears in Windows needs different attention from a device that records clearly in Sound Recorder but stays silent in a court reporting application.
This guide is for Windows 11 users who want a practical sequence for checking a USB microphone. The examples are illustrative troubleshooting exercises, rather than reports of tests performed on a particular customer's equipment. Use a practice recording before an important proceeding, interview or meeting. Keep the successful settings and sample file so that a future problem can be compared with something known to work.
Connecting a USB microphone establishes a possible route into the computer. It does not prove that every recording application has selected that route. A laptop can have its own microphone array, a webcam microphone, a headset microphone and a USB recording device available at the same time. A program may continue using the last input it remembered even after another microphone is connected.
The visible device name may describe an interface rather than the product's retail name. Match it by connecting the microphone before opening your audio settings and observing the available inputs. If several devices have similar names, simplify the test by disconnecting unrelated external audio devices. Do not unplug equipment that is actively recording an important session. Make those changes during preparation or a planned break.
Also distinguish an electrical connection from a successful recording. An indicator light can help show that a device has power or activity, but the most useful end-to-end check is a saved file that you can reopen and hear. The file proves more than the presence of an icon because it exercises the input, recording application, storage destination and playback process together.
Seat the USB connector fully and examine the cable for obvious damage. If your setup includes a USB-C adapter, confirm that every connection is secure. A connection that feels loose when the laptop moves deserves attention before you depend on it. Keep the recorder, interface and cable positioned so that ordinary typing or moving papers does not pull on the connector.
For the first test, use a direct laptop USB connection when one is available. This removes a hub, docking station or extension cable from the troubleshooting path. It is a diagnostic step, not a claim that every hub is unsuitable. Once the microphone works directly, reconnect the accessories one at a time and repeat the same sample recording. The accessory that changes the result becomes the next part to investigate.
Avoid choosing an adapter only because its plugs fit. Some USB accessories are intended for charging or have connection limitations. Use the adapter supplied or recommended for the equipment when possible, and ask the seller about an unfamiliar cable. A tidy cable arrangement also helps you reproduce a successful setup: put a small removable label on the audio cable so it is not confused with a charging lead from another device.
An illustrative example is a reporter whose microphone works on a desk but disconnects when the laptop is moved into position. The useful test is to record while gently arranging the equipment as it will be used, without forcing any connector. If the fault follows normal cable movement, increasing input volume will not resolve the physical interruption. Document the behavior and have the connection examined.
Open Start, select Settings, then System and Sound. In the Input area, select the microphone you intend to use. Microsoft documents an input test on the device's properties page: start the test, speak normally, stop it and play the recorded sample. Interface wording can vary with Windows updates, so use the input device and microphone test controls shown on your computer.
Say a distinctive practice phrase rather than making a tapping noise. For example: “External USB microphone test, first connection, normal speaking voice.” Speech gives you information about clarity, volume and completeness. Tapping only proves that some vibration reached a microphone, and a laptop's internal microphone might hear that vibration too. Keep the test short enough that you can compare several results without confusion.
Watch whether the selected input reacts as you speak. If it does, proceed to a saved recording rather than treating the meter as the final answer. If it does not, check the selected input again and confirm that there is no physical mute control engaged. A headset, interface or software control may have its own mute function. Identify the control before changing it so that you can return to the intended state.
Write down the device name after a successful test. A photograph of your own settings screen can be useful for personal reference, provided you keep any private information out of it. The goal is a simple setup record: connection used, Windows input name and the date of a working sample. You do not need an extensive technical inventory to make the next troubleshooting session more efficient.
Windows microphone access is separate from choosing an input. In Windows 11, the relevant controls are under Settings, Privacy & security, Microphone. Microsoft distinguishes device microphone access, access for supported apps and access for desktop applications. A recording program can have the correct input selected and still fail when the access it requires is turned off.
Enable the access needed for the application you are deliberately using. Read the labels rather than assuming every switch applies to the same kind of program. Desktop programs do not necessarily appear as individual switches in the same list as Microsoft Store apps. If the computer is managed by an organization and the controls are unavailable, ask its administrator to check the policy instead of trying to defeat the restriction.
A browser-based meeting introduces another decision. Windows permission for the browser and the website's own microphone permission are different controls. Check the meeting site's microphone selection and any permission indicator the browser shows. Only approve access for the site you intend to use. A permission prompt appearing in an unrelated tab is not a reason to grant microphone access elsewhere.
After changing a relevant permission, reopen the recording program if necessary and run the same practice phrase again. Note the result before making another change. If the Windows sample works but a website remains silent, the evidence points toward the browser, site permission or meeting input selection. It does not establish that the USB microphone itself has failed.
Open Windows 11 Sound Recorder from Start and make a brief practice recording. If more than one input is available, use the application's available input selection and confirm that it matches your intended microphone. Name or identify the file so you can find it again. Stop the recording deliberately and reopen it from the saved location.
Before judging silence, check the playback output. The audio may be going to a connected headset, dock, monitor or another output device. Select an output you can hear and start at a comfortable listening level. A working input can appear broken when the saved file is playing through an unattended device. Conversely, loud speaker playback does not prove that the file contains the intended external microphone.
Use your spoken test phrase to establish that you are hearing the new sample rather than an older recording. Listen for the beginning, middle and end. Does the first word arrive? Is the sound continuous? Does the voice remain understandable? A file that exists but contains the wrong microphone, missing speech or severe distortion is a different result from a file that cannot be found at all.
Keep the sample after a successful test. Suppose the Windows recording is clear but the transcript application records nothing. You now have a useful boundary: the microphone can deliver usable speech through Windows into one recording program. Focus the next test on the transcript application's input and recording controls. Replacing the microphone at this stage may leave the actual application setting unchanged.
Open the program you need for the actual work and find its audio input settings. Use the program's current help or vendor instructions when the control names are unfamiliar. Choose the external microphone explicitly if the program provides that option. A system default and an application's remembered input are not always the same selection, particularly after using a different headset or webcam.
Next, distinguish monitoring from recording. A live meter or an audible monitoring path may be available before a file is being saved. Confirm the application's recording status, the destination file or job and the action required to start capture. Make a practice job rather than experimenting inside an important existing matter. Stop it, close it if appropriate, then reopen its audio using the normal review workflow.
For a court reporting program, also distinguish typing or translating text from enabling its audio feature. A job can accept text without having a working audio recording path. Follow the software vendor's directions for that version. This article does not assign a universal menu sequence to every CAT program because those settings differ. The meaningful check is whether the current practice job contains the new spoken sample.
If the application changes its input after you reconnect the microphone, record that behavior. Reconnect before launching the program and repeat the test. If that sequence is reliable, make it part of your preparation routine while you ask the software vendor about device selection. A reproducible sequence is more useful than repeated restarts with no record of what was connected or which input the program selected.
Quiet audio is not the same as no audio. First decide whether the recording contains a clear but soft voice, a distant reverberant voice or mostly background sound. These observations lead to different tests. Increasing a level control may make both speech and room noise louder without improving the difference between them. Move the microphone or speaker position when placement is the main limitation.
Make two samples using the same sentence. In the first, use the normal seating arrangement. In the second, place the microphone where it can receive the intended speech more directly without obstructing anyone or creating cable hazards. Compare saved playback rather than judging by the meter alone. Keep the speaking voice natural so that the comparison tests placement, rather than a change from ordinary speech to shouting.
Adjust input volume gradually if the voice remains too low. Follow the device and Windows controls available in your setup. Stop increasing the level if ordinary louder speech sounds harsh or flattened. Distortion in the saved file is a reason to reassess levels and distance. It is not a reliable indication that the microphone needs to be pushed even harder.
An illustrative conference-room test uses three seats: near, middle and far. Ask a volunteer at each position to read a different sentence at a normal level. Play the whole sample back and identify which voices are difficult. This produces a practical room map. A single impressive near-seat sample cannot establish that quiet speakers at the other end of the table will also be understandable.
Describe an unwanted sound before trying to remove it. A steady hum, intermittent clicking, paper movement and a hollow echo are different observations. Write when the sound occurs and whether it is present during silence. A microphone that records a chair scraping beside it is receiving a real room sound; a software permission change will not remove that sound from the room.
For handling noise, move the microphone away from objects people touch repeatedly. Keep cables from rubbing against a stand or work surface. Make one sample with papers still and another during the ordinary activity that causes trouble. This is especially helpful when a sound is mistaken for a device fault even though it only appears when someone handles a folder near the microphone.
For intermittent noise, compare a direct connection with the usual dock or hub arrangement. Change one component between samples. If a noise follows a particular connection, preserve that observation for support. Avoid opening the computer, modifying power wiring or experimenting with unidentified electrical adapters. Ordinary audio troubleshooting should not require improvised changes to the computer's electrical safety arrangements.
For room echo, listen to how speech trails after a sentence. Try a quieter, less reflective location when the work allows it, or bring the microphone closer to the intended speakers. Do not promise that a microphone will turn every large reflective space into a studio. A clear explanation of the room and seating arrangement helps Martel recommend a suitable recording approach.
Some microphone complaints occur only after a break, reconnection or change in the laptop's operating state. Capture the sequence precisely. For example: the first practice recording works, the computer sits unused, the next recording starts late, and reconnecting the microphone changes the input name. That description is much more useful than simply reporting that audio is unreliable.
Prepare a short comparison exercise during noncritical time. Record a baseline, leave the setup as normally used during a break, then make another sample. Note whether the device remains visible in Windows and whether the application still lists the same input. Repeat with the laptop connected directly to the microphone if a hub is normally involved. Keep your observations factual and avoid deciding the cause before the comparison is complete.
When the failure occurs after changing an output device, inspect the inputs too. Connecting a headset can introduce a new microphone option. A program may choose that option or remember an earlier selection. Check both sides of the audio route after the change. If the selected input has moved, correct that selection and save a new test before trying driver changes.
Do not make broad changes to power, security or device settings during a live job. If the problem persists, use the computer manufacturer's current guidance and contact support with the recorded sequence. For work that cannot tolerate a missed recording, plan an appropriate independent backup before the session. A recovery action after silence has been discovered cannot recreate words that were never captured.
You can make an effective comparison record with four columns: connection, application, result and sample filename. Start with the direct USB connection in Windows, then the intended application. Add the usual hub or dock only after the direct path is understood. Each row should describe a completed recording test, not a planned change or a device that merely appeared in a list.
Consider this illustrative sequence. Test A is clear in Sound Recorder using direct USB. Test B is silent in the work application using the same connection. Test C becomes clear after selecting the USB input in that application. The evidence supports an application selection problem. It does not support a claim that the cable, microphone and computer all failed together.
A different illustrative sequence is clear in direct USB but repeatedly interrupted through one adapter in both programs. That points the next investigation toward the adapter path. It still does not prove the precise electrical cause. State the observation accurately when asking for help: direct connection passed, accessory connection failed, and both saved samples are available. This lets support choose a useful next test.
Do not fill a matrix with dozens of random combinations. Two or three controlled comparisons often reveal the most useful boundary. If an important recording is approaching and you have not restored a reliable path, stop experimenting and arrange a known working alternative. The purpose of troubleshooting is dependable capture, rather than collecting a large number of settings changes.
Martel's HGM-USB product page describes a USB-powered microphone package for laptop recording, with USB and USB-C connection support and live listening features. It is a relevant option for court reporters who want a dedicated external input and setup assistance. Use the current product page for its package contents, availability and specific connection information rather than relying on an older description.
Buying a dedicated microphone does not remove the need to choose its input in Windows and the recording program. Treat the equipment and the application as a complete workflow. Before an important session, make a short saved recording using the intended program and seating arrangement. Ask Martel about the computer, connectors and software version you actually use if you need help selecting or configuring equipment.
You can view the HGM-USB microphone and current package details. For broader room coverage, compare the options in Martel's court reporter microphone category. Describe the room, recording destination and number of speakers when asking for a recommendation. Those details matter more than choosing equipment by the shape of a plug alone.
Include the microphone model, Windows 11 version if known, laptop model, connection path and application name. Then state the first test that fails. Say whether the device appears in Input, whether the Windows sample contains speech and whether the work application's saved sample contains speech. These facts help distinguish a connection problem from a selection, access or recording-control problem.
Use a nonconfidential practice phrase for support samples. Do not send a client's proceeding, interview or private conversation merely because it demonstrates an audio difficulty. A new sample can reproduce many connection and noise problems without exposing the original material. If the fault only happens under special conditions, describe those conditions and ask support how to capture an appropriate diagnostic example.
Keep a record of the setting that resolves the problem. Record the successful input name and connection, then make one final sample after restarting the application in your normal sequence. A solution that only exists in memory is easy to lose when you next connect a headset or travel with the laptop. A short written setup note makes the working process easier to repeat.
The device list confirms that Windows recognizes an input, but the application may be using another source or may lack the access it requires. Make a Windows test recording, then inspect the application's input and recording controls. The difference between those results identifies a useful place to investigate. Do not assume that recognition alone proves a complete recording path.
Start with a controlled sample unless there is obvious physical damage or another clear reason to replace equipment. A different microphone can encounter the same application selection problem. Check the connection, Windows input, access and saved recording first. If a replacement is needed, provide those observations so the next purchase addresses the actual workflow rather than an untested assumption.
Listening and saving are different actions. A monitoring path can let you hear an input while no file is being written. Confirm that the recording program has started capture and identify the destination. Stop the practice recording, reopen the file and listen again. That exercise separates live monitoring from a saved recording you can review later.
Inspect the selected input in Windows and in the application. Use a distinctive spoken sample from the intended microphone position and compare the result after selecting the external device explicitly. Avoid relying only on tapping the case because several nearby microphones can hear it. Simplify the available inputs during preparation if similar device names make the selection unclear.
A moving meter is useful evidence that sound is reaching one part of the system. It does not prove that the application saves the intended file or that playback is understandable. Complete a short recording and reopen it. Check the actual speech and destination so your preparation covers both capture and later review.
Yes, an adapter adds another connection to the route you are testing. Compare the direct or recommended connection with the usual adapter arrangement when your equipment allows that comparison. Keep the speaking phrase and application the same. If the result changes with the adapter path, report that observation without claiming a cause that the comparison has not established.
Detection does not measure useful speech clarity. The selected input level, microphone distance, speaking direction and surrounding room sound can all affect the saved sample. Compare normal speech from the actual working positions before adjusting everything. Raise levels gradually if needed, and listen for distortion. A louder recording of mostly room noise is not necessarily a better recording.
Listen to the character of the problem. If speech sounds distant and buried in room noise, improve placement where practical before adding large amounts of gain. If it is clear but simply soft, an input-level adjustment may help. Use matched practice phrases so the comparison shows the effect of the change rather than differences in how loudly someone spoke.
A headset can introduce another input device. Windows or a program may select it, or the application may remember a previous headset setting. Check the input after connecting or removing audio equipment. A short saved sample before work is more reliable than assuming that last week's setting will remain correct after the device arrangement changes.
An indicator can provide useful device information, but interpret it according to the manufacturer's instructions. It does not replace checking the application's recording state and saved file. The strongest practical confirmation is the new practice phrase in the intended recording. Keep that distinction clear whenever lights, meters and application controls describe different parts of the audio path.
For ordinary microphone troubleshooting, create a new nonconfidential sample instead. A saved private file tests playback more than microphone capture, and sending it to support can expose information unnecessarily. Speak a simple test phrase into the current input. This creates a relevant example of the present setup while keeping the original material out of the diagnostic exchange.
It means one Windows recording path can produce usable audio. Check the CAT program's chosen input, audio enablement, practice-job recording controls and vendor instructions next. Do not conclude that all hardware is perfect, but use the successful sample to narrow the investigation. Supply the software version when requesting help because application controls can differ between releases.
The computer may be managed by an organization or subject to settings controlled by an administrator. Explain which recording application needs access and show the unavailable control to the responsible support team. Do not try to bypass management or security controls. Meanwhile, avoid depending on an untested recording path for work that requires complete audio capture.
Use basic connection, input and recording checks first. Broad driver changes can affect working speakers, webcams and other equipment. If driver repair becomes necessary, follow current instructions from Microsoft or the computer manufacturer and understand the device being changed. Make these changes during preparation time, with an appropriate recovery plan, rather than during an important recording.
The paper may be much closer to the microphone than the speaker. Compare placement and ordinary room activity using a practice recording. Move frequently handled objects away from the microphone and position it to receive the intended speech more directly. The useful target is understandable voices at working seats, rather than a claim that every unwanted sound can be removed electronically.
No. A nearby voice can sound clear while a distant, soft speaker remains difficult to understand. Test the positions that matter, including the farthest expected speaker. Give each seat a different practice sentence so playback identifies the source. Room coverage decisions should be based on those practical comparisons and the equipment's verified capabilities.
Write down the sequence and reproduce it outside critical work. Compare a baseline recording with a sample after the normal idle period. Check whether Windows still shows the device and whether the application retained its input. Include any dock, headset or power-state change in your notes so support can investigate the specific trigger rather than a general description of silence.
Yes. Playback can be directed to an output you are not listening to, or its volume can be reduced. Confirm the output device and use a known working listening method at a comfortable level. Reopen the new practice sample and listen for its distinctive phrase. This checks playback without assuming that a quiet speaker means the microphone captured nothing.
Use a separate practice job whenever possible so diagnostic material does not become mixed with the actual record. Follow the application's normal recording and review procedure in that practice job. Once it works, confirm the intended settings for the real session. Keep your test phrase and file name clearly separate from client or meeting material.
It can be, particularly when the device is missing or the physical connection is questionable. Change only the port and repeat the same sample. Observe whether the device name or application selection changes after reconnection. Record the result instead of moving repeatedly among ports without knowing which combination produced a reliable file.
That statement gives too little information to choose a focused test. Add whether Windows detects the device, whether its input meter responds, whether Sound Recorder saves speech and whether the intended application saves speech. Include the connection path and software name. A short, specific description can prevent a long exchange about components that have already passed useful checks.
A local recording exercise and an online meeting are different workflows. Use the recording application's requirements to determine what it needs. If local capture works while an online meeting does not, investigate the meeting input and site permissions separately. Do not treat a network problem as proof of a USB microphone failure without a local capture comparison.
It provides a reference for clarity, device selection and file location. If the setup changes later, repeat the same phrase and compare the results. Keep the file name and connection note together. This is especially useful for portable equipment that is frequently disconnected, packed and reassembled with different docks, adapters or meeting accessories.
Change one setting or component between short recordings and label each sample. State the change aloud at the beginning if that helps. Listen before moving to the next option. This method keeps the cause of an improvement visible. It also lets you restore the previous working arrangement when a proposed change makes the recording worse.
Yes, programs can have their own input choices and remembered settings. Check each program you actually depend on rather than assuming one successful selection applies everywhere. Test the intended combination during preparation, because simultaneous applications can also create practical workflow complications. Keep the test focused on your real working arrangement instead of opening unnecessary programs during diagnosis.
No microphone removes the need for a functioning recording application and correct input selection. The HGM-USB is an equipment option within that larger path. Review its current product information, connect it as directed and make a saved sample in the program you use. Ask Martel for help with the exact computer and application if the setup is unfamiliar.
A complete reset is not a proportionate first response to a single untested symptom. Begin with connection, input, access and saved-file checks. A specific finding may point toward a smaller correction. If a larger computer repair is ultimately needed, discuss its implications and backups with qualified support rather than using it as a routine microphone troubleshooting step.
Long enough to include the start of speech, normal sentences, a short pause and the end of speech. A brief, repeatable sample is usually more useful for comparison than an unstructured long recording. For room coverage, include each important seating position. For idle-time problems, add a separate sample after the condition that normally triggers the failure.
Repeat the actual recording and review workflow with a fresh sample. Confirm the selected input, recording destination and audible beginning and end. Then reopen the application in your normal sequence and check again if the change concerned device selection. Save the successful configuration in a short note so that the repair becomes a reproducible routine.
Microsoft's current microphone support pages explain Windows input tests and microphone privacy controls. Martel's current product page supplies the equipment-specific information. Use those sources for exact controls and package details, then apply the original comparison exercises in this guide to your own setup. If a screen differs, follow the labels for your installed Windows 11 version.