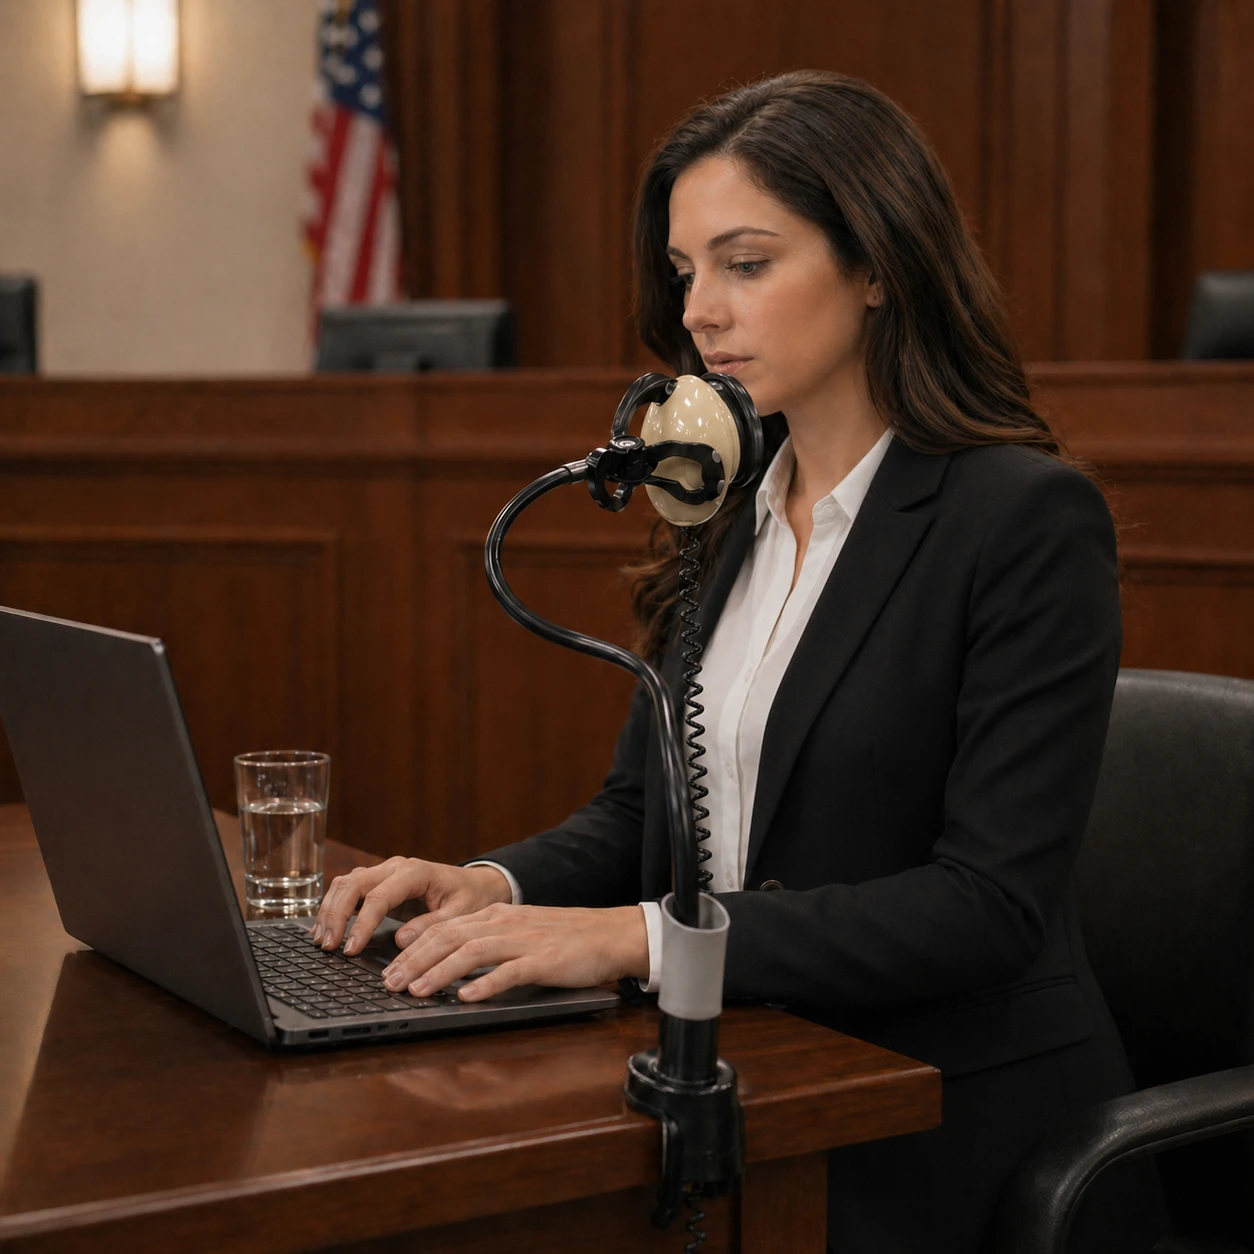
Stenomask Troubleshooting Guide for Court Reporters
Find the cause of silent, quiet, distorted or intermittent Stenomask audio. Follow practical tests for USB and analog inputs, recognition errors, separate mask and room recordings, and Martel support.
By Martel Electronics · Published November 3, 2026
Find the failure before changing the equipment
When a Stenomask produces no sound, quiet speech, broken audio, or unexpected text, start by locating the point where the result changes. The microphone, computer input, application, saved recording, and recognition output are connected parts of a workflow. Checking them in order gives you an explanation you can act on and helps you choose the right repair, setting, accessory, or replacement.
This guide covers direct USB masks and compatible analog arrangements for court reporters and voice writing students. Use the symptom links below to reach the relevant test. If you are connecting a mask for the first time, the Dragon Stenomask setup guide provides the complete initial setup sequence.
“My Stenomask is not working” can describe several different failures. A laptop may not list a USB device at all. An analog interface may appear normally while receiving no mask speech. A recording program may hear the wrong microphone. Recognition may receive clear speech but insert a different word. Each situation calls for a different test, so begin with the most concrete description you can make.
Write down what you expected and what you observed. For example, “the mask appears in the input list, but the practice file contains the laptop microphone” describes a routing problem worth investigating. “A sentence is missing from the text, and I have not checked the audio yet” describes an unresolved comparison. These descriptions leave room for evidence instead of assuming that the mask itself has failed.
Saved audio, listening level, capture level and position
The same phrase before and after one change
Audio works, text is wrong
Spoken words, application source and recognition procedure
Source passage, mask audio and text together
Only one recording survives
Each destination's input, recording and save process
File names and which path contains speech
Works until a break
Reconnection, application state and resumed input choice
The exact break-and-return sequence
Preserve useful work before experimenting
If a problem occurs during an assignment, follow the established reporting and recording procedure for that assignment. Save material that has already been captured and identify the current recording status before making changes. Repeatedly unplugging equipment or closing programs can interrupt a path that is still working. Investigate with a separate practice sample when you have an appropriate opportunity to do so.
For troubleshooting outside the assignment, use fictional material and a clearly named practice folder. That makes samples easy to share with an instructor or support contact without including proceeding content. Keep the original problem sample when possible. It may contain the evidence needed to distinguish an intermittent connection from an application selection that was changed afterward.
Draw the actual route in one sentence
Identify the mask, its output, the receiving input, and the application. A direct USB arrangement might read “Dragon mask through this USB port into the selected writer input.” An analog arrangement needs the receiving interface or recorder included in the sentence. If you cannot name that receiving device, inspect the equipment before changing software settings. The connection between the mask plug and the computer is an important part of the diagnosis.
Add a separate sentence for a room microphone or second writer destination. Labeling the routes helps when a control named “input one” belongs to a different device than expected. It also prevents a second mask output from being mistaken for participant audio. You should be able to point to the physical source associated with every recording you intend to review.
Use one short passage as the reference
Choose a passage you can speak consistently and repeat it for each comparison. A useful opening is “practice route check,” followed by several ordinary sentences and a clear ending. Keep the speaking pace comfortable and the working position steady. Difficult material can introduce repetition errors that distract from the connection or recording question you are trying to answer.
Give each attempt its own file name and note the single change being tested. A name such as “practice USB direct second attempt” is easier to interpret than five files called “new recording.” Do not overwrite the only example of a failure with the next trial. Comparing the two files often answers a question that memory cannot settle reliably.
Look for the earliest unsuccessful checkpoint
Ask whether the intended input is available, whether it receives the writer, whether the application uses it, and whether a useful file or text result is preserved. Stop at the first checkpoint that fails. If the computer does not detect a USB input, vocabulary changes are premature. If the recording is clear and complete, return to the spoken passage and recognition process before buying hardware.
A successful checkpoint narrows the problem; it does not prove everything after it. Input activity can exist without a saved recording. A saved recording can contain the wrong source. Clear speech can be repeated inaccurately from the original source. Keeping these distinctions visible makes the investigation more efficient and helps you explain why a particular change is worth trying.
Change one thing and state the result
Choose one relevant adjustment, repeat the reference passage, and describe the outcome in plain language. “The direct connection restored the input listing” is a useful finding. “I changed several settings and it works now” leaves you without a repeatable recovery method. When a change does not help, record that too and return to the previous documented setting when appropriate.
Some failures are intermittent, so one successful attempt may not settle the question. Repeat the ordinary movement, break, or reconnection that previously triggered the symptom, using a controlled rehearsal. Avoid stressing cables or forcing connectors to manufacture a failure. You are trying to reproduce normal use, not create damage that obscures the original problem.
A useful stopping point
Once the relevant path saves and replays the intended speech, document it before continuing. If you cannot establish a supported route or a physical fault persists, prepare the support information near the end of this guide. A well-described unresolved issue is more useful than continuing to replace unrelated components.
2. Stenomask no sound: identify the connection you are testing
The first no-sound check depends on the mask's output. A USB mask and an analog mask do not appear on a computer in the same way. A USB mask supplies a computer audio-device route. An analog mask connected through an interface relies on that interface's input path. Seeing an interface in Windows does not establish that the mask plugged into it is supplying speech.
Use the model matrix to identify the route before testing. The connection descriptions, SKU identifiers, and listed prices were checked on November 3, 2026. Current product pages provide order status and included items. If your receiving equipment differs from the planned input, confirm compatibility with Martel before assembling a chain of adapters.
Inspect the complete physical route without forcing any connector. Confirm that the plug is seated, the selected port is the one in your notes, and any USB-C adapter supports the required data connection. If you are using a dock or hub, compare with a suitable direct computer port when available. Keep other parts of the test unchanged so the result has a clear meaning.
After each connection change, inspect the input list again. Record whether an audio device appears or disappears and which name it uses. A generic device name can still represent the intended mask. Identify it through the available input test rather than expecting every computer to display the complete retail product name. If nothing appears through a confirmed supported route, report that specific detection failure.
When an analog mask is silent
Trace the analog lead to its receiving microphone input. Check that the receiving equipment accepts the mask's connection and uses the intended input configuration. A socket's size is not a complete specification. A laptop headset socket, an interface input, and a recorder connection can have different requirements even when a plug seems to fit. Confirm the actual device model and input rather than relying on appearance.
If the analog mask feeds a USB interface, select the interface's appropriate input in the application and make a short recording. The interface may remain visible when the mask is unplugged, so device visibility alone is inconclusive. The useful observation is whether the intended analog input receives and preserves intelligible writer speech through the complete supported route.
When one output works and the other does not
On a dual-output mask, identify the working route and protect it while testing the other destination during practice. Label the leads and the receiving devices. Check each destination's input selection, recording status, and saved sample independently. A successful USB recording does not establish that a separate analog recorder is connected or configured correctly.
Use the same brief phrase for both destinations and compare the saved files. If the silent route uses a different input type, include its receiving equipment in the support question. Do not substitute a random splitter and assume it creates the independent microphone arrangement your workflow requires. Choose and test the actual routes provided by the mask and supported by the receiving devices.
Dragon: check USB detection first
The Dragon is the direct USB choice in this comparison. Confirm the computer route, identify its input, and then test the application. If you need an additional analog writer output, compare a model that provides one rather than assuming a USB connector also supplies a separate analog feed.
Its USB and separate 3.5mm routes serve the writer's speech through two internal mask microphones. Check each destination on its own before relying on both together. This arrangement can support a separate writer destination; it does not supply the participant source that a room microphone records.
Trace each of the two independent 3.5mm leads to a confirmed compatible destination. A computer may require a suitable interface as part of that route. Labeling the leads helps you test the intended primary and secondary destinations without confusing one saved recording with the other.
The XLR and 3.5mm routes require the appropriate receiving equipment and configuration for each. Describe the exact silent path when asking for help. Two different connector types do not make every possible recorder or interface combination compatible, and both mask elements still serve the writer.
The MM-18 has one 3.5mm analog output. Check its receiving microphone input or suitable interface and the selected recording source. It is neither a direct USB mask nor a dual-output model. A second recording requirement needs a separately supported equipment plan.
Use the XLR route with equipment confirmed to accept this microphone. Provide the receiving model and input details when asking about configuration. For a computer workflow, include the interface and application source in your test. Checking a different recorder alone does not verify the computer route.
This model's quarter-inch connection belongs in a setup specifically confirmed for that mask input. A physical plug conversion does not establish electrical compatibility. If your plan is a computer USB microphone input, verify the complete route with support before choosing this specialized connection.
Worked example: an interface is listed, but the analog mask is silent
Consider a fictional practice setup using an MM-18 and a compatible computer interface. The interface appears in the input list, but the saved sample contains no writer speech. Begin by writing the route as separate connections: mask lead into the receiving microphone input, then interface into computer, then selected interface input into the application. This exposes the analog connection that a device list alone cannot verify.
Check the specified receiving input and configuration, then repeat a short phrase without changing the application or the rest of the route. If speech arrives after the receiving input is corrected, save that result and describe the correction. If silence remains, record whether the receiving equipment itself shows a response and whether the application is using the intended input. Continue at the earliest point where speech has not been demonstrated.
A useful comparison might involve another destination already confirmed to accept that mask. Keep the comparison supported and change only the route being investigated. If the mask works there, bring both equipment arrangements to support. If it does not, report the unsuccessful comparisons without declaring a cause that the tests have not established. The important finding is where speech was demonstrated and where it was not.
This example also explains why buying a different software edition is premature while the analog input remains unverified. Solve the missing-signal question first. Once speech is captured, evaluate application behavior and text separately. A replacement should answer the connection or fault you have actually identified.
If the route works on one confirmed compatible destination but not another, keep that comparison in your notes. It narrows the receiving-side investigation without proving that every other part is perfect. For a fuller buying comparison, use the Martel Stenomask model comparison and Stenomask buyer's guide.
3. Windows receives the mask, but the application does not
A working operating-system test and a silent application are useful pieces of evidence. They suggest that the investigation should continue at the application boundary rather than immediately replacing the mask. Confirm that the two tests used the same physical route and selected input. If they did, examine source selection, access, listening state, and the application's supported workflow.
Keep the mask model and software edition separate in your notes. “Dragon” can refer to the Martel mask model in your equipment list, while a recognition program has its own edition, version, profile, and settings. A hardware connection question is different from a question about the program's dictation behavior. Naming both precisely helps support understand which part of the system you are describing.
Use the Windows recorded test as a checkpoint
For Windows 11, open Settings, System, and Sound, then select the intended microphone under Input. Its properties provide the microphone test: begin the test, speak, stop it, and play the recorded sample. Identify the writer's speech rather than relying on a moving meter alone. Microsoft's microphone testing instructions show the current supported controls.
Note which device you tested and what you heard. The Windows sample is a checkpoint, not the actual application's saved recording. If you later change a port or interface, confirm the input again before comparing results. Otherwise a successful system sample from one arrangement can be incorrectly treated as evidence about a different route used by the application.
Check the application's selected source
Open the installed program's audio-input controls and identify the intended device explicitly. Some applications retain a source choice independently of the operating-system default. A previously selected webcam, laptop microphone, or room input can therefore remain relevant to the diagnosis. Use the device label you established during the Windows check and confirm the program responds to speech supplied through that route.
If the source list contains several similar names, use a controlled practice test to distinguish them. Save the file you need to preserve before changing a connection. Then compare the available devices and use distinct fictional phrases to identify the source. Do not identify the mask merely because it occupies the first position in a menu; lists can change as equipment is connected.
Check microphone access in Windows 11
In Settings, open Privacy & security and then Microphone. Check microphone access, app access, and the desktop-app access setting as applicable. Desktop programs do not necessarily have individual switches in the same list as other apps. Microsoft's microphone permission guidance explains these distinctions. If the computer is managed and a required setting is restricted, refer the displayed restriction to the administrator.
Keep the scope of this check narrow. You are confirming whether the intended application may receive microphone audio, not changing unrelated permissions. If correcting access restores the program's response, make a new saved sample and note the result. The useful conclusion is that the route now works through that application; do not assume that an earlier silent file somehow acquired the missing audio afterward.
Inspect listening state and the intended task
A recognition application can be open without accepting live dictation in the way you expect. Inspect its displayed microphone or listening state and confirm the intended user or audio source where the software provides those choices. Follow the Help for the installed edition to enter the supported live-input workflow. Menu names and status indicators differ, so use the labels actually shown on your system.
Distinguish a live dictation task from reviewing a recording, importing an audio file, or editing existing text. These actions can use different controls. If you have changed task modes during practice, record that sequence and test the intended mode again. The fact that playback works does not establish that the program is currently accepting live microphone input.
Separate microphone response from text insertion
If the application shows it is receiving speech but no words appear in the expected document, check the intended editing location and the program's supported dictation procedure. Use an appropriate test field described in its documentation. Confirm the cursor and target window before speaking a fictional sentence. A program's ability to receive audio and its ability to insert text into a particular application are separate questions.
Suppose a practice sentence appears in a supported test location but not in the reporting document you were trying to use. Preserve that comparison. Investigate the supported integration and target-field workflow with software support instead of assuming that a new microphone will fix text insertion. Also verify that both trials used the same source and user configuration so the comparison remains meaningful.
Test simultaneous applications deliberately
If a recognition program and a separate recorder both need the microphone, verify that combination rather than assuming two successful individual tests prove simultaneous operation. Save a brief sample through the exact working arrangement. Inspect both results. Some supported configurations can share a device, while others require a different routing approach; the application's documentation and the actual test determine what your setup supports.
A practical comparison has three stages: test the recognition workflow alone, test the recorder alone, then test the supported combination. Keep a record of which stage changes the result. Close an unrelated audio application during rehearsal when appropriate and after saving its work. Do not interrupt an active assignment just to repeat an experiment that belongs in a controlled test session.
Confirm what an audio-processing change actually affects
Some devices expose microphone processing or enhancement controls; others do not. Microsoft describes manufacturer-dependent locations in its audio enhancement guidance. If the relevant support instructions call for a comparison, record the original setting, change the specified control, and repeat the same sample. Keep the selected device and listening arrangement constant.
Interpret the result narrowly. A change that helps one input route does not establish a universal setting for every mask and computer. If you cannot find the documented control, report the device and the controls you actually see. Do not continue searching through unrelated menus or change several processing options simply because another computer's screenshot looks different.
Use version-specific help for recognition software
The official PC version-15 microphone troubleshooting page is a reference for that version's microphone checks. For a different edition or version, use its own Help. Record the exact version in a support request, especially when a suggested command or menu does not exist on your installation.
Do not rebuild a working user profile merely to compensate for an unselected device or a paused listening state. Establish the input first, then use the software's supported correction or profile procedure if the evidence points there. Preserve your existing configuration and follow the appropriate backup instructions before making substantial software changes.
Example: system audio succeeds, document entry fails
In a fictional rehearsal, the writer hears the correct mask phrase in the Windows test and in the application's saved audio, but sees no text in a particular document. The next useful comparison is a supported dictation field in that application. If it works there, the investigation moves toward the document workflow and integration. The saved audio keeps the hardware question separate from the text-entry question.
4. Low volume, muffled speech, distortion, and unwanted noise
Audio quality descriptions are most useful when they identify a repeatable feature of the saved recording. “Quiet throughout,” “harsh on strong syllables,” “dull after repositioning,” and “a click during normal hand movement” suggest different comparisons. Listen to an actual saved file before deciding which description fits. Text appearing on screen does not let you hear the capture conditions that produced it.
Use the same playback device and a consistent listening level for comparisons. If you raise the speaker volume between trials, a louder impression may come from playback rather than improved capture. If a file sounds different only through another listening device, investigate that listening route as well. Keep the capture question and the playback question in separate notes.
When the Stenomask recording is too quiet
First confirm that the file contains the intended mask source and that the microphone is positioned for your normal working delivery. Then inspect the supported input-level controls for the actual route. Microsoft's microphone problem guidance includes input-volume checks. There is no single percentage that suits every voice, interface, mask, and application.
Choose a short phrase containing both ordinary and stronger syllables. Make one relevant level adjustment, save a new sample, and compare it with the baseline through the same listening arrangement. Note whether speech becomes easier to review without introducing a new problem. If the signal remains absent or interrupted, return to the route checks; increasing a level cannot restore a source that is not arriving.
When speech sounds muffled or dull
Check the mask's working position, mouthpiece condition, and the correct replacement components for that model. Look for a change from the last known arrangement rather than assuming that more pressure is needed. If you moved the mask, changed a mouthpiece, or serviced a filter just before the symptom appeared, record that sequence. Compare a short sample after restoring the intended fit according to the product instructions.
Use a sentence with several short words and clear endings. Listen for the same words in both samples. If the entire signal remains dull, include the receiving equipment and any processing settings in the investigation. If only your delivery changes when the mask is held awkwardly, the positioning question deserves attention. These observations help narrow the cause without claiming that one sound alone identifies a particular failed part.
When strong syllables sound harsh or broken
Listen for whether the problem is tied to louder parts of speech or occurs randomly. Keep the passage and position steady while checking the supported recording level and receiving input configuration. Do not solve a harsh recording by merely lowering playback volume; that can make the problem less loud without changing what was captured. Compare the saved samples after a relevant capture adjustment.
If an application displays a waveform or level indicator, use it as additional evidence, not a substitute for listening. Describe the affected phrase and the sound you hear. A visual display can help locate an event, but the diagnosis still depends on the route, settings, and repeatable test. Share a small fictional sample when support needs to hear the difference.
When movement introduces clicks or interruptions
Make a stable-position sample first. Then make a separate sample using the ordinary keyboard and hand movements expected during practice. Keep cable slack and support the connections. If the interruption appears only during normal movement, note which movement and route are involved. Avoid pulling, twisting, or repeatedly flexing a lead to force a stronger failure.
Inspect whether the mask position changes, a connector is being loaded by an unsupported adapter, or a cable catches on the desk. Correct the obvious routing issue and repeat the normal movement test. If the symptom persists through the supported arrangement, provide that precise finding to support. It is more informative than describing every click as a recognition error.
When the recording contains too much room sound
Verify the selected source before altering the mask. A built-in laptop microphone or a room microphone can produce a recording with different ambient coverage. Use distinct practice phrases to identify which source reached the file. If the writer's mask is selected correctly, review fit and the intended working technique rather than expecting every outside sound to disappear completely.
Consider what kind of noise you hear. Paper movement near a room microphone calls for a room-source placement investigation. Handling transmitted during mask movement calls for a different test. Listen to separate mask and room files when your arrangement provides them. Treating both as one unnamed recording makes these distinctions unnecessarily difficult.
Review mouthpiece, filter, and support options
The SS4 leather mouthpiece and SS1 silicone mouthpiece are options to discuss when fit, material, or replacement is the issue. Confirm the correct part for your mask and follow its care instructions. Different materials can require different treatment. A mouthpiece is a fit and maintenance component; it does not change an incorrectly selected computer input.
Use the foam silencing filter pack of 12 when that is the confirmed replacement supply for your mask. Inspect and replace components according to the product guidance and condition. Do not add extra layers or improvise an internal arrangement in an attempt to make the mask quieter. If the proper installation or service method is unclear, ask Martel before changing the assembly.
SS4 mouthpiece: confirm fit and material-specific care.Use the correct filter and the product's installation guidance.
The Martel hands-free flex stand can be considered when the workflow requires supported mask positioning. Check the mounting, reach, cable route, and your ability to return to the same position. Rehearse keyboard use and ordinary movement with it. A support accessory should be evaluated in the complete working position, not only while the desk is empty.
Worked example: a recording seems quiet through one listening route
In this fictional comparison, a writer describes a saved practice file as very quiet when playing it through the laptop speakers. Before changing the microphone level, keep that exact file and inspect the selected playback destination and application listening level. Then listen through another suitable, verified playback arrangement at a sensible level. The file must remain the same for this comparison to answer a playback question.
If the same file is readily intelligible through one listening route and difficult to hear through the other, investigate the playback arrangements before changing the capture that produced it. The comparison does not certify the original capture level as ideal. It shows that the listening path influences the reported symptom and should be understood before making a recording adjustment.
If the file remains difficult to review through the verified listening arrangement, return to source identification, position, and supported input-level checks. Record a new reference sample only after choosing a relevant capture adjustment. Compare the old and new files through the same playback route. Keep the names distinct so a louder playback setting is not accidentally reported as an improvement to microphone capture.
The support note should state which file was used, which listening routes were compared, and what changed. That information is much more specific than saying the mask has low volume on every attempt. It also helps prevent an unnecessary accessory purchase when the immediate question concerns how a saved recording is being heard.
Keep technique changes separate from component changes
Work with the delivery taught by your voice-writing program or supported professional workflow. If you change both your delivery and the mouthpiece between samples, the comparison becomes harder to interpret. Begin with a stable, comfortable position and a passage you can repeat accurately. Ask your instructor to help evaluate technique when the saved examples suggest that your speaking pattern changes during the task.
Once a useful recording is restored, save it as the new reference. Include the parts fitted, supported position, selected source, and the adjustment that helped. You can then compare a later problem with a real example from your own setup instead of relying on how you remember it sounding. Keep the older problem sample until the investigation is resolved.
5. Intermittent audio, USB dropouts, and delays
An intermittent fault is easier to investigate when you describe its trigger. Does speech disappear when the laptop resumes, when the mask is repositioned, when another program opens, or only after an extended practice session? Begin with the last normal event before the symptom. A specific trigger gives you a rehearsal to repeat and a small number of relevant parts to compare.
Keep the successful part of the setup documented as well. If the first saved sample is clear, preserve it. If a second sample fails after a break, label that one separately. Comparing the files and the events between them can reveal whether the source changed, the recording stopped, or the incoming speech itself was interrupted. Those possibilities require different recovery steps.
Separate a disappearing device from a silent device
When the problem appears, inspect whether the intended input is still listed. A missing USB device calls for a different investigation from an input that remains available but supplies silence. Record the current route, displayed name, and application status before changing them. If an analog mask uses an interface, remember that the interface can remain listed even if the analog side is not delivering speech.
During a controlled test, compare with the previously verified connection arrangement. If a direct port works and the dock route does not, note that comparison without declaring the dock permanently defective. Its connection, supported configuration, and surrounding equipment may still need review. The immediate useful fact is which tested route preserved the intended speech.
Repeat the normal break-and-return sequence
Rehearse the break that preceded the problem. Stop the practice recording deliberately, place the mask as you normally would, and return to the working position. If the computer's ordinary routine includes sleep and resume, test that routine outside an assignment. Check the input choice, application listening state, and a newly saved sample after returning.
Write down the first checkpoint that differs from the successful baseline. If the application now names another source, restore the intended source through its supported controls. If the correct source is selected but no speech arrives, continue with the connection and access checks. Avoid treating every post-break symptom as a reason to change broad computer power settings.
Test cable routing without stressing the equipment
Look at how the cable moves during ordinary work. A lead that catches on the table edge can pull on the mask or receiving connector. A heavy adapter can put unwanted load on a small computer port. Provide appropriate slack and support, then make another normal-use sample. Include keyboard work, a modest turn toward the source position, and the hand movements you actually expect to make.
If speech cuts out in association with normal movement after the route has been arranged appropriately, document the event and ask support about inspection or repair. Do not repeatedly bend a cable at the suspected point to make the problem more dramatic. A short example showing the ordinary trigger is enough to make the support question specific.
Compare direct, adapter, and dock routes carefully
Use a suitable direct connection as a comparison where your equipment permits it. Then test the supported adapter or dock arrangement you intend to use. Keep the microphone, application, passage, and listening device consistent. Record any difference in detection, saved speech, or source selection. This comparison isolates a route change more effectively than replacing the mask and the dock together.
If you need the dock for normal work, a successful direct test is a diagnostic result rather than the end of the investigation. Confirm the dock's supported audio arrangement with the relevant equipment support. Repeat the final intended arrangement after the issue is addressed. The setup you will rely on should be the setup that has passed the saved-file test.
Investigate a failure that appears when another application opens
First establish whether the incoming audio changes or only the visible text response changes. Save a short fictional sample through the supported recording route while observing the event. If you are testing simultaneous applications, confirm that the combination is supported. Record which program was opened and which source each program selected. A general statement that the computer became “slow” leaves several possible causes unresolved.
For comparison, rehearse with the required applications only, after saving any unrelated work before closing it. Then reintroduce the relevant program in a controlled test. If that changes the result, keep the sequence and sample for support. Do not conclude that adding memory, replacing a mask, or reinstalling every program is the answer without locating the failing part of the workflow.
Distinguish audio interruption from delayed text
Listen to the saved mask recording at the moment the text appeared to pause. If speech remains complete, the capture may have continued while recognition or text insertion lagged. If the saved recording has a gap at that point, investigate the capture or recording route. This comparison does not explain every delay by itself, but it tells you which evidence to bring to the next investigation.
Keep a simple event note that identifies the phrase, what the screen showed, and what the saved audio contains. A visible pause without a corresponding audio gap is a different report from a device disappearing entirely. Avoid judging the whole system only by the speed at which one line of text appears. Review the preserved result as well as the live display.
Check the beginning, middle, and end of a longer rehearsal
A short successful test can miss a failure associated with the normal session routine. After the brief checks work, rehearse a longer period using the actual power arrangement, intended applications, recording destination, and ordinary breaks. Review representative passages at several points, including the end. Confirm that the files saved and reopened as expected.
Choose rehearsal material appropriate to your training level and keep the test's purpose clear. If the exercise becomes too difficult to repeat accurately, that adds a separate training question. You can still examine the saved input and file completeness without claiming that every source mismatch came from equipment. Use the evidence category that fits the observation.
Fictional case: successful direct test, failed dock test
A writer's practice file is clear through a suitable direct computer port. Using the same passage, mask, and application through the intended dock produces an interrupted sample. The next support question concerns the complete dock route and its supported configuration. Replacing the mask immediately would remove the useful controlled comparison and might leave the receiving-side problem unresolved.
Keep a change ledger for intermittent faults
Record the date, physical route, application version, selected input, trigger, file name, and result for each relevant attempt. Add only the changes that influence the investigation. A small chronological ledger helps distinguish a new symptom from the original one and shows which comparisons have already been tried. It also reduces the temptation to repeat the same unsuccessful adjustment without new evidence.
When the fault is resolved, keep the successful sequence as a return-to-work note. State what to connect, which source to select, what to test after a break, and where the verification sample belongs. A useful recovery note describes observable checkpoints. It should let you confirm that the intended route is working again instead of relying on a memory that it worked earlier in the day.
6. Stenomask recognition errors when the audio sounds clear
A text error is a result to investigate, not a diagnosis of the microphone. Compare the original source, the writer's saved mask speech, and the produced text. The original source establishes the intended words. The mask file establishes what the writer supplied. The text shows the application's interpretation and formatting. Keeping all three available makes it possible to identify a useful next step.
For example, a fictional source may say “the second folder,” while the writer inadvertently repeats “the third folder.” Text that reads “third” may reflect the supplied speech accurately even though it differs from the source. That example calls for a repetition review. A clear recording of “second” with text reading “third” calls for a different comparison involving the recognition workflow.
Classify the discrepancy before correcting it
Use practical categories: source listening, spoken repetition, incomplete capture, word interpretation, formatting, speaker notation, and text insertion. You do not need an elaborate classification system. Choose the category that tells you what to inspect next, and note uncertainty when more than one explanation remains possible. The point is to organize the investigation rather than assign blame to a component.
Locate an exact example in the saved audio and compare it with the text. If speech is interrupted there, return to capture troubleshooting. If the phrase was not supplied as intended, work on the training task. If the phrase is clear and consistently interpreted differently, use the supported correction or vocabulary procedure for the installed software. Keep the result of that correction with the example.
Check that recognition and recording use the same writer source
A clear practice recording does not prove that a separate recognition program used the same microphone. Confirm each application's input when the workflow involves more than one program. A recorder could preserve the mask while recognition receives another source. The reverse can also happen. Use source-identification phrases and the applications' supported controls to establish what each path receives.
If the software links audio and text, learn which saved source its playback function exposes. A file selected elsewhere on the computer may not be the audio associated with the displayed text. Record the sample name and the way you opened it. This small organizational step prevents a clear recording from another attempt from being used to explain the wrong text result.
Use unfamiliar names as a focused language test
Choose a fictional name and place it in a short, repeatable sentence. Confirm the intended spelling, listen to the supplied speech, and observe the output. Follow the current application's supported method for correcting or adding the term. Manual editing, vocabulary entry, and pronunciation work can be different operations; use the procedure appropriate to the installed edition.
Keep a modest list of recurring examples rather than changing many terms at once. Include the sentence, the saved audio location, the unexpected output, and the action tried. If an instructor is helping with delivery, preserve the before-and-after samples. This gives the instructor or software support a specific language problem to evaluate while leaving the hardware route documented separately.
Review numbers for meaning as well as appearance
Compare the value spoken with the value displayed before judging formatting. A number written in digits instead of words can be a formatting issue, while a changed quantity is a content discrepancy. Dates, times, amounts, and identifiers deserve deliberate review because a small difference can alter meaning. Use the conventions taught for your reporting workflow and supported by your software.
When a number is wrong, listen to that exact mask passage. Determine whether the supplied value was complete and whether you repeated a prior number from the source. If the speech is clear and correct, document the output and investigate the relevant recognition or formatting procedure. Do not make a microphone-level change merely because one quantity was displayed incorrectly.
Keep speaker handling distinct from room capture
The writer's mask speech may include speaker identification or reporting notation according to the training method and application. A room microphone supplies participant audio for a different purpose. Neither route automatically proves that the writer supplied the intended speaker information. Compare the saved writer speech with the required notation and the text, using the conventions appropriate to the task.
If a speaker change was missed during practice, identify whether the writer noticed it, supplied the required information, and received the expected text result. These are separate checkpoints. A second mask output preserves another writer route; it does not independently identify every participant or supply a separate room source. Use the room recording only within its actual captured coverage and supported review workflow.
Original exercise: distinguish a value change from formatting
The fictional inventory contained 28 sealed packets and 140 loose pages. A later note revised the page total to 104. The packet count stayed at 28. Before the materials were moved, the coordinator asked for the revised total to be read back and checked against the note.
Read the passage at a pace you can control. Mark each value in the source, then compare it with the saved mask speech and text. If the revised number was not spoken correctly, record a repetition observation. If the correct value is clear in the mask file but differs in the text, preserve the example for the software procedure. Treat preferred digit formatting as its own question.
Original exercise: check word endings and similar phrases
The coordinator placed the draft beside the final copy. Both copies contained a list of requested changes. The reviewers checked the lists, signed the cover sheet, and returned the folder before the afternoon session. A separate note explained which changes had already been completed.
Listen to the endings of words such as “copies,” “lists,” “requested,” and “completed.” Check what you actually supplied before evaluating the text. Repeat a short phrase after one relevant technique or software adjustment. Avoid changing the connection, delivery, vocabulary, and listening device together. The comparison becomes more useful when it answers one defined question.
Original exercise: question-and-answer transitions
Question: Where was the folder when you arrived? Answer: It was on the lower shelf beside the entrance. Question: Was the cover open? Answer: The cover was closed, and a handwritten note was attached. Question: What did the note request? Answer: It requested a review of the final page before the folder was delivered.
Apply the speaker and punctuation method required by your course or professional workflow. The written labels show the structure of the exercise; they do not prescribe universal voice commands. Review the transitions in the saved writer speech and the text. If the application did not receive the expected notation, identify whether it was supplied before adjusting vocabulary or changing equipment.
Measure your own practice only with a defined method
If you track results, state the passage, conditions, source comparison, and the way you counted discrepancies. Keep capture failures separate from repetition and interpretation errors. A personal practice result describes that exercise under those conditions; it should not be treated as a promise about every room, voice, or proceeding. Exact examples often help troubleshooting more than a single broad score.
After a supported correction or training adjustment, repeat the relevant passage and keep both results. Look for a specific improvement you can explain. If the same issue persists with clear, correctly supplied speech, provide the paired sample and text to the appropriate software support or instructor. The mask route can remain verified while the language workflow receives further attention.
7. Troubleshoot mask channels, room microphones, and saved files
A complete reporting workflow can involve the writer's mask recording, a room recording, recognized text, and more than one storage destination. Name each source and destination before investigating a missing passage. “The audio is gone” is less useful than “the writer file contains speech, but the room file was not saved.” The second description identifies which route needs attention and which material remains available.
The mask source records the writer speaking into the mask. A room source records participants through microphones placed for that purpose. A second internal microphone in a dual-output mask still serves the writer. Keep that distinction in the channel labels, equipment notes, and review procedure. It prevents a correctly saved writer recording from being mistaken for an independent participant recording.
During practice, use different neutral phrases to identify the routes. Speak a writer phrase into the mask and have an informed helper speak a different phrase near the room microphone. Record through the intended arrangement, stop, save, and reopen the result. Select the available sources one at a time and confirm which phrase each contains. Do not rely only on labels assigned before the test.
Some sound may be audible across sources depending on placement and isolation. The purpose is to establish the intended source and useful captured speech, not to demand that every unrelated sound be absolutely absent. If the selected channel contains mainly the wrong source, trace the input mapping and recording configuration. Keep the test file so the corrected mapping can be compared with the original.
Use playback controls without changing the recording unintentionally
Learn which controls select playback, which control monitoring, and which affect active capture in your software. A solo, mute, or source button can serve different purposes in different applications. Use the installed program's documentation and rehearse the supported review procedure outside an assignment. A playback experiment should not inadvertently stop the source you are trying to preserve.
Once the recordings are saved, toggle between the mask and room sources through the available playback controls. Listen to a matching phrase in the room source, then the writer source, then compare the text. That sequence can distinguish participant speech, the writer's repetition, and recognition output. If a source is unclear or absent, record the limitation rather than treating another channel's label as proof of what should be there.
Check whether separate microphones remain separate in the file
A system with several physical microphones can still produce a combined output. Confirm what the receiving hardware and recording software actually save. If the original signals were mixed into one recording, a later track-selection control cannot simply be assumed to recover each original microphone independently. Plan separate review access around the supported recording arrangement and verify it with an identification test.
Confirm whether recording actually started, whether it continued for the intended period, and how the application saves the result. Input activity can exist while a program is only monitoring or waiting. Reproduce the procedure with a short fictional passage and deliberate start and end markers. Stop recording, complete the supported save process, and reopen the file from its expected location.
If the file cannot be found, inspect the application's configured destination and the name used for that attempt. Avoid creating several more recordings before locating the first one; that adds ambiguity. Note whether the application stores audio separately, inside a project, or through another documented arrangement. Follow its supported file-management process instead of moving associated files blindly.
When the file is silent or contains only part of the attempt
Listen at several locations, including the beginning and ending markers. A silent file may reflect an input or recording-state problem. A file that begins late or ends early may reflect the start, stop, or save procedure. These observations narrow the investigation but do not identify every cause by themselves. Compare them with the application's status and the physical route used during that trial.
Make a new short sample after correcting the relevant step. Keep the failed file labeled as such. Do not assume that a newly working input changes an earlier incomplete recording. If material is missing, document what was actually preserved and follow the appropriate assignment or support procedure for that situation.
When the mask and room files do not line up
Separate programs or devices may begin recording at different moments and may not share the same time reference. Use an authorized practice event that both routes can capture and learn the supported method for locating corresponding passages. Elapsed time from the beginning of one file is not automatically the same event in another. Check alignment with actual content, not only with the displayed counters.
For a longer rehearsal, compare an early reference and a later reference. If your software provides linked or synchronized review, follow its procedure. If you locate events manually, keep a note of the method and its limits. The goal is to avoid comparing words from different moments while believing that you are reviewing the same exchange.
Martel Double Dragon 2 product photograph. Verify its writer connections and the receiving equipment on the product listing.
When one backup works and another does not
List the source each backup is intended to preserve and the destination that stores it. A second writer recording, an independent room capture, and a copy of a saved file address different needs. Check the surviving material before making recovery assumptions. Two files on one computer also have shared dependencies that should be understood in the equipment plan.
During rehearsal, test each destination by opening and playing its actual result. Label both the source and the trial. If one destination fails, use the working route as a comparison while investigating the other. Avoid describing the entire arrangement as independently protected merely because it has two connected leads. Verify the protection your own workflow actually supplies.
Worked example: two recordings contain the writer, but neither is the room source
A fictional rehearsal produces two saved files, both containing the writer's mask phrase. The equipment plan expected a writer recording and participant audio. First identify whether the second file was intentionally fed by a second mask output or whether a room recorder selected the mask input by mistake. Both situations can produce useful writer audio, but neither establishes that the participant source was captured.
Review the physical routes and the saved-source labels. If the second destination is connected to another mask lead, describe it as a second writer destination. Add a separately planned room source if participant recording is required. If room equipment was connected but its application selected the mask, correct the supported source mapping and repeat the identification exercise with an informed helper.
After the change, save and reopen the new results. Listen to the different identification phrases and confirm which source each file contains. Keep the original trial labeled so nobody assumes that the earlier second file contains room audio simply because its name included the word “room.” Names are organizational aids; playback establishes the contents.
If the receiving arrangement combines sources, document what remains selectable in the saved result. Ask the equipment and software question in those terms before changing packages. The goal is to obtain the sources and review access your workflow requires, with an actual test that demonstrates them. The number of files or microphone plugs alone cannot make that determination.
Keep review and file handoff organized
Use names that identify the practice date, source, and attempt. Keep related text and audio together through the application's supported organization method. If you hand a sample to an instructor or support contact, identify which file and passage illustrate the issue. A correctly captured recording becomes less useful when nobody can tell which source or trial it represents.
After a correction, reopen the saved result through the same review procedure you expect to use later. Confirm the selected source and matching passage again. The Stenomask and room microphone guide provides a fuller discussion of participant coverage, recording packages, and switching between the two sources. Use it when the room-recording plan itself needs redesign.
Martel Electronics
8. Decide whether to adjust, repair, replace, or ask for support
The best next purchase solves a requirement or a fault you can describe. A worn compatible mouthpiece presents a different decision from an unsupported input socket. An intermittent cable symptom presents a different decision from a text-field integration problem. Use the observations collected earlier to state which part of the workflow needs attention before choosing a replacement.
Keep a working component in the comparison whenever practical. If a mask produces useful speech through one confirmed route, that result can help investigate another receiving path. If an accessory was changed immediately before the symptom, review its fit and installation. The purpose is to choose a focused next action while preserving the information that made the diagnosis possible.
When a connection change is the right buying question
Review the Dragon USB Stenomask when your supported workflow needs a direct USB writer input. Review the Double Dragon 2 when the plan needs its USB route plus a separate compatible 3.5mm writer destination. Compare the MM-ST1 and MM-ST2 around their actual analog output arrangements. Choose the receiving requirements first, then the model that serves them.
A new connection type can simplify an equipment plan, but it should not be used as an unexplained cure for every recognition or file-saving issue. Confirm the application, intended input, any necessary interface or adapter, and the required second destination before ordering. Use the Stenomask product category to review current listings and ask Martel about the exact combination when compatibility is uncertain.
When an accessory replacement is appropriate
If the evidence points to fit or a worn replaceable component, confirm the correct accessory and care procedure. The current listings identify the SS4 leather mouthpiece, SS1 silicone mouthpiece, foam filter supplies, and hands-free flex stand. Compare the actual part requirements with your mask and workspace. Do not assume that changing an accessory will correct an application that is recording the wrong input.
After fitting an appropriate replacement according to its instructions, repeat the short reference sample and the ordinary movement check. Keep the result with your equipment notes. This confirms the effect of the replacement in the working arrangement rather than treating the purchase itself as proof that the original problem is resolved.
Evaluate support and mounting in the position you will actually use.
When the computer workflow needs attention
If the mask route is verified but application behavior, file handling, or the complete computer arrangement remains unresolved, review the computer workflow separately. Record the installed software editions, versions, required simultaneous applications, physical inputs, and the event that causes the problem. A memory figure or a new microphone alone does not establish why a particular application stopped responding.
The Martel VOX laptop category includes the 32GB VOX listing and 64GB VOX listing. When considering a computer change, ask about the exact package contents, software and licensing arrangements, connections, preparation, transfer needs, and support for your workflow. Compare the intended complete setup rather than treating a laptop specification as a diagnosis of the current fault.
Prepare a support packet with a small fictional sample
Identify the mask model and SKU, computer and operating system, receiving equipment, any adapter or dock, and application edition and version. State the intended source and destination in one sentence. Then describe the first failing checkpoint: detection, incoming speech, application access, saved recording, playback, or text output. Include the event that reliably triggers the symptom if you have established one.
Add a short fictional recording and the corresponding text or source passage when relevant. Identify the passage location and what the listener should notice. If you compared two routes, label both samples and state the one difference between them. Keep confidential material out of a troubleshooting example unless an appropriate authorized support process specifically calls for it.
Reusable support note
Mask model and SKU: [enter]. Computer and operating system: [enter]. Application and version: [enter]. Physical route: [enter]. Intended recording destination: [enter]. First checkpoint that fails: [enter]. What changed before the symptom: [enter]. Comparison already tried: [enter]. Fictional sample name and passage: [enter]. Result or question requiring help: [enter].
Use the Martel contact page for equipment, connection, replacement, and service questions. Direct software-specific behavior to the installed application's appropriate support as well. Check current order status, included items, and the applicable return policy before ordering. If availability wording is unclear, obtain a confirmation rather than relying on an assumed delivery date.
Use a return-to-work acceptance check
Rebuild the intended arrangement. Connect the mask, supported receiving equipment, and any required adapter exactly as documented in the successful test. Identify the writer and room routes separately. Confirm the relevant application sources before beginning the acceptance sample. This step tests the arrangement you expect to use, rather than a temporary route that happened to work during diagnosis.
Save a complete short attempt. Use fictional start and ending markers with a brief passage between them. Complete the application's recording and save procedure, then reopen the result. Identify the intended voice and listen to the whole attempt. Include each required destination so an unchecked secondary path does not disappear behind a successful primary sample.
Repeat the ordinary trigger. Rehearse the movement, break, dock connection, or application sequence associated with the original symptom. Preserve the new sample and compare it with the successful baseline. If the fault returns, keep the test unresolved and report the exact sequence. A normal-use repetition provides better evidence than a forced cable movement or several unrelated setting changes.
Write the recovery note. State the route, successful file, relevant setting or replacement, and any remaining limitation. Include the quick source check to use after a normal break. Keep this note with the equipment information so you can reproduce the verified procedure later. Returning to work should follow demonstrated operation and the requirements of the assignment.
Common Stenomask troubleshooting questions
Why does my Stenomask have no sound?
Begin with the connection type and the first failed checkpoint. For USB, check whether the intended audio device is detected through the supported route. For an analog mask, include the compatible receiving input or interface in the investigation. Then verify the selected source, microphone access, application state, and a saved test. Silence alone does not identify which of those stages failed.
Why can Windows hear the mask when recognition cannot?
Confirm that both tests use the same input. Examine the application's own source choice, relevant microphone permission, listening state, and supported task mode. If the application receives speech but cannot insert text into the target document, investigate that text-entry workflow separately. A successful Windows sample is useful evidence, but it does not prove every application has selected and used that device.
Should I turn the microphone level all the way up?
Use the supported input controls for the actual route and compare saved samples after a relevant adjustment. There is no universal maximum setting that solves every quiet recording. Confirm the source and position first, and keep playback level consistent. A missing or interrupted signal needs its own investigation; making an unrelated level control louder does not establish that the correct microphone is arriving.
Does a muffled recording mean the mask is broken?
Not by itself. Review the selected source, working position, mouthpiece and filter condition, receiving input, and relevant processing configuration. Compare a short repeated phrase after one appropriate change. If the symptom persists, provide the exact route and a fictional sample to support. A sound description becomes useful when it is connected to a repeatable observation and a controlled comparison.
Can a second mask output replace the room microphone?
A second internal mask microphone still captures the writer speaking into the mask. Participant audio needs a separately planned room source. Check what each saved channel contains and whether the recording arrangement preserves the sources for separate playback. The intended backup purpose should be stated explicitly so writer audio, room audio, and file copies are not confused with one another.
Why are there two files but only one useful recording?
Check each file's source, start and stop procedure, input selection, and saved contents. Two file names do not prove that both destinations received speech. Use a source-identification exercise and reopen both results after a short rehearsal. If one path works, preserve that example while investigating the other. Describe which source is missing and which checkpoint failed.
Should I buy a new laptop to fix recognition errors?
First determine whether the problem is capture, repetition, word interpretation, text insertion, or a broader application issue. Keep exact examples and the software and equipment information needed to evaluate them. If the complete computer workflow needs replacement or redesign, compare the supported package around your actual requirements. A new computer should answer a defined equipment need, not substitute for identifying the symptom.
What must pass before I return to the working setup?
Verify the physical route, intended input, application response, and saved speech. Reopen the sample and confirm that the correct source is complete enough to review. Check any required second writer or room destination, then rehearse the ordinary break or movement that previously caused trouble. Record remaining limitations clearly and resolve known failures before relying on the affected route.
Return with a verified route and a clear record
Keep the successful sample, connection note, and recovery procedure together. When a symptom returns, compare it with that working reference and begin at the earliest failed checkpoint. If a replacement is needed, use the model matrix and support packet to choose the component that matches the actual requirement.
Continue with the setup, student, model-comparison, and room-microphone guides when the investigation points toward a broader workflow question. Each guide addresses a different part of the equipment plan, so you can go directly to the decision that remains unresolved.