
Connecting a Writer, Microphone, and Pedal to a Court Reporter Laptop
Connect a writer, microphone and playback pedal to a court reporter laptop. Plan USB ports, the four-port adapter, device setup and a saved-file test.
Compare the Martel HGM-2 battery microphone and HGMUSB microphone. Choose a recording path, check inputs and power, and test the saved sound.
Martel equipment guide · Choosing a recording path
Choose the microphone that belongs in your working system, then prove that the complete path captures the voices you need.
A microphone purchase usually begins with a practical frustration. An answer is difficult to hear during review. A reporter is replacing a writer, preparing a second recording device, or moving more work onto a laptop. Two microphones may both be intended for court reporting while solving different connection problems. Comparing their names or appearance alone leaves the most consequential part of the decision unanswered: where will the sound become a saved recording?
The Martel HGM-2 with built-in battery tester belongs to compatible microphone-input workflows involving a writer, recorder, or other appropriate receiving device. The Martel HGMUSB is a USB choice for computer recording. Those different starting points shape power checks, device selection, live listening, and the steps needed to find a recording after a proceeding.
This guide develops a purchase and rehearsal method around that distinction. The scenarios are original planning examples, and the suggested exercises use fictional speech. They are intended to help you describe your setup, ask a precise compatibility question, and evaluate a working arrangement before depending on it. Your equipment instructions and the procedure governing the proceeding remain the authority for operation and permitted recording.

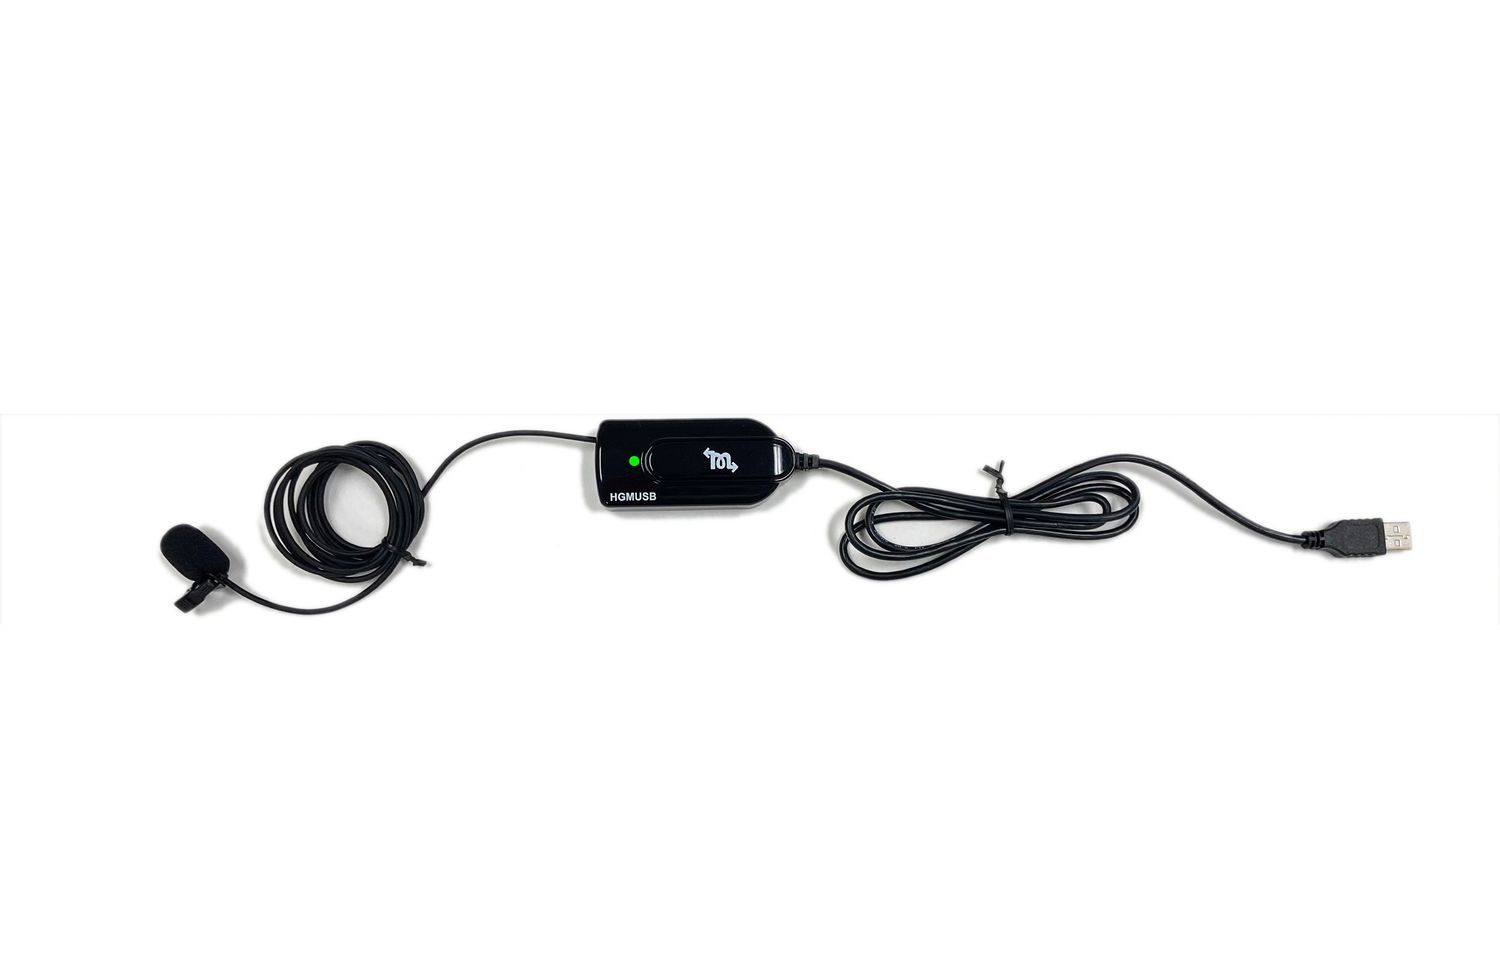
Write the name and model of the recording destination at the top of a page. Be specific: a particular steno writer, a particular digital recorder, or the laptop running a named recording application. This small step separates the sound source from the equipment that stores it. A microphone can deliver a usable signal while a receiving device is paused, recording the wrong input, or saving somewhere you do not expect.
Under the destination, list the relevant input and its documented purpose. For a writer or recorder, inspect its manual and connector labels. For a computer, identify both the physical connection and the application's audio-source choice. If the description is only “there is a hole that fits,” the compatibility question is unfinished. The connection must carry the kind of signal the receiver expects, with the correct wiring and any required supporting equipment.
Then describe how you normally review the result. Perhaps you open audio alongside a CAT job, play a writer recording, or transfer a recorder file. The microphone choice should support that actual routine. A convenient connection has limited value if the resulting files are awkward to locate or do not fit the review workflow. Include the person who will scope or otherwise review the recording when deciding what a successful handoff looks like.
| Decision | HGM-2 path | HGMUSB path |
|---|---|---|
| Starting destination | A compatible microphone input on a writer, recorder, or supported system | A computer using an appropriate USB audio connection |
| Power preparation | Check the microphone battery using the supplied operating instructions | Check the computer connection and the power state of the computer arrangement |
| Source selection | Confirm the receiver uses the connected microphone input | Confirm the operating system and recording application select the intended USB source |
| Listening plan | Establish monitoring through the supported receiving equipment | Establish live listening through the computer audio workflow |
| End-of-job check | Reopen or transfer the receiver's saved recording | Reopen the application's saved job or audio file |
The table compares working responsibilities. It does not rank the microphones by sound quality or promise that every receiver supports a particular feature. Martel's microphone category guidance distinguishes the HGM-2 writer/recorder role from the HGMUSB computer role and describes HGMUSB listening through the computer audio path. Confirm your exact combination before ordering any additional cable, adapter, or mixer.
Use this comparison to reduce uncertainty. If your existing workflow already produces useful writer recordings and you want to replace its microphone, concentrate on that receiving input. If your goal is a laptop recording source, concentrate on the computer and application. If you need both destinations, describe both explicitly. A two-destination requirement deserves a connection plan of its own instead of an assumption that one plug can simply be divided.
The HGM-2 product is identified by its built-in battery tester. Treat the test as one preparation step in the microphone's own power routine. Follow the supplied instructions for interpreting the indication, selecting the replacement battery, and fitting it correctly. Keep the replacement procedure simple enough to perform calmly in a suitable break. A spare that has the wrong type or cannot be found quickly contributes little to readiness.
A battery indication and an audio recording answer different questions. After checking power, make a short recording through the intended receiving device and listen to it. This establishes that the microphone, cable, selected input, recording controls, and saved-file route are working together. If a new battery has been installed, the audio check also gives you a chance to discover a disturbed connection before the next session.
Keep battery information with the microphone case rather than relying on a vague memory of how long the previous one lasted. A small card can identify the required type, where spares are stored, and the date of a replacement. Avoid turning a general battery-life claim into a guarantee for a particular day's work. Your useful decision is whether the complete setup passes its preparation routine and whether a suitable replacement is available.
With HGMUSB, organize the computer side so that the intended input is recognizable. Microsoft's Windows microphone instructions explain how to select and test an input. Use that system check, then inspect the input setting inside the recording application. Write down the name shown by your actual computer; the display name is more useful than a label invented for a purchasing checklist.
During the test, speak from the microphone's planned location rather than leaning toward the laptop. This makes it easier to notice accidental use of the computer's built-in microphone. A working input meter is helpful evidence, but the saved practice passage is more informative. Listen for the voice you intentionally placed at the external microphone, and verify that the beginning and end of the passage are present.
Keep the first setup uncomplicated. Add only the connections needed for the trial, establish a successful recording, and then introduce the rest of the workday equipment. This produces a known starting arrangement if a later change causes difficulty. It also makes a support question more useful: you can explain which configuration worked and what changed when the symptom appeared.
Start a monitoring plan with the question, “Where will the headphones connect, and what will I hear there?” For HGMUSB, use the supported computer audio workflow. The presence of live listening in a product description does not by itself describe a headphone socket on the microphone. Martel distinguishes HGMUSB from other microphone models that specifically advertise a built-in headphone jack. Keep the features of each model attached to that model.
For a microphone feeding a writer or recorder, establish what monitoring the receiving device supports. Its output and settings determine the listening arrangement. If you need to hear the input while recording, ask about that exact behavior with the model you own. Hearing a previously saved file is a different operation from listening during the recording, and the two may use different controls.
Use comfortable headphone volume during rehearsal. Compare what you hear while recording with the passage reopened afterward. This can reveal a mistaken assumption about the listening source or saved input. Once you understand the relationship, put the relevant controls on your connection note. A clear note is especially useful when a colleague assists with setup but does not use your equipment every day.
A microphone can be electrically connected correctly and still occupy an unhelpful place. Begin with the person or speaking position that has been hardest to understand in previous work. Consider where that person faces, what sits between the voice and microphone, and which nearby activities create avoidable noise. A position beside a pile of exhibits can change character as soon as the exhibits begin moving.
Use an ordinary speaking voice for a placement trial. Ask a helper to answer a short question, give a fictional street name, and read a number containing easily confused digits. Have the helper face the usual listeners. A test performed by projecting directly into the microphone can make a poor everyday position seem satisfactory. The trial should resemble the assignment closely enough to expose its practical weaknesses.
Compare one deliberate change at a time. Move the microphone away from a noisy laptop fan, clear an obstruction, or choose another permitted table position. Record the same passage after the change and label the trial. You are building a practical reason for the final placement. That reason is easier to repeat in the next room than an impression that the sound was somehow better.
Trace the route from microphone to receiver with your eyes before the session. Check that cables have enough freedom for ordinary movement without lying where chairs or feet will pull them. Keep connectors accessible for inspection, and avoid burying a critical plug beneath a bag. A neat arrangement is useful because it preserves the connection you tested and makes a changed condition easier to notice.
Label the cable at the receiving end if the workspace contains several similar plugs. The label should describe its job, such as room microphone, instead of relying only on color. When a system is packed between jobs, keep its tested accessories together. A cable taken from an unrelated kit may fit physically while performing a different electrical job or having an unhelpful length for the room.
Before adding an extension, explain the complete proposed route to the supplier. Include the microphone, receiving model, connector types, and needed distance. Avoid basing the purchase only on the shape of an online photograph. Once the extension is confirmed, rehearse with it installed. The final tested arrangement should match the equipment that will travel to the assignment.
If both microphones can be demonstrated in supported arrangements, make the comparison fair and useful. The purpose is to evaluate complete working paths for your job. Use the same speaking locations, room conditions, and sample passages, and identify the receiving equipment for each trial. Differences in a laptop recording and a separate recorder file may involve settings and receivers as well as microphones.
Create three short passages with fictional content. The first can be a question and answer spoken across a table. The second can include a date, an address, and a sequence of numbers. The third can include someone turning a page while another person gives a quiet answer. These passages test recognizable reporting difficulties without introducing confidential material into a demonstration.
Record a spoken label at the beginning of each sample. Include the microphone, receiving device, and placement. After stopping, rename or organize the sample according to a simple plan so it remains identifiable later. Listen on the playback equipment you will normally use for review. A purchase decision based only on a quick speaker demonstration may not reflect the way you actually inspect difficult passages.
Write the result in plain language: all digits understandable, quiet answer obscured during paper handling, or opening word missing after recording started late. That description points toward a concrete adjustment. It is more actionable than calling the sound excellent or poor. Repeat the exercise only for the uncertainty you still need to resolve, and keep the successful configuration as the reference.
Silence requires a different investigation from distant speech. If no intended speech appears in the saved recording, first establish that the receiver was actually recording the intended source. Then inspect the shared connection and the relevant power checks. If speech is present but difficult at one seat, examine that position and its surroundings. Separating these symptoms keeps a placement problem from becoming an unnecessary computer reconfiguration.
A distorted loud voice also deserves its own test. Recreate the condition with harmless speech and inspect the input controls documented for the receiver. Keep a note of the initial setting before making a change. Lowering headphone volume may make listening more comfortable while leaving the saved distortion unchanged. Evaluate the newly saved sample to determine whether the recording path itself improved.
If a computer application cannot access a microphone that Windows recognizes, consult Microsoft's microphone troubleshooting guidance and the application documentation. Record the exact symptom and device selection before requesting support. A concise account of what works, what fails, and what changed helps someone investigate the correct part of the setup.
A second recording can be valuable when its role is explicit. Decide whether you want another copy produced by the same computer or a separate receiver with its own recording controls. Then identify which components the paths share. A common microphone or mixer can still affect both recordings, even if two files are ultimately created. The word backup becomes useful when you can describe what situation the second path addresses.
For example, a reporter might plan a laptop recording for normal review and a separate recorder for an additional authorized record. That is a system design question involving outputs, inputs, level compatibility, and monitoring. It does not follow merely from owning an HGM-2 and HGMUSB. Ask for a supported connection plan and practice starting, checking, stopping, and reopening both destinations.
Give each recording a clear operational responsibility. Identify who starts it, how its status is checked, and where its file will be kept. During a rehearsal, deliberately pause one practice recording and observe which other recording continues. Use this harmless exercise to understand the limits of the arrangement. Do not discover those limits for the first time during a proceeding.
Suppose the writer and its review process already meet the reporter's needs, but the existing microphone is worn. The useful starting point is the writer model and its supported input, followed by the HGM-2 configuration being considered. Ask whether any cable or input setting must change. Keep the successful review routine intact while testing the new microphone through that same complete path.
Suppose the reporter is beginning to use a computer recording application and wants an external room microphone. HGMUSB is the relevant comparison point for a USB path. The important demonstration is a recording inside the actual application, with the chosen input visible and the resulting job reopened. Include the intended headphone arrangement if live listening forms part of the working method.
Suppose one assignment uses writer audio and another depends on a laptop. Create a connection card for each arrangement. Owning two suitable microphones may be more straightforward than assembling several unverified adapters, but the decision depends on the equipment and tasks. Price the supported complete arrangements, including the accessories needed to repeat them. Keep each kit labelled so a successful setup does not become a guessing exercise at the next venue.
A useful inquiry contains a short inventory, a task, and an unanswered question. For example: “I record into this writer model, use this CAT version for review, and want a replacement room microphone. Which HGM-2 connection and accessories fit that input?” For a laptop, identify its operating system, recording program, available ports, and the live-listening behavior you need. Such an inquiry is easier to resolve than asking which microphone is best in every situation.
Include any practical constraint that affects the recommendation. You may need a permitted cable route around a long table, an unobtrusive placement, or a connection that stays assembled during transport. State the constraint without converting it into an assumed specification. Ask the supplier to identify the exact included items and any additional components required. Confirm current pricing, availability, and applicable purchase terms on the product page or quote.
After receiving an answer, write down the approved arrangement in your own working language. Keep the product names and model identifiers exact, while making the operating sequence brief. This becomes both a preparation aid and a record of what was evaluated. The best purchasing result is equipment you can connect, test, and review confidently within the routine you actually use.
Preserve the useful details of the successful trial: receiver, input, accessory list, microphone position, practice-file location, and listening output. A single page is usually enough. Include a small space for changes made at a particular venue. This creates continuity between the office rehearsal and the working day without turning a microphone setup into a lengthy documentation task.
At the next assignment, use the note as a starting point and inspect what differs. The furniture may place a speaker farther away, the laptop may have a different connected headset, or the receiving device may have been used for another task. Check the affected part and make a brief saved sample when permitted. Familiar equipment still benefits from evidence that today's arrangement is the one you intended.
At the end of the job, confirm the recording is saved and accessible through the required review process before packing away the equipment. Return accessories to their assigned places, and note any fault that needs attention. This closes the loop between preparation, use, and review. The microphone choice becomes part of a repeatable working method rather than a purchase whose value depends on remembering every detail.
Open the product that matches your recording plan, check the current purchase details, and include your receiver model when asking about compatibility.
Identify the device that will make and save the recording. A writer input, a recorder input, and a computer recording application create different requirements. Once that destination is known, describe the input and review method. This gives the supplier enough context to recommend a supported connection and gives you a clear target for the first test.
A useful choice depends on the recording path and the assignment. Someone maintaining a supported writer workflow has different needs from someone establishing a USB laptop input. Compare the complete arrangements available for your equipment, including monitoring and saved-file review. A general ranking cannot settle a compatibility question involving a specific receiver.
It provides the battery indication described in the microphone's instructions. Follow those instructions when interpreting it. Include an audio test afterward because a battery indication cannot establish that the receiving device selected the right source, started recording, or saved a usable file. Power readiness is one part of the complete preparation routine.
Include the correct replacement in your preparation plan when the microphone instructions call for a replaceable battery. Keep it identifiable and protected with the kit. Learn the replacement procedure before an assignment. A brief practice recording after replacement confirms that the assembled microphone and receiver are still working together as intended.
Check the laptop's documented audio connection and the microphone's required receiving input. Similar-looking sockets can serve different purposes, and a combined headset socket can require a specific wiring arrangement. Describe the exact computer and connector before buying an adapter. The completed path needs to be confirmed electrically and tested in the recording application.
A USB port's presence does not establish support for a USB microphone. It may serve charging, storage transfer, or another function. Ask about the specific receiver and its documented ability to accept that audio device. Treat HGMUSB as a computer workflow unless the manufacturer confirms a different supported combination.
Use the documented computer audio arrangement for HGMUSB monitoring. Do not transfer a feature from a different Martel model to this microphone. When ordering, explain that you need to listen during recording and ask where the headphones connect in the proposed setup. Include that exact listening path in your rehearsal.
That depends on the writer's supported monitoring facilities and settings. Consult its instructions and confirm whether it offers the particular live-listening behavior you need. Replaying a completed recording and monitoring incoming audio are different operations. Test the intended operation with the actual writer, microphone connection, and headphones before relying on it.
The application may have its own source selection, even when Windows recognizes the external microphone. Confirm the source within the program used for the job and save a short practice passage. This verifies the operating path that matters to your work, including the application's recording controls and the location of its output.
Inspect the saved file and the controls used during the session. Headphone volume can affect listening comfort without changing what the application stores. Also confirm that the listening and recording paths used the intended source. Repeat a short sample after making a documented adjustment, then assess the reopened recording on your normal review equipment.
Choose a permitted position based on the voices and nearby noise. Beside the laptop may be convenient, but keyboard activity, ventilation, document handling, and distance from participants can affect the result. Make a short speech recording from the relevant seats and compare another practical position if the first arrangement leaves important words difficult to understand.
Use a realistic room demonstration to judge the arrangement you need. Distance claims do not describe every voice, obstruction, background sound, or recording setting. Your useful evidence is an understandable sample from the expected speaking positions. Write down what improved or remained difficult so the purchase decision reflects the actual task.
Do not assume a single recording path creates isolated speaker tracks. Overlapping speech can remain difficult even when the microphones capture sound clearly. If separate channels are a requirement, discuss the complete multichannel system and its playback method. For ordinary overlap during a proceeding, follow the established practice for obtaining a clear record.
Confirm the cable's intended signal path, wiring, and suitable length for the equipment. A physical fit is only part of compatibility. Provide the microphone and receiver models when asking for an extension recommendation. After approval, test the full length in the arrangement you will use rather than relying on a shorter earlier demonstration.
Include ordinary speech from the intended seats, a fictional name and number sequence, and one realistic activity such as turning a page. Label the sample with its microphone, receiver, and position. Keep the conditions consistent enough that a difference is understandable. Review the saved files through the equipment and software you normally use.
It needs to answer the unresolved question. A brief passage can confirm the selected input and saved-file route; evaluating several seats requires a passage from each one. Avoid making a lengthy test that repeats already-established behavior. End by reopening the sample, because that step connects the preparation exercise to the later review task.
The computer may still have another available input, so visible meter activity alone can be misleading. Identify the selected source and speak from the external microphone's planned position. Reopen the saved sample and verify the intended voice. Keeping the input name on your setup note makes the same check easier after equipment changes.
Examine that position's distance, direction, obstructions, and nearby activity before changing the whole system. Try a permitted placement adjustment and record the same sample again. A location-specific symptom often calls for a location-specific investigation. Keep the successful change on your room note so it can be repeated or explained later.
Confirm that the receiving device was recording the intended input and that the relevant connections and power checks passed. Work through the shared path in a clear sequence. Note the result of each step instead of changing several controls at once. If support is needed, those observations make the problem easier to investigate.
The battery and source selection address different parts of the system. A powered microphone can still feed a receiver that is using another input or is paused. After any power-related correction, make a new sample through the intended destination. This checks the full recording process rather than treating one successful indication as a complete result.
First define the backup you want and the failure or interruption it is intended to address. Owning two microphones does not by itself create two usable recordings. Plan the receivers, connections, start and stop responsibilities, and file review. Then decide whether both microphones belong in that supported arrangement or serve separate assignments.
That requires an appropriate supported output arrangement, with the receiving inputs and levels considered. Ask for a complete connection plan instead of assuming a simple splitter is suitable. Practice both destinations together and reopen both recordings. The rehearsal should also establish which components are shared and what happens when one destination is paused.
The answer depends on the current software's supported recording inputs and the proposed hardware path. Describe your exact software version and receiver before buying. A microphone change may only require a supported input selection, while a different workflow may involve additional setup. Verify the resulting job and its audio using the normal review procedure.
Provide the microphone model, recording destination model, relevant connector, software version, and intended listening method. Add any existing mixer or adapter in the path. State the desired result, such as writer recording or computer recording with live listening. This creates a concrete configuration to confirm and a clear arrangement to test after purchase.
Compare the supported complete setups needed for your task. Include any required accessory, receiving equipment, and setup help, while keeping items you already own clearly identified. Check current product pages or a quote for purchase details. A lower microphone price has limited meaning if the rest of the proposed connection remains unresolved.
Label the microphone connection, its tested cable or adapter, and the recording destination where confusion is possible. Keep a short card identifying the normal input selection and review route. Use labels that describe jobs in plain language. The goal is to reconstruct a successful arrangement quickly, even when furniture or available space changes.
Use invented speech for ordinary setup and comparison exercises. Fictional names, addresses, and numbers provide useful material without bringing a real matter into the test. If an actual recording must be examined for support, follow the applicable authorization and handling requirements. Most microphone selection questions can be explored with a harmless fresh sample.
Explain how the recording will be delivered or opened, identify the practice sample, and ask whether the speech needed for review is understandable. Include any supported channel or playback instructions relevant to the arrangement. Their feedback can expose a handoff problem before the equipment becomes part of a regular assignment.
Record the receiver, selected input, accessories, microphone position, and saved-sample location after a successful trial. Add a brief description of the speech exercise and its result. Preserve this note with the kit. When a later setup behaves differently, the note provides a concrete reference for identifying what changed.
Change one relevant item at a time when practical, keeping the starting condition recorded. Then make a new labelled sample. This makes the result interpretable and avoids losing a working setting among unrelated adjustments. If time is limited during an assignment, follow the established procedure for restoring a known supported recording arrangement.
Stop and save the recording using the receiving system's normal procedure, then confirm that it is accessible through the required review process. Handle transfer and storage according to the assignment's rules. Inspect and repack the tested accessories together. Record any fault that needs attention while the circumstances are still clear.
Use Martel's direct HGM-2 product page or HGMUSB product page. Review the current configuration and purchase details there. If your receiving equipment or listening requirement remains uncertain, include those model details in your inquiry before selecting accessories. Keep the confirmed arrangement for your first complete recording test.
The product links identify the microphones and purchasing destinations. The Windows references support computer input selection and troubleshooting. The example scenarios, comparison routine, and Q&As were written specifically for this guide.