TIME IS RUNNING OUT FOR 2026 TAX WRITE-OFFS

Example: write an input record before a four-microphone rehearsal

Consider a room with microphones assigned to a witness position, a bench and two counsel tables. These are example positions, not a recommendation that four microphones will cover every courtroom. The useful first step is to give each physical microphone a recognizable label and carry that label through the recording setup.

For the witness position, the record might state the exact microphone model, its documented supply requirement, the approved cable, the destination input and the name used for that channel in the recording program. Repeat those fields for the other three positions. Leave an unanswered requirement visibly unresolved rather than filling it with a guess based on the equipment beside it.

Add a column identifying which control enables the supply. If a switch affects a pair of inputs, note the pair. If the recording device supplies all connected microphones together, record that arrangement. This makes it possible to review the effect of changing one microphone without forgetting the other equipment controlled by the same switch.

During the rehearsal, have a person speak from each position separately. Record the position's label and a short passage at a realistic speaking level. The operator should confirm the intended input response and then check the saved channels in the review program. Keep the resulting sample with the configuration record when the organization's storage procedures allow it.

Suppose the witness microphone is audible in the wrong channel. That result calls for checking labels and routing; it does not establish a phantom-power fault. Suppose a channel contains loud distortion. Review the supported signal level and gain. Suppose there is no signal anywhere from one microphone. Its supply, cable, input selection and connection become relevant checks, one at a time.

Finally, record the accepted configuration and any unresolved limitations. Include the date, recording mode and power source used in the rehearsal. If a substitute microphone is installed next month, the operator can compare its requirements with a specific accepted arrangement instead of assuming the room's power switch will suit anything connected to it.

This record also improves a support conversation. A statement such as “the witness microphone is connected to input two with the supplied cable, and the saved sample is silent on that channel” identifies a testable path. It gives the supplier a more useful starting point than a general report that the room needs more microphone power.

Twenty questions about courtroom microphone phantom power

What does phantom power do?

It supplies electrical power to a compatible microphone through its supported balanced audio connection. It operates microphone circuitry; it is not a volume control or a measure of pickup distance. Confirm the microphone's requirement and the receiving device's supported supply before connecting the complete arrangement.

Does every XLR microphone require 48V?

No. The exact microphone model determines its requirement. XLR identifies the connector, not a universal power specification. Read the model's instructions or ask Martel to confirm the supported input and supply. Do not apply one microphone's requirement to another merely because the plugs look alike.

Does every XLR recorder input supply phantom power?

No universal capability follows from the connector. Check the exact recorder, selected input and operating configuration. Identify whether a supply is available and whether its voltage and current capability meet the microphone's requirements. Keep the accepted setting in the equipment record.

Does the Martel Voice Grabber require phantom power?

The Voice Grabber XLR boundary-microphone listing specifies 48V phantom power. Confirm the current product variation and use it with a supported recorder or interface and the appropriate cable. Verify ordinary speech in a saved sample rather than treating the switch position as the entire setup check.

Will phantom power increase a microphone's recording range?

It enables a compatible microphone to operate as specified; it does not create a guaranteed pickup radius. Distance, speaking direction, room sound and placement still affect intelligibility. Test the actual speaking positions and review the saved recording before making a coverage claim.

Is phantom power the same as input gain?

No. Power supplies the microphone electronics, while gain changes signal level at the receiving stage. Raising gain can increase unwanted sound along with speech. If a voice is unclear, identify whether the cause is power, placement, level, routing or another part of the recording path.

Is microphone bias interchangeable with phantom power?

No. Low-voltage bias and balanced phantom power are different supply arrangements for compatible microphone circuitry. A physical adapter does not automatically convert between them. Confirm the exact microphone and receiving input together, especially when moving between small analog microphone sockets and XLR equipment.

Does USB power tell me what an audio input supplies?

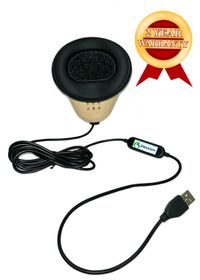
No. USB describes part of the device's connection and power arrangement. The audio input's capabilities come from that device's specification. A USB sound card for a compatible Stenomask does not automatically provide the same microphone supply as an XLR recording interface.

Can a passive XLR adapter supply phantom power?

A passive connector adapter does not create a microphone power supply. It may change a specified connection or wiring arrangement, but the complete path still needs a suitable source and input. Ask the supplier to confirm the intended function before using an adapter in a powered microphone setup.

Should I switch phantom power on before connecting equipment?

Follow the sequence in the microphone and receiving equipment's instructions. Include any specified level reduction, power-off step or settling period. Do not substitute a universal rule based on another device. Once the supported configuration is established, make and replay a nonconfidential test recording.

Can phantom power damage equipment?

Compatibility and wiring matter, particularly with unsuitable sources, adapters or certain microphone designs. Use the equipment's instructions and a confirmed connection rather than assuming every XLR device can receive the supply. If the arrangement is uncertain, resolve it with the supplier before changing power settings.

What if one switch powers several microphone inputs?

Check every input affected by that switch. Record the connected model, signal type and required supply for each. A setting appropriate for one microphone is not automatic permission to apply it to unrelated equipment on the same group. Confirm the complete mixed arrangement.

Can two recorders both power the same split microphone?

Do not assume that is the correct arrangement. The splitter and connected equipment determine the approved power path. Ask which destination supplies power and how other paths are handled, then follow that configuration. Verify both saved recording results after the supported connection is established.

Why is a powered microphone still silent?

Power is only one possible cause. Check the compatible connection, input controls, selected channel and recording application. The microphone may be operating while the software listens elsewhere. Trace the path step by step and use a saved sample after each meaningful correction.

Why does the microphone sound distorted?

Review signal-level compatibility and gain as well as the microphone connection. Distortion can occur in a powered system when a stage is overloaded. Lowering headphone playback volume does not repair captured distortion. Make a fresh sample after an approved adjustment and compare the saved result.

Does phantom power affect portable operating time?

The connected microphone load is part of the equipment's overall power use. Actual operating time also depends on settings, storage, display use and the power source. Test the complete supported arrangement with the intended microphone quantity instead of assuming every configuration matches the longest advertised runtime.

Can I calculate battery runtime from 48V alone?

No. Voltage alone does not give microphone current, conversion losses, the recorder's other power use or available battery energy. Use manufacturer guidance and representative testing. If you use a planning calculation, label its assumptions and do not present it as a measured product specification.

What should I check when replacing a microphone cable?

Confirm the cable's intended microphone, connector wiring and supported length for the complete arrangement. Use an approved replacement and follow the connection sequence. Record a new sample afterward. A matching plug shape alone does not establish that the replacement preserves the required power and signal path.

Does a moving input meter prove the recording is usable?

It shows activity at the displayed stage, which is useful but incomplete. Confirm the recording state, destination and saved result. Open the test file through the intended review workflow and check each required microphone or channel. Monitoring and saved-file verification answer different questions.

What information should I send Martel before ordering?

Send microphone models and quantities, recorder or interface model, intended inputs, existing adapters or splitters, and the required recording duration. Add a room sketch when placement is relevant. Ask for a confirmed connection plan and a representative saved-file test using the quoted configuration.
Explore equipment for this workflow

Phantom Power for Courtroom Microphones: A Practical 48V Setup Guide

By Martel Electronics · November 11, 2026

Identify which device powers each microphone, confirm the supported connection, and verify the complete recording path before work.

Phantom power runs compatible microphone electronics

Phantom power supplies electrical power to a compatible microphone through the same balanced connection that carries its audio. In a courtroom recording setup, the supply may come from a recorder, mixer, audio interface or a suitable separate supply. The microphone and receiving equipment must support the same arrangement. A connector that fits is not enough to establish that compatibility.

The familiar “48V” label identifies a common phantom-power supply voltage. It is not a microphone-volume control, a measure of recording quality or a distance setting. A microphone that requires this supply needs an appropriate source to operate as specified. Turning on phantom power does not by itself make speech farther away more intelligible.

For a standard balanced three-pin XLR phantom arrangement, the DC supply is applied equally to the two audio conductors relative to the shield/reference conductor. Shure's explanation of phantom power describes that arrangement. The important buying implication is that the microphone, cable and input must be designed to work together.

Martel's Voice Grabber XLR boundary microphone is listed as requiring 48V phantom power. Martel also offers recording arrangements such as DM4 and DM246 with relevant microphone-input capabilities. Confirm the exact microphone and recording configuration in the quote. Do not extend one product's stated requirement to every microphone that happens to use an XLR plug.

This guide connects the power question to a practical recording workflow. It covers what to check before buying, how to distinguish phantom power from other microphone supplies, how to make a documented setup, and how to verify the resulting recording. The objective is a clear, supported connection that can be operated consistently, not a collection of assumptions based on a switch label.

Identify the device that actually supplies the microphone

Draw the microphone's connection to the first receiving input. That input is the place to investigate the required supply. A later USB connection to the computer or an output to another recorder does not tell you which device powers the microphone. Follow the physical route and identify the exact model and input used.

In a computer-based arrangement, an audio interface may provide the microphone input, power and conversion before sending digital audio to the computer. The computer's recording software then uses the selected input stream. In a standalone arrangement, the recorder may provide the microphone input and power directly. The arrangement changes where the operator finds the controls and where the power requirement belongs in the preparation checklist.

Confirm whether phantom power is selectable for individual inputs, groups of inputs or the whole device. Different products handle this differently. If a switch affects several connected sources, every affected connection must be appropriate for that setting. Do not assume that the behavior of a previous interface applies to a new recorder.

Ask what the device requires to provide the specified supply. The supported operating mode and power accessory matter. Use the manufacturer's instructions for the exact equipment, and identify any limitation that applies when several microphones are connected. A general statement that an interface has phantom power is not a complete specification for every possible load.

Record the accepted source in the setup notes: microphone model, input number, supplying device and required setting. A later operator should be able to identify the source without tracing an unfamiliar collection of adapters. This also helps support distinguish a missing microphone supply from a software-selection or recording problem further along the path.

Match the Voice Grabber XLR microphone to a confirmed 48V input

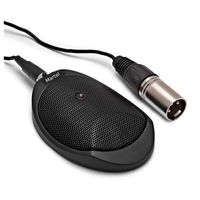
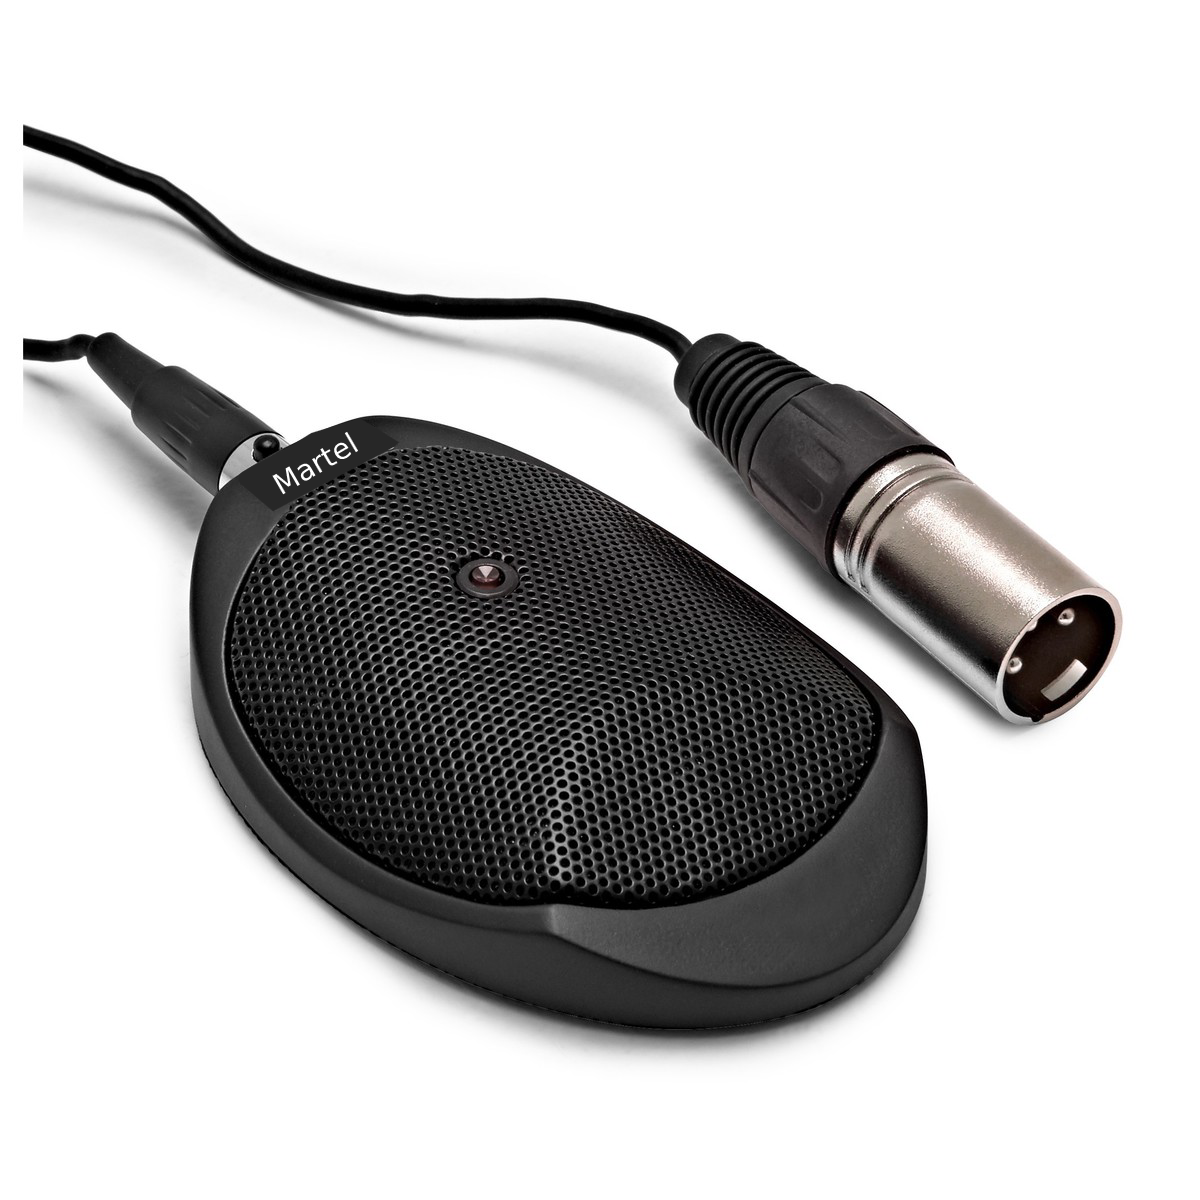
Voice Grabber Microphone (48 Volt phantom powered Microphone)
Voice Grabber Microphone (48 Volt phantom powered Microphone). Product image from Martel’s store; see the listing for current package contents.

Martel's Voice Grabber XLR boundary-microphone listing identifies a condenser boundary design, a detachable microphone cable and a 48V phantom-power requirement. Use that requirement when checking the intended recorder or interface. The presence of an XLR socket alone does not prove that the selected input supplies the required power.

Confirm the exact product variation and supplied cable with the current listing or written quote. A cable supplied for this microphone should not be confused with an unrelated adapter that merely ends in an XLR connector. Keep the appropriate cable identified with the microphone so portable setups can be rebuilt consistently.

Place the microphone for the speaking area it is intended to serve. A boundary microphone's placement and surrounding surfaces affect the capture. Follow the product's orientation guidance and test the actual table position. Do not interpret phantom power as a substitute for useful microphone placement or as a guarantee of a particular pickup distance.

During acceptance, record ordinary speech from the required position and review the saved file. Include the level and microphone position used in the setup record. If the microphone is being compared with another model, keep the test task consistent and state which input and power arrangement each model requires.

Ask Martel to confirm the complete microphone-to-recorder path when reusing older equipment. The familiar name of a recorder family is not enough if the exact model, input settings or connection accessories differ. A documented supported combination is the useful result of the power check. It allows the operator to focus on recording and monitoring instead of guessing which switch or adapter supplies the microphone.

Check the power path in DM4 and DM246 arrangements

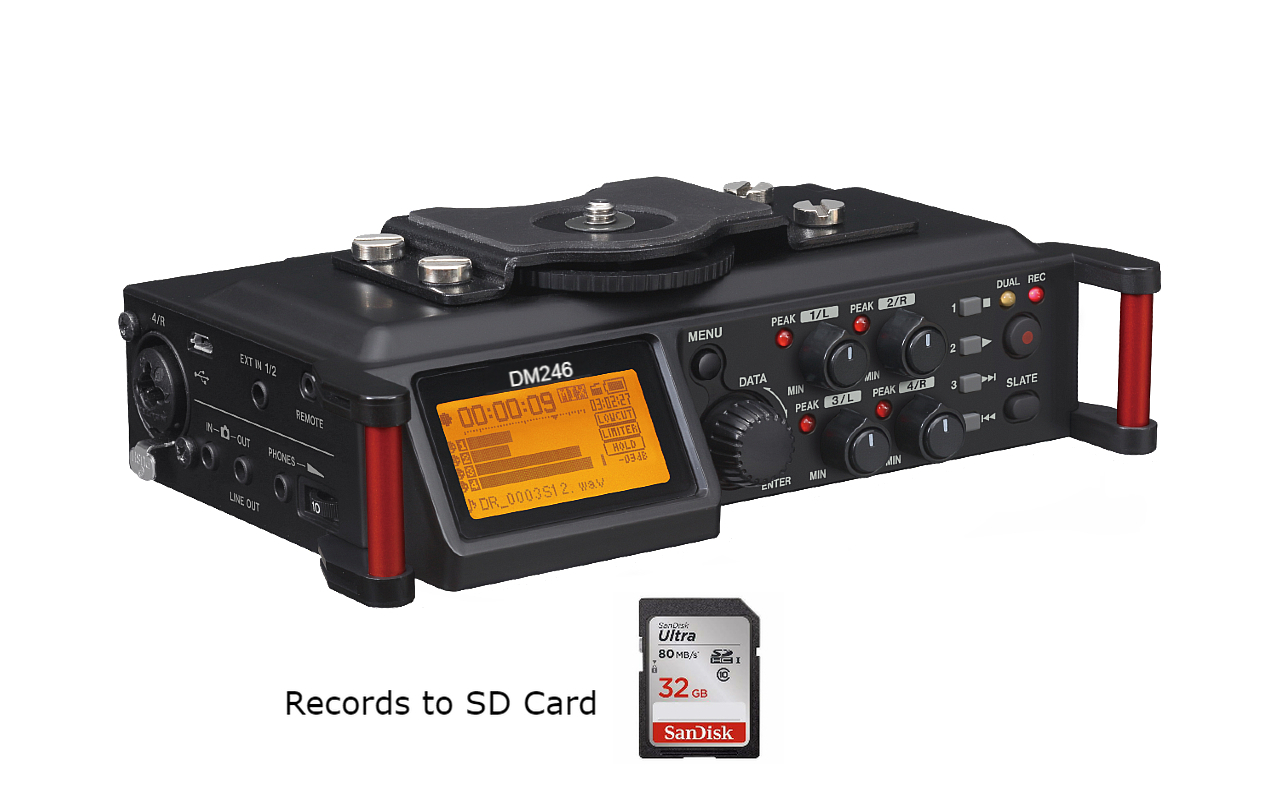
Martel DM246 V2 Four Channel Courtroom Recorder - System
Martel DM246 V2 Four Channel Courtroom Recorder - System. Product image from Martel’s store; see the listing for current package contents.

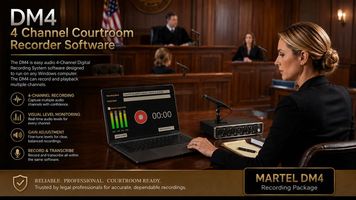
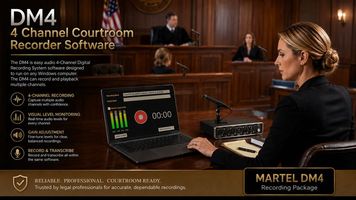
The DM4 and DM246 recording approaches place the microphone supply in different operating contexts. DM4 uses a compatible computer with the supplied recording interface and software arrangement. DM246 provides a standalone recording path. Both require the microphone inputs, power settings and saved recording channels to be configured for the actual package.

For DM4, identify the interface input serving each microphone and the relevant phantom-power controls. Confirm the interface's supported connection and power arrangement, then verify that the recording application uses the intended channels. The microphone may be powered correctly while the application listens to a different device, so power and software selection need separate checks.

For DM246, identify the recorder inputs and the required microphone-power settings under the current operating instructions. Include the recorder's power configuration and recording media in the preflight. A standalone recorder still needs a clear microphone map and a saved-sample check; removing the computer from live recording does not remove those responsibilities.

For either system, label the physical microphone positions and the corresponding recorded channels. If a package uses multiple microphones in a supported shared arrangement, describe that arrangement accurately. The power requirement and the channel structure are related parts of the system, but supplying power does not automatically establish separate recording tracks.

Ask for a demonstration using the quoted microphones and the intended operating configuration. Confirm that each required microphone is present in the saved result and that the reviewer can use the channels as planned. Keep the accepted settings with the equipment record. This turns a broad phantom-power feature into a verified part of the complete recording workflow.

An XLR connector is not a power specification

XLR describes a connector family. The exact microphone and input determine the required signal and power arrangement. Do not assume that every XLR microphone needs 48V, that every XLR socket supplies it, or that a device with an XLR output is a microphone intended to receive phantom power.

Read the model-specific documentation. A microphone may have a stated phantom requirement, another power arrangement or no need for an external supply. An input may support selectable power, while another may serve a different signal function. These distinctions are why an equipment quote should name the models and connection roles explicitly.

For example, Martel's HGM-2 XLR listing identifies an XLR connection, but the connection label alone should not be used to assign it the Voice Grabber's 48V requirement. Ask Martel for the correct power and input arrangement for that exact microphone. The appropriate answer comes from the product specification and supported combination, not an assumption about three pins.

Take the same care with adapters. A passive adapter can change connector format or wiring in a specified way, but it does not automatically provide a suitable power conversion or input circuit. Adding an XLR-to-3.5 mm adapter does not establish that a computer microphone socket can power an XLR microphone correctly.

When several devices share a path, identify every input and output. A wireless receiver, mixer output or other electronic source should be connected according to its instructions. Do not enable phantom power on an input merely because the source has a familiar connector. The purchasing and setup record should make the role of each connection clear before power settings are changed.

Distinguish phantom power, microphone bias and USB power

Microphone power can arrive in different forms. Professional balanced phantom power is different from the low-voltage bias used by some small analog microphones and headset inputs. USB power is another part of the equipment arrangement. Similar language in casual conversation does not make these supplies interchangeable.

Shure's phantom-versus-bias discussion explains that the supply arrangement and the microphone circuitry must match. For a buyer, the practical step is to confirm the exact microphone requirement and the receiving input's supported supply. Avoid choosing a connection solely from a voltage label or plug diameter.

TermWhat it tells youWhat it does not establish
48V phantom powerA stated microphone supply capability in a supported balanced arrangementCompatibility with every microphone or electronic output
Low-voltage microphone biasA supply arrangement for compatible small microphone circuitryAn interchangeable substitute for a microphone's 48V phantom requirement
USB-powered deviceThe device receives power through its supported USB arrangementThe voltage or current supplied at every audio input
Battery-powered microphoneThe microphone has a stated battery operating arrangementPermission to ignore its connection and external-power instructions

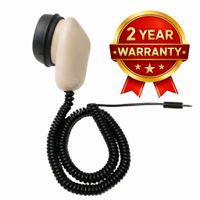
A USB audio interface can have microphone features beyond the computer's built-in audio socket, but those features belong to the interface's specification. Check the exact model. A small USB sound card intended for compatible analog headset or Stenomask inputs should not be assumed to provide the same XLR phantom-power path as a professional recording interface.

Keep accessories associated with the configuration they were approved for. An adapter useful in a Stenomask setup may serve a different job from a cable used with an XLR boundary microphone. Clear labeling and a short connection drawing help prevent an apparently convenient substitution from changing the power arrangement without anyone noticing.

Voltage and current answer different power questions

A microphone supply has a voltage specification and a current capability. The microphone's requirement must fit the supplying equipment, including any limits that apply across several inputs. A “48V” label alone does not describe every aspect of that compatibility. Confirm the current and channel-loading requirements in the relevant documentation or with the supplier.

Sound Devices' phantom-powering overview discusses microphone current requirements and supply capability. The useful lesson for a multi-microphone courtroom arrangement is to evaluate the complete connected set, rather than assuming a successful test with one microphone proves every larger configuration.

For an illustrative calculation only, a hypothetical microphone drawing 5 milliamps from a 48-volt supply represents 0.24 watts at that supply point: 48 multiplied by 0.005. Four such hypothetical microphones would represent 0.96 watts before conversion losses and the recording equipment's other power use. These are arithmetic examples, not Voice Grabber current specifications or measured DM4 or DM246 consumption.

This calculation cannot be turned directly into recorder battery runtime. The recorder, interface, display, storage and power conversion also consume energy, and battery capacity and operating conditions matter. Use the product's supported configuration and a representative runtime test for your intended settings. Do not derive a promised recording duration from the phantom-voltage label.

Record the microphone quantity and power configuration used in the test. If more microphones are added later, revisit the supply requirements and operating-time assumptions. A complete power plan identifies the actual load and the supported source without inventing specifications that the microphone or recorder manufacturer has not provided.

Use the equipment's connection and power sequence

Follow the microphone, recorder or interface instructions for connecting equipment and changing phantom-power settings. Where the manufacturer specifies reducing levels, switching power off or allowing a settling period, include those steps in the operating procedure. The correct sequence is model-specific and should not be replaced by a habit learned on unrelated equipment.

Prepare the system before the recording task begins. Identify the microphones, supported cables and intended inputs. Confirm the required power settings and the supplying device's approved power arrangement. Keep monitoring volume at a suitable level while establishing the connection according to the instructions.

After the equipment is configured, verify each microphone using ordinary nonconfidential speech. Check the relevant input indicators, confirm the selected recording channels and make a saved sample. Play that sample back through the intended review path. This checks the complete result rather than stopping when a power indicator is illuminated.

Document the accepted settings in plain language. A note such as “Voice Grabber on input one, using the confirmed 48V setting” is more useful than “power on” when the device has several switches and operating modes. Include the exact model and input map so another operator can reproduce the arrangement.

If a connection or microphone changes, reassess the affected power requirement before returning to work. Do not assume the new item is electrically identical because it looks similar. A deliberate connection procedure protects the equipment and makes troubleshooting easier by establishing what configuration was actually in use when the recording was made.

Keep power, gain and microphone distance separate

Phantom power enables the compatible microphone electronics to operate. Input gain adjusts the signal level at the receiving stage. Microphone placement determines the sound reaching the microphone. These are related parts of a recording system, but each answers a different question. Increasing one does not automatically correct a problem in another.

A powered microphone placed poorly can still produce an unclear recording. A high gain setting can make room noise and handling sounds more prominent along with speech. If the voice is distant, evaluate placement and the intended microphone pattern before assuming the power supply or level setting is the solution.

Use a controlled sample from the actual speaking position. Keep the supplied power arrangement correct and stable, then make one relevant placement or level change at a time. Save each useful comparison and listen at a consistent playback level. Do not describe the result as an improvement unless the required speech is actually more usable in the saved sample.

Keep microphone pickup claims separate from power specifications in a quote. “Requires 48V” describes an operating requirement. It does not establish a guaranteed recording radius, room capacity or transcription accuracy. Ask for a recommendation based on the room and required positions, then test that proposed configuration.

This distinction also makes support more effective. Describe whether the problem is absent input, low level, distortion or unclear distant speech. Each symptom points toward different checks. A precise description is more useful than saying that the microphone needs more power when its actual requirement has not been evaluated.

Check cables and adapters before changing power settings

A compatible cable is part of the power and signal path. Use the microphone's supplied or approved connection arrangement and inspect it for obvious damage according to the manufacturer's guidance. Keep connectors protected during transport, avoid strain and identify replacement cables by their intended function.

Balanced phantom-power arrangements depend on suitable wiring. An adapter that changes to an unbalanced connection can change the electrical situation. Do not assume that a cable is appropriate because its plugs match. Focusrite's phantom-power guidance discusses why microphone type and wiring matter when evaluating compatibility.

If a cable is suspected, follow the approved connection sequence and substitute a known-compatible cable where practical. Make a fresh sample afterward. Avoid changing the microphone, input, cable and software settings simultaneously, because a successful result would not identify which change solved the problem.

Label accessories used in special arrangements. A cable intended to receive a mixer output may serve a different job from the cable powering a microphone. Keep the route diagram with portable equipment so a substitute operator does not combine unrelated accessories simply because they fit in the same case.

When requesting a replacement, provide the microphone model, supplying device, input and required length. Ask the supplier to confirm the exact connection rather than relying on a generic connector description. This makes the replacement a controlled change to the accepted setup.

Diagnose missing input without guessing at the cause

Begin by confirming the microphone's documented power requirement and the actual input connection. Check that the supplying device is operating in the supported configuration and that the required setting applies to the selected input. Do not change unrelated inputs or enable additional supplies as an experiment.

Next trace the signal beyond the microphone. Check the relevant input control, channel selection and recording destination. In a computer setup, confirm the application selected the intended interface. In a standalone setup, confirm that the required input is included in the selected recording arrangement. Correct microphone power does not guarantee that the receiving recorder uses that input.

Make a short test after each meaningful correction. Check the saved result, not only a live indicator. If the signal remains absent, isolate components using known-compatible equipment and the manufacturer's connection instructions. Record the symptom and the changes already tried so support can continue the diagnosis efficiently.

If the sound is present but distorted, review signal-level compatibility and gain rather than assuming the microphone lacks power. If it is present but distant, review placement and the speaking position. These symptoms can occur in a correctly powered system and require different responses.

Keep confidential proceedings out of a troubleshooting exchange when a nonconfidential sample demonstrates the same problem. Provide exact model names, connection details and the stage where the expected signal disappears. That information usually helps more than an unsupported conclusion that a particular switch or accessory is defective.

Test portable operating time with the complete microphone set

A portable recorder's operating time depends on the actual configuration. Recording mode, microphone supplies, display use, media and power-source condition can influence the result. Use the manufacturer's supported setup and test representative operation with the microphone quantity you intend to deploy.

Do not treat a maximum advertised runtime as a guarantee for every phantom-powered arrangement. Record the conditions of your own nonconfidential rehearsal: microphones, settings, power source, duration and any relevant status observations. The result is evidence about that test, not a universal specification for the product.

Plan the required duration with practical margin under the organization's procedures. Identify approved charging, replacement or external-power arrangements and what the operator should check before work. Do not assume that the presence of both battery and AC options guarantees uninterrupted switching under all circumstances; verify the documented behavior of the exact device.

Repeat relevant checks when the microphone set or operating mode changes materially. A test with one microphone does not fully describe a later arrangement with several powered inputs. Keep the tested configuration with the packing list so the equipment arriving at the assignment matches the equipment that was evaluated.

At the end of the rehearsal, verify the saved files and their expected duration. A device that remained powered on has not necessarily recorded the entire intended sample. Power planning and recording verification should support each other while remaining separate checks.

Document shared switches and mixed microphone arrangements

Some devices apply a power setting to several inputs together. Others provide more individual control. Identify the behavior of the exact recorder or interface before connecting a mixed set of microphones and other audio sources. A shared switch means every affected input deserves a compatibility check.

Make an input list showing the connected model, source type and required power arrangement. Include unused inputs where their settings matter to the operating procedure. The list should describe the real setup rather than a generic assumption that all connected devices are identical microphones.

When a microphone feed is split to multiple destinations, confirm the approved source of power and the splitter's supported paths. Do not enable supplies at several destinations based on guesswork. The appropriate arrangement depends on the specific distribution equipment and should be confirmed with the supplier.

If another operator supplies an audio feed, identify that feed before connecting it. A mixer output or wireless receiver is an electronic source with its own specification. It should not be treated automatically as a microphone that needs power from the receiving input. Agree on the connection and test the receiving result.

Keep changes visible in the equipment record. Replacing one microphone in an otherwise familiar setup can change the requirements on a shared input group. A clear list helps the operator check the affected connections without rebuilding the entire system from memory.

Turn the power question into a complete quote checklist

Provide Martel with the exact microphone models and quantities, recorder or interface, intended input numbers and required recording duration. Include any adapters, splitters or existing equipment you hope to reuse. State whether the equipment will remain in one room or travel between assignments.

Ask the quote to identify supported cables, required power accessories and any settings or limitations that affect the proposed combination. Confirm the microphone supply requirement separately from the recording format and channel count. A complete explanation should make both the electrical path and the saved result understandable.

Include a saved-sample demonstration in acceptance. Each required microphone should be checked in its actual position, with the intended power configuration and recording channels. Then verify the review workflow. A power indicator alone is not the final acceptance result.

Keep the dated configuration record with the equipment. It should explain which microphone is powered by which input, which settings were accepted and what changed during testing. This gives the next operator and support staff a reliable starting point when a component is replaced or a room arrangement changes.

Martel Electronics | 3 hours ago

Phantom Power for Courtroom Microphones: A Practical 48V Setup Guide

Identify which device powers each microphone, confirm the supported connection, and verify the complete recording path before work.

First paragraph

Use this space to develop your idea and move the story forward. Add details, examples, or observations that make your point clearer. Keep each paragraph focused around one idea. Add more sections to build your story step by step.

Martel Electronics

More Posts

How Quiet Is a Stenomask? Sound Leakage and Fit EvaluationHow Quiet Is a Stenomask? Sound Leakage and Fit Evaluation
How Quiet Is a Stenomask? Sound Leakage and Fit Evaluation

An original guide to checking what listeners and outside microphones hear. Includes room planning, fit observations, measurement limits, and practical worksheets without invented sound-reduction claims.

Stenomask Accuracy: How to Measure Speech Recognition ResultsStenomask Accuracy: How to Measure Speech Recognition Results
Stenomask Accuracy: How to Measure Speech Recognition Results

Learn how to separate microphone capture, speech-recognition errors, and correction work. Includes an original evaluation process, practice text, and worksheets for comparing complete stenomask setups.

Zoom Foot Pedal: Hands-Free Mute and Unmute for Court ReportersZoom Foot Pedal: Hands-Free Mute and Unmute for Court Reporters
Zoom Foot Pedal: Hands-Free Mute and Unmute for Court Reporters

Connect the pedal to the Windows computer running Zoom and rehearse a complete mute, unmute and recording check before your next remote deposition.

Marantz PMD661 and PMD620 Replacements for Court ReportersMarantz PMD661 and PMD620 Replacements for Court Reporters
Marantz PMD661 and PMD620 Replacements for Court Reporters

Use your existing recorder setup to decide which connections, recording functions and review controls a replacement has to support.

Microphone Splitter vs. Mixer: Plan the Right Court-Reporting Audio PathMicrophone Splitter vs. Mixer: Plan the Right Court-Reporting Audio Path
Microphone Splitter vs. Mixer: Plan the Right Court-Reporting Audio Path

Identify the sources, destinations and channel separation you need before choosing a splitter, mixer or USB interface.

Stenomask USB Sound Cards: Andrea USB-SA vs. Sound Blaster PLAY! 3Stenomask USB Sound Cards: Andrea USB-SA vs. Sound Blaster PLAY! 3
Stenomask USB Sound Cards: Andrea USB-SA vs. Sound Blaster PLAY! 3

Match the adapter to the mask, computer and application, then verify the complete microphone path with a saved recording.

DM4 vs. DM246: Choosing a Four-Channel Courtroom Recording SystemDM4 vs. DM246: Choosing a Four-Channel Courtroom Recording System
DM4 vs. DM246: Choosing a Four-Channel Courtroom Recording System

Choose the recording workflow that fits your team, then compare complete microphone packages and verify the saved files through transcription review.

Digital Court Reporting Equipment: A Complete Recording and Transcription SetupDigital Court Reporting Equipment: A Complete Recording and Transcription Setup
Digital Court Reporting Equipment: A Complete Recording and Transcription Setup

Build a complete recording-to-transcription workflow. Compare equipment roles, map the room, and verify the saved result before accepting a system.

Martel Video Transcriber Kit or Software Only: Choose the Right SetupMartel Video Transcriber Kit or Software Only: Choose the Right Setup
Martel Video Transcriber Kit or Software Only: Choose the Right Setup

Compare Martel SKU 1515 with pedal and headset against SKU 1527 software with two licenses. Choose the setup that matches the equipment you already own.