In this guide
- List the voices that must reach the recording
- Define the required review result
- Make a seating map that includes movement
- Give the witness and interpreter separate checks
- Include counsel's document-facing speech
- Account for the reporter's occasional voice
- Plan the remote participant as an audio route
- Choose pickup locations around required coverage
- Keep the channel map honest
- Test ordinary turn-taking before a more demanding exchange
- Use original six-position practice material
- Keep quiet answers in the acceptance exercise
- Include paper, typing, and posture changes
- Verify the saved file and the review workstation
- Prepare a focused equipment request
- Rehearse an answer that moves through an interpreter
- 30 questions and answers about interpreted-deposition audio planning
An interpreted deposition can involve several distinct speaking positions even when everyone sits around one table. The witness and interpreter may be close together, counsel may occupy opposite sides, the reporter may need to speak occasionally, and a remote participant may enter through a computer audio path. A microphone plan should account for each required source instead of treating the room as one undifferentiated conversation.
This guide presents an equipment-planning and rehearsal method. It does not prescribe how an interpreter should work or how a deposition should be conducted. Coordinate seating, recording permissions, and procedural requirements with the responsible people. The six-position example is fictional and can be adapted to the permitted arrangement you actually need. It is not a claim that six microphones, six channels, or one particular package are required.
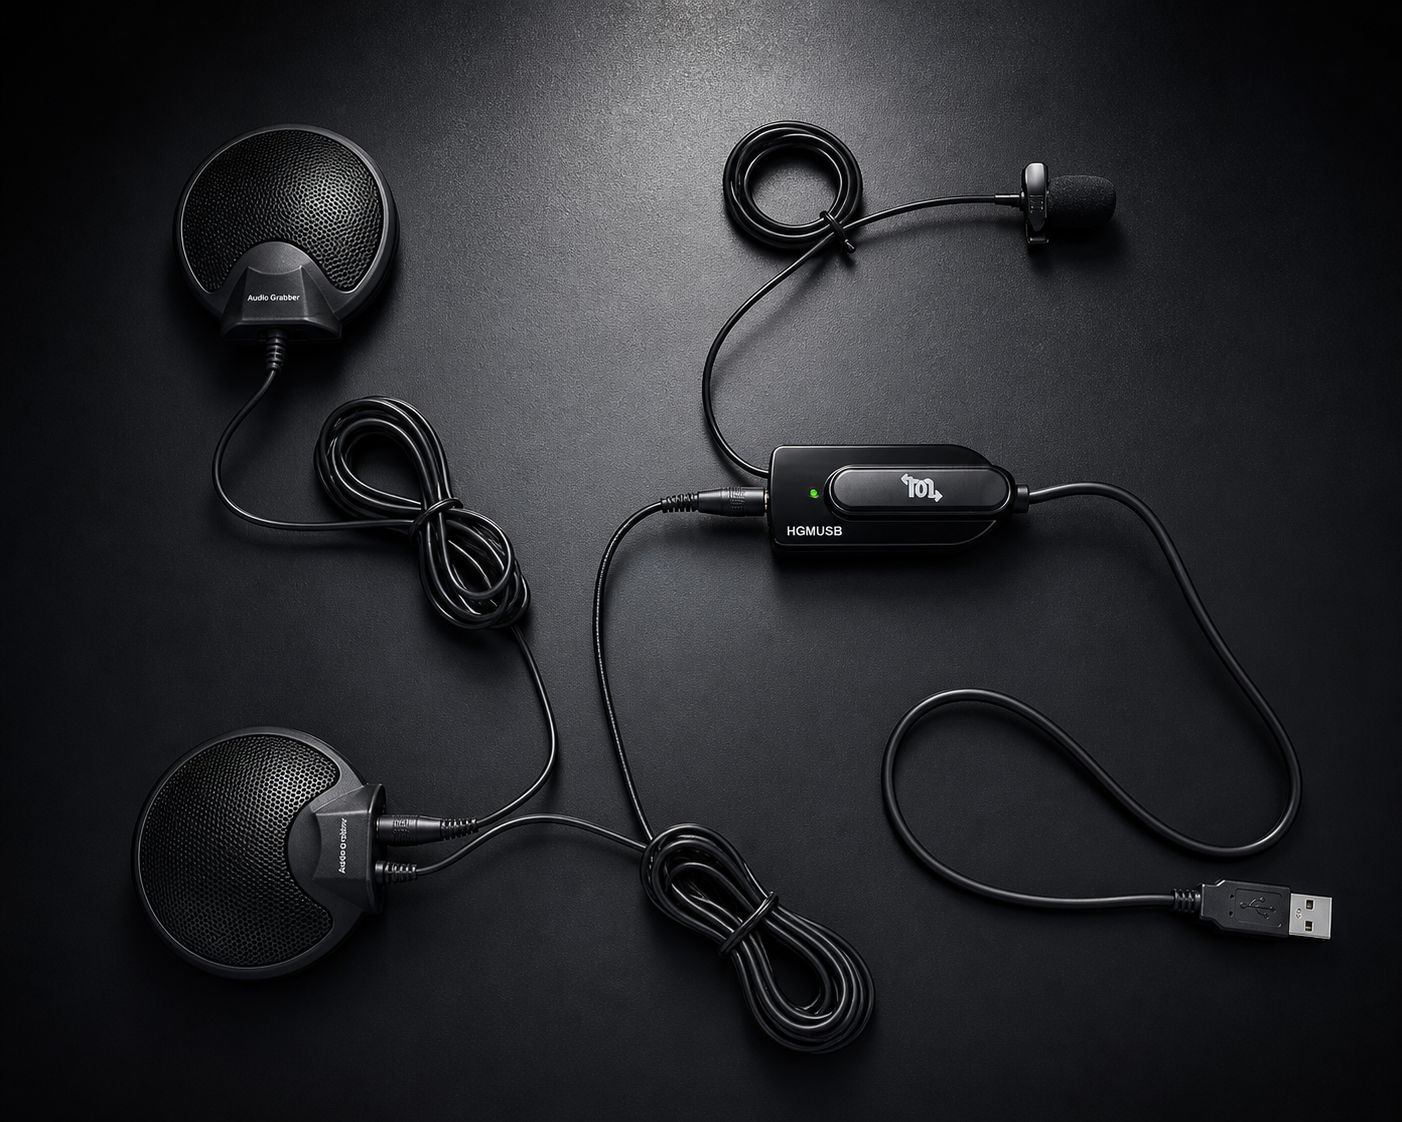
Use the Martel HGMUSB3 microphone package when discussing a supported USB arrangement with distributed pickup positions. Consider the Martel DM246 V2 four-channel recorder when the requirement includes a compatible multichannel recording workflow. These products serve different roles. Define coverage, recording, and review needs before deciding which configuration fits the assignment.
List the voices that must reach the recording
Start with a source list, not a shopping list. In the example used here, Position A is the witness, B is the interpreter, C is the questioning attorney, D is another participating attorney, E is the reporter's occasional spoken contribution, and F is a permitted remote participant. Your actual list may be shorter, longer, or arranged differently.
Describe each source's normal location and likely direction of speech. The witness may address the interpreter, the interpreter may turn toward counsel, and an attorney may look down at an exhibit. These are acoustic planning observations. They do not establish procedural rules or determine who should speak when. Confirm the permitted arrangement before using it as the basis for equipment placement.
Mark any source whose route is different from the others. A remote voice may arrive through a computer playback or supported recording path rather than a microphone at the table. Keep that distinction visible from the start. Otherwise, a room test can sound complete to the people present while the saved recording is missing a source they heard through another path.
Define the required review result
Decide what the later reviewer needs from the recording. Is a combined audio reference sufficient for the assigned workflow, or must supported channels be selectable separately? Will the recording be reviewed on the capture device, in a particular application, or after an approved transfer? The answer shapes the system more directly than the number of chairs.
Several microphones can provide pickup at several locations while feeding a combined input. Conversely, a multichannel recorder has a defined channel structure that must be matched to supported inputs and playback. Do not use the phrases "six speakers," "six microphones," and "six tracks" as if they describe the same thing. They describe different parts of the arrangement.
Write the required result in a short sentence for the equipment discussion. For example: "The practice recording must include all six permitted sources, and the review process must provide the channel controls specified for this assignment." Add the actual channel requirement rather than leaving it implied. This makes it easier to evaluate a package without promising a function that has not been verified.
Make a seating map that includes movement
Draw the table, chairs, computer, display, document area, and proposed microphone locations. Add the A-through-F labels to the source positions. For a remote participant, draw the receiving device and audio route instead of placing a fictitious chair beside the table. Mark the nearest ordinary noise sources, such as ventilation or equipment fans.
Add a small arrow for the direction each person commonly faces. A witness looking toward an interpreter and an attorney reading from a document may not project toward the same pickup point. Include normal changes in posture in the rehearsal. A successful test should not depend on asking people to lean unnaturally toward a microphone every time they speak.
Photograph the permitted practice arrangement and keep the drawing with the equipment notes. If a chair or document area later moves, you can identify the change rather than relying on memory. The map is a record of the tested configuration. It does not guarantee that the same physical layout will produce the same result in every room.
Give the witness and interpreter separate checks
The witness and interpreter should appear as separate sources in your equipment evaluation even when they sit close together. Their voices, speaking directions, and usual levels may differ. A clear interpreter passage does not automatically establish that the witness's quieter response is equally understandable, or that both sources reach the intended recording path.
Use distinct practice labels and short passages from each position. Include ordinary speech, a softer answer, and a natural turn toward the other participant where appropriate. Keep the exercise non-confidential. The purpose is to evaluate capture from the two positions, not to assess language skill, interpretation quality, or the accuracy of any professional work.
If one source is harder to review, examine the placement and supported connection that serves it. Do not immediately make a broad sensitivity change that could distort another nearby voice. Compare a practical position or configuration adjustment and repeat both passages. Preserve the stronger source while improving the difficult one, and document any remaining limitation clearly.
Include counsel's document-facing speech
Attorneys may speak while consulting an exhibit, looking across the table, or addressing a display. Add these ordinary directions to the practice sequence when they reflect the permitted work arrangement. Keep the speaking level natural. An exaggerated microphone-test voice can conceal the condition you are trying to evaluate.
Place the proposed pickups so that routine document handling does not repeatedly cover or strike them. Identify where exhibit stacks will move and where laptops or other equipment will be used. Evaluate a short passage during normal paper activity. A room that sounds clear while everyone sits still may behave differently once the actual work begins.
If a document-facing passage becomes difficult, record the condition precisely. "Position C, looking down at the exhibit" gives you a useful next comparison. "Counsel audio bad" is too broad. Test a permitted microphone or document-area change, then return to normal forward-facing speech to confirm that the revised arrangement remains useful across the expected movements.
Account for the reporter's occasional voice
The reporter's position can be overlooked when the microphone plan focuses only on the main exchange. If the assigned recording workflow needs to capture the reporter's spoken contributions, include that source explicitly. Confirm the relevant requirements with the responsible professional rather than assuming every local voice belongs in the same record or channel.
Use a brief neutral practice phrase from the reporter's normal working position. Include the usual relationship to the computer, writer, or keyboard. Check whether nearby activity affects the passage. A microphone convenient for equipment connection may be well positioned for the reporter while less useful for the witness, or the reverse.
Treat the result as one part of the complete plan. Do not move the main pickup to improve an occasional source without checking the principal speaking positions again. The equipment arrangement should support the required conversation as a whole. If the needs conflict, that is useful information for discussing a different supported configuration with Martel.
Plan the remote participant as an audio route
Identify the application and equipment through which the remote source will arrive. Then identify the supported path into the intended recording destination. Hearing the participant through room speakers or headphones does not establish that the chosen recorder or application saves that source. Keep the listening path and recording path separate in the notes.
Use a permitted practice call or supported demonstration arrangement. Have the remote participant read a distinct phrase, followed by a local response. Stop the recording and play the new file. Confirm both sides and the transition between them. A source-specific phrase makes an omission easier to identify than a general conversation whose content everyone already remembers.
Do not assume that turning the loudspeaker up solves an uncertain recording route. It changes what the room hears and may affect nearby microphones, but it does not answer the routing question. Verify the supported method for the actual application and hardware. If the required combination is unclear, resolve it before relying on the arrangement for an assignment.
Choose pickup locations around required coverage
One pickup may serve more than one nearby speaking position when the saved recording supports that arrangement. Several pickups may be useful when voices are separated or when movement creates difficult coverage. The number should follow the required result and supported system, not a rule that every person must have a separate microphone.
For an HGMUSB3 discussion, identify the three proposed pickup areas and the computer recording destination. Explain which source positions each area must cover. Verify the current package, cable arrangement, and application support. Keep the resulting recording-channel structure explicit instead of treating the three microphones as proof of three independently saved tracks.
For a recorder-centered arrangement, identify the supported inputs and the microphones intended for them. The DM246 V2 is described as a four-channel courtroom recorder, but the complete package and review workflow still need confirmation. Six source positions do not automatically fit into six independent channels on a four-channel recorder. Define any shared-source arrangement deliberately and test it.
Keep the channel map honest
Create a channel map only for channels the equipment actually records and the review workflow actually exposes. Label a combined feed as combined. If two source positions share a supported input or pickup area, say so in the equipment notes. Do not assign separate track labels merely because doing so would make the room diagram look tidy.
Use a spoken identification sequence to check the map. Record from each source position, then review the supported channels in the intended software or device. Confirm what is audible where. Some sound may reach more than one microphone, so source labels are a way to inspect routing and coverage, not a promise of complete acoustic isolation.
If the recorded result differs from the planned map, stop treating the diagram as authoritative and investigate the actual connection path. Correct the supported arrangement or revise the documented expectation. A clear explanation of shared capture is more useful than an impressive-looking diagram that suggests separation the saved file does not provide.
Test ordinary turn-taking before a more demanding exchange
Begin with one source speaking at a time. Use the same simple sequence so you can locate each position in the recording. This establishes a reference for the placement and routing before you add pauses, movement, or other realistic conditions. It also gives the reviewer a manageable way to confirm that no required source is absent.
Next, rehearse the ordinary transitions relevant to the permitted workflow. A question, a response from another position, a brief pause, and a short follow-up can reveal more than six unrelated microphone announcements. Keep the exercise clearly fictional and focused on equipment. Do not use it to prescribe interpretation technique or to evaluate legal adequacy.