TIME IS RUNNING OUT FOR 2026 TAX WRITE-OFFS

Check the mask plug, socket and microphone requirements

A 3.5 mm plug is a physical size, not a complete electrical specification. Plugs can carry different arrangements of microphone, headphone and channel connections. A computer may have separate microphone and headphone sockets or a combined headset socket. Confirm the exact connection rather than treating every small round socket as an interchangeable audio port.

Martel's MM-18 is described as a single analog microphone path with one 3.5 mm plug. A compatible external USB microphone adapter may provide the required computer connection when the built-in input is unsuitable. The mask and adapter remain separate components, and their combination should be confirmed for the intended computer and application.

Some Martel masks provide two independent microphone outputs. Identify each path and its intended destination. Two plugs do not automatically mean that one stereo adapter will accept both independent feeds through an arbitrary splitter. The input wiring and power arrangements must be suitable, and the receiving software must handle the resulting channels as required. Ask for an approved connection plan instead of improvising one.

Microphone power terminology also matters. Small analog microphone inputs can provide low-voltage bias for compatible microphones. That is different from 48-volt phantom power used by some professional XLR microphones. Neither the USB connector's presence nor a passive plug adapter makes those arrangements interchangeable. Do not introduce an external power device unless the microphone and receiving equipment specifically require and support it.

Send Martel the exact model numbers and a clear description of the plugs and destinations when asking for help. If you already own equipment, identify it from its label or documentation rather than from an approximate memory of the name. A precise connection question is easier to answer than “will this sound card work?” and reduces the chance of ordering an accessory for a different microphone arrangement.

Identify the input Windows and your application actually use

After connecting an adapter, identify how it appears among the computer's audio devices. Names can vary with drivers and software versions. Record the name shown on your own machine rather than assuming it will match a screenshot from another workstation. Confirm that the selected microphone path changes as expected when you speak into the mask using a nonconfidential test passage.

Then check the receiving application's input selection. Some applications use a selected device directly; others follow a system default or a saved profile. Consult the current instructions for that application and verify the chosen route. A device can be available in Windows while a recording or speech application continues to use another microphone.

Make the test discriminate between sources. Speak into the mask in the normal working position, save a short sample and listen to it. If there is uncertainty about the selected input, use an approved test procedure that isolates the intended source. Avoid assuming that a moving meter proves the mask is active when a nearby webcam or laptop microphone could also hear the voice.

Check microphone access through the computer's normal privacy and organization settings. A blocked application may need an authorized setting change; that is different from a defective adapter. Do not broadly weaken computer protections to solve an input problem. Identify the specific application and follow the organization's approved support process when permissions are managed centrally.

Finally, rehearse normal reconnection. Restart the application as required, reconnect the tested equipment and verify the selected input again. Device selection can be affected by changes in the connected equipment or application configuration. Keep the beginning-of-work check short enough to perform consistently: correct device, appropriate level, saved sample and playback confirmation. A repeatable check is more dependable than assuming yesterday's selection still applies.

Set recording level with a saved speech sample

Recording level should suit the voice and input path. Too little useful level can make later listening difficult; excessive level can distort the signal. Begin with the recommended setup for the microphone and receiving application, then use normal working speech to evaluate the result. Do not choose a maximum setting merely because the microphone is small or the meter appears quiet.

Use a short passage that includes ordinary speech, names, numbers and a slightly stronger phrase representative of your work. Keep mask position consistent. Save the sample and listen through suitable headphones at a comfortable playback level. Separate microphone recording gain from headphone playback volume: turning headphones down does not repair an overloaded recording, and turning them up does not change what was captured.

Adjust one relevant input setting at a time and make a fresh sample. Label the files with the setting change if that helps comparison, using test material rather than confidential content. Listen for clear speech, harshness, unexpected noise and changes caused by movement. A comparison is more useful when the passage and working position remain similar between takes.

Do not turn bit depth or sample rate into a guarantee of recognition accuracy. Those specifications describe aspects of the digital audio format. The actual result also depends on microphone capture, level, pronunciation, application configuration and the task. Use the format supported and recommended for the intended workflow, and keep any recognition evaluation separate from the basic check that a clean voice sample was recorded.

When the arrangement works, record the settings and the circumstances of the test. Include the adapter, mask, computer connection and receiving application. If an update or replacement changes the result later, that record gives support a useful baseline. It also helps distinguish a new equipment problem from an accidental change in the recording path.

Run a fair comparison before declaring a winner

If both adapters are confirmed suitable for your mask and computer, compare them under similar conditions. Use the same microphone, working position, passage and receiving application where possible. Record the relevant settings for each configuration. A comparison made with different speaking levels or different microphone positions can tell you more about the test conditions than about the adapters.

Begin with a basic recording rather than a complicated production session. Include a few seconds of room sound, ordinary speech and a short pause between phrases. Keep the files labeled by configuration and date. Listen to both at comparable playback loudness, because a louder sample can seem clearer even when it contains more noise or distortion. Do not alter the original test files in a way that hides the differences you are trying to evaluate.

Use observable criteria. Could you identify the correct input consistently? Was the recorded speech intelligible? Did the connection remain stable during the representative exercise? Did ordinary cable movement create a problem? Could the operator reconnect the equipment and repeat the result? These questions describe practical suitability without inventing laboratory measurements.

If speech recognition is part of your work, perform a separate application-specific evaluation using its recommended setup and a suitable test passage. Record what changed between tests. A single recognition result cannot establish a universal accuracy rate for an adapter, and a change in training or software settings can affect the comparison. Keep conclusions limited to the conditions you actually checked.

Finish with a short decision note. For example: “Both configurations recorded usable test speech; we selected the arrangement that matched our existing supported setup and was easier for our operator to identify.” That is a defensible local decision. Claims that one adapter is always clearer, more accurate or more reliable require evidence beyond a small workstation comparison.

If the mask produces no recorded input

Trace a no-input problem in order. First confirm that the application is intended to capture the mask and that the microphone plug is in the adapter's microphone socket. Check the exact model and connection instructions. A plug in a listening output can fit without providing a microphone path, so the physical connection deserves attention before software settings are changed.

Next confirm that the computer recognizes the USB audio device. If it does not, inspect the approved USB connection and any necessary adapter or hub. Use the documented setup for the product and computer. Do not install unrelated driver packages or utility software merely because a search result promises to fix all audio devices. Keep changes specific to the identified equipment.

When the device is available, confirm the selected input in the receiving application and its applicable microphone-access settings. Check for mute or disabled-input controls in the relevant path. If a managed computer prevents the required access, document the application and symptom for authorized support. A permission problem and a missing hardware device are different branches of the diagnosis.

Make a fresh saved test after each meaningful correction. If input is still absent, use known-compatible components to isolate the problem where practical. Change one component at a time: the microphone, connection or adapter, according to the supported arrangement. Several simultaneous substitutions can produce a working result without revealing which part caused the failure.

Before contacting support, collect a concise description: mask and adapter models, computer and Windows version, application name, device name shown in settings, and the point where the signal disappears. Avoid sending confidential recordings when a nonconfidential sample can demonstrate the issue. A precise account of the path and checks already performed helps support address the problem without repeating unrelated setup steps.

If the recording is noisy, weak or distorted

Different symptoms suggest different checks. A weak voice may reflect distance or mask position, the selected input, insufficient recording level or an unsuitable connection. Harsh distortion may reflect excessive level or another problem in the capture path. Intermittent noise can be associated with movement, a connection or interference. Describe what you hear before deciding that the adapter itself is responsible.

Listen to a saved sample through a known working playback arrangement. This helps separate a capture problem from a headphone or playback problem. If the sample sounds normal on another suitable playback device, investigate the listening path before replacing the microphone adapter. Conversely, if the unwanted sound is present in the file wherever it is played, focus on how it was captured.

Use a short controlled sequence: speak normally without moving the equipment, pause, then make ordinary permitted movements one at a time. Do not bend or stress connectors to provoke a fault. Note whether the symptom follows cable movement, mask position, a particular USB arrangement or a level setting. These observations are more useful than a general statement that the sound is bad.

Check processing options deliberately. Automatic level changes, noise reduction or other effects may help a particular application, but they can also change the recorded character of speech. Follow the application's recommended baseline and compare one change at a time. Do not stack several effects and then assume a quieter pause means clearer words.

Preserve a clean test record of the accepted configuration and any remaining limitation. If a cable or accessory needs replacement, confirm the correct part rather than adding increasingly complex adapters around it. The goal is to restore a comprehensible signal path. An external USB sound card can be part of the solution, but the entire microphone-to-file chain determines the result.

Treat headphone listening and microphone monitoring separately

Both products provide a listening connection, but a headphone socket alone does not specify the monitoring behavior you need. Ask whether your intended arrangement provides direct microphone monitoring, software monitoring, ordinary playback or a selectable combination. Confirm the behavior for the exact adapter, software and settings rather than assuming that every USB sound card works like a studio interface.

Software monitoring can involve a delay between speaking and hearing the voice. The practical effect depends on the configuration and the task. Test it in the actual working arrangement if monitoring your own speech is required. Do not promise delay-free monitoring from the presence of a headphone socket or from a maximum audio-format specification.

Keep playback volume at a comfortable level during testing and distinguish it from recording gain. A loud listening level can make background noise conspicuous without showing that the recording input is set incorrectly. A quiet playback level can conceal distortion that becomes obvious later. Use a consistent listening arrangement when comparing saved samples.

Remote audio introduces another output decision. If the computer also plays meeting participants or instructions, identify which output receives that sound and how the operator will hear it. Avoid accidental routing to room speakers when a private headphone arrangement is intended. Verify the application output as well as the microphone input, since they may be selected independently.

Write the monitoring requirement in the buying brief. “I need headphones for later playback” is different from “I need to hear the captured microphone signal while speaking.” A precise requirement lets Martel explain whether the proposed adapter and software arrangement supplies the needed behavior. It also prevents an otherwise suitable input adapter from being judged against a monitoring feature that was never confirmed.

Stenomask USB Sound Cards: Andrea USB-SA vs. Sound Blaster PLAY! 3

By Martel Electronics · November 11, 2026

Match the adapter to the mask, computer and application, then verify the complete microphone path with a saved recording.

Choose a USB sound card around the complete Stenomask connection

A USB sound card gives a compatible analog Stenomask a microphone connection outside the computer's built-in audio circuitry. The adapter receives the microphone signal, converts it for the computer and appears as an audio device that your software can select. That is a useful role, but it is only one part of the voice-writing setup. The mask, connector wiring, computer, application and selected settings still have to work together.

Martel offers both the Andrea USB-SA and the Creative Sound Blaster PLAY! 3 for appropriate Windows-based microphone arrangements. The practical buying question is which adapter fits your exact equipment and working method. A familiar brand, higher advertised playback specification or matching plug diameter does not settle that question. Confirm the complete combination and verify a saved voice sample before relying on it.

This comparison is about the connection between an analog mask and the computer. It does not assume that a USB adapter improves every recording, cures every noise problem or produces a particular speech-recognition accuracy. It also does not treat microphone input and headphone output as the same capability. Those distinctions help prevent a purchase based on a feature that belongs to a different part of the signal path.

Begin by writing down the mask model, number of microphone plugs, computer model, Windows version and the application that will receive the voice. Add any headset, recorder or other audio device used in the same arrangement. If your computer has only a combined headset socket, say so. If it has only USB-C connections, include the exact connection arrangement you intend to use. These details give Martel a useful basis for compatibility advice.

The objective is a stable input you can identify and check at the beginning of work. The best adapter for that purpose is the one that fits the microphone electrically, works in the intended software environment and can be tested as part of your normal routine. Use the following sections to compare those requirements without confusing product specifications with measured results from your own workstation.

Understand the analog-to-USB path

An analog Stenomask supplies a microphone-level signal through its cable. A computer application uses a digital audio stream. Somewhere between the two, an input circuit and analog-to-digital conversion must provide that stream. A suitable external USB adapter supplies this stage through a USB connection, making the adapter part of the microphone input path rather than simply a change in plug shape.

This is different from a passive connector adapter. A passive adapter can rearrange compatible connections, but it does not automatically provide microphone amplification, conversion, appropriate microphone power or correct wiring. A cable that fits physically can still connect the wrong signal type. Identify the intended microphone input and confirm the mask's requirements before adding adapters to solve a mismatch.

The computer may list the external device separately from its internal microphone, webcam microphone, monitor audio and other connected devices. The operating system's selected default is useful to know, but an application may have its own device selection. Verify both where applicable. A working external adapter can be connected while the application continues listening to the laptop microphone.

Output takes the reverse route: digital audio from the computer is converted for headphones or speakers. An adapter can provide both input and output, but a successful headphone test does not prove that the microphone is being recorded. Check each direction separately. Hearing a test tone through headphones tells you about playback; recording and replaying your voice tells you about the capture path you selected.

Draw these paths with arrows. For input: mask microphone, adapter microphone jack, USB connection, selected application input, saved or processed result. For output: selected playback application, chosen output device, headphone or speaker connection. This simple drawing becomes especially useful when more than one audio device is attached. It gives troubleshooting a starting point and helps you avoid changing unrelated settings when only one direction has a problem.

Andrea USB-SA: a dedicated microphone and listening connection

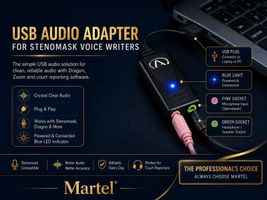
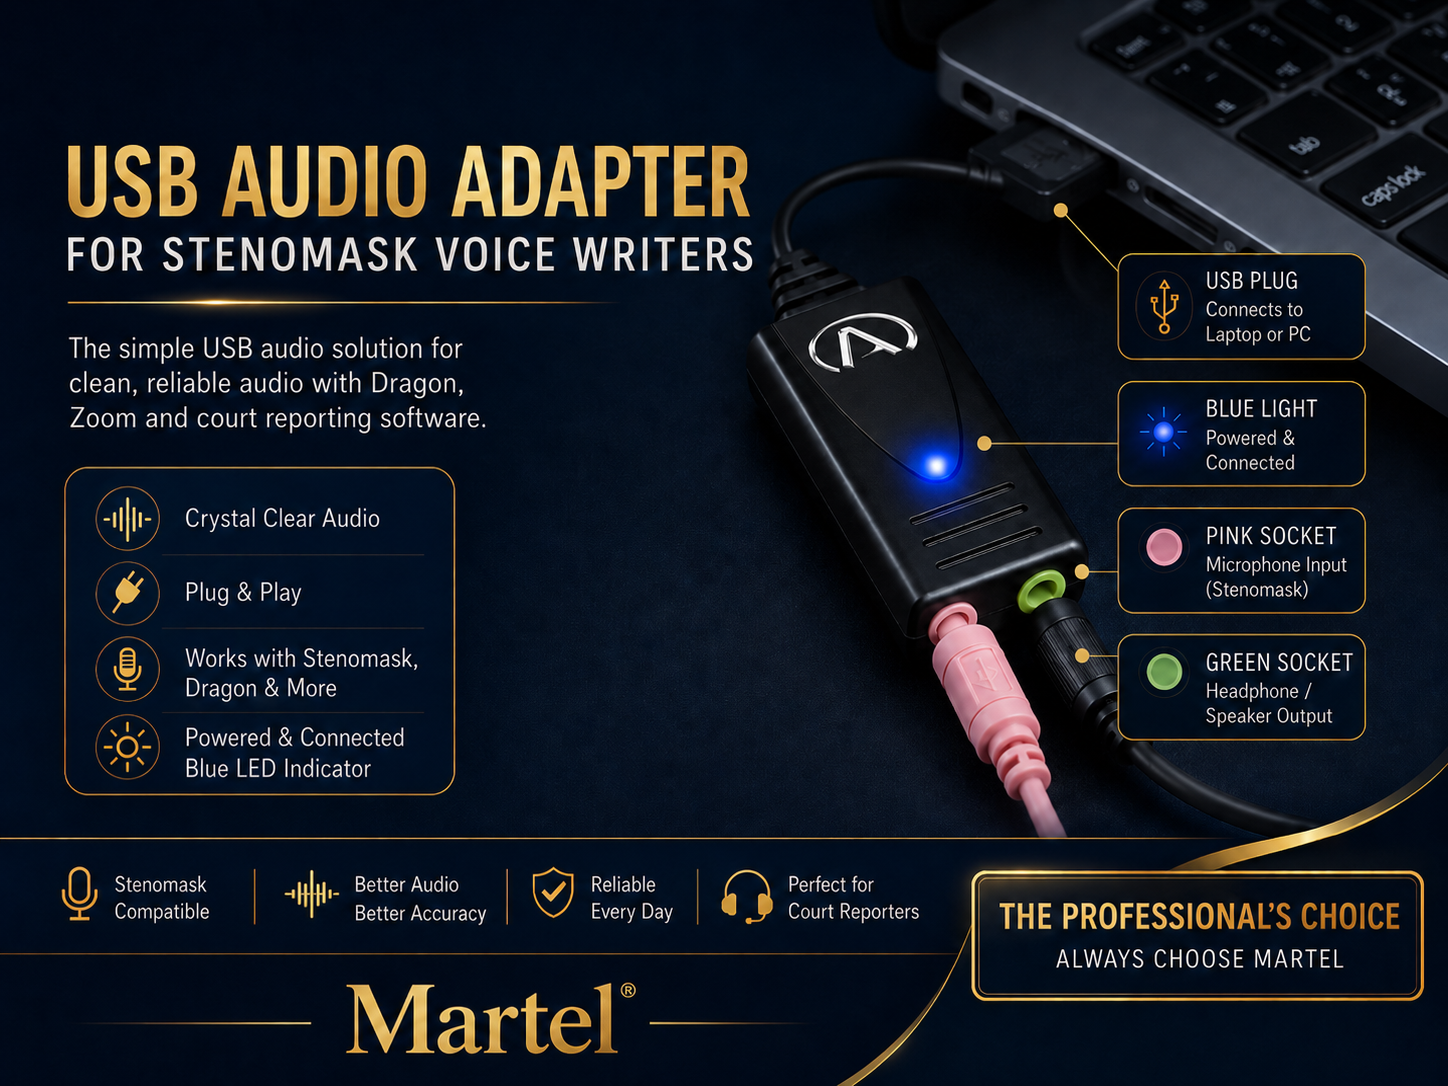
Andrea Stenomask USB-SA Premium Genuine External USB Microphone Adapter
Andrea Stenomask USB-SA Premium Genuine External USB Microphone Adapter. Product image from Martel’s store; see the listing for current package contents.

The Andrea USB-SA provides separate 3.5 mm microphone and speaker/headphone connections. Andrea identifies the microphone connection in pink and the output in green. The manufacturer's specification sheet describes stereo microphone input and stereo output, USB power and 16-bit conversion. Those details describe the adapter; they do not establish that every connected mask supplies two independent microphone feeds.

For a Martel Stenomask setup, begin with the compatible mask plug in the microphone input and the USB connection to the computer. If headphones are used through the adapter, connect them to the output intended for listening. Confirm the input and output device names shown by Windows and by the receiving application. Keep those names in the setup record so a later operator knows what should be selected.

Andrea's USB-SA documentation is useful when confirming specifications or distinguishing it from related adapters. The similar USB-MA name does not describe the same connection set. Order the exact model needed for your workflow, and keep its identification with the equipment. A replacement should be checked against the working configuration rather than chosen solely because its case or brand looks familiar.

An external input may help when the built-in computer connection is unsuitable or noisy, but diagnose the actual symptom. Noise can also originate from a cable, microphone, excessive gain, physical handling or another component. A USB adapter is not proof that those causes have disappeared. Compare short recordings under controlled conditions and listen to the saved files before describing the result as an improvement.

Use the Andrea USB-SA support information and manufacturer specification sheet to check the exact product details. Then ask Martel to confirm the mask-and-computer arrangement you intend to buy. A documented compatible setup is more useful than selecting an adapter from one specification in isolation.

Sound Blaster PLAY! 3: separate capture and playback specifications

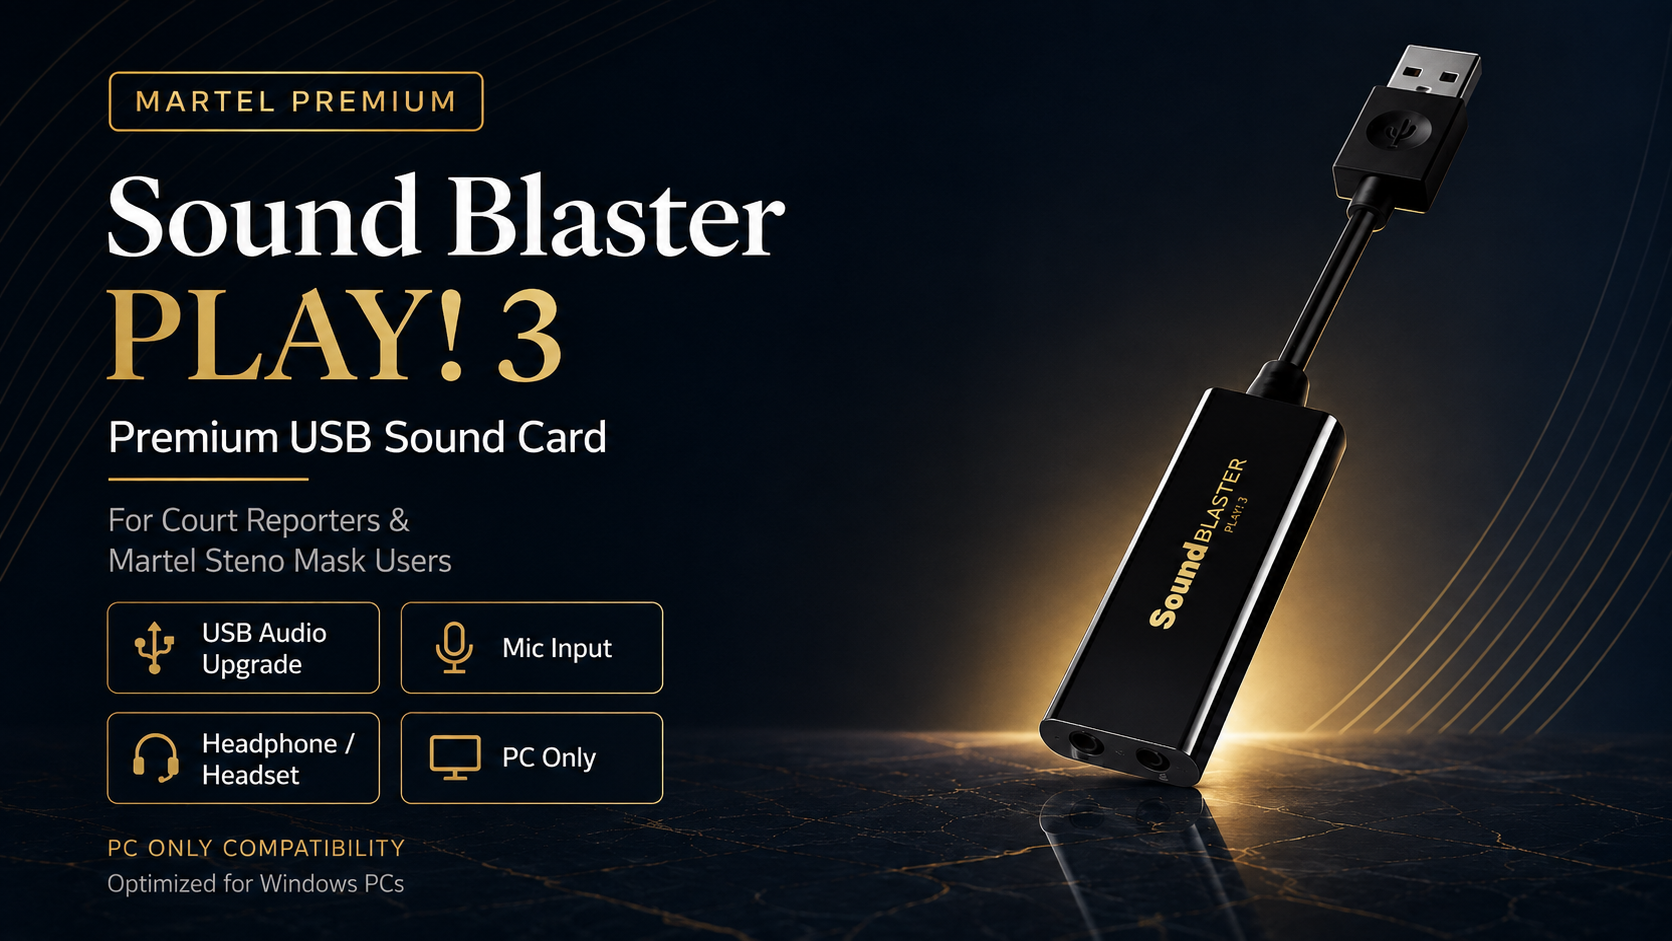
Sound Blaster PLAY 3 Premium Genuine External USB Microphone Adapter
Sound Blaster PLAY 3 Premium Genuine External USB Microphone Adapter. Product image from Martel’s store; see the listing for current package contents.

The Sound Blaster PLAY! 3 has a dedicated 3.5 mm microphone connection and a headphone/headset connection. Creative lists microphone recording up to 24-bit/48 kHz and playback up to 24-bit/96 kHz. These are different specifications for different directions. The higher playback figure should not be described as the microphone recording rate.

Martel offers this adapter for Windows PC microphone and Stenomask configurations. Match the analog mask connection to the microphone input and confirm the complete setup with Martel. The presence of a four-pole headphone/headset connection does not mean every three-pole microphone plug can be placed into either socket interchangeably. Use the port intended for the signal and follow the product's connection guidance.

Creative provides product and support information for the adapter and its software. Check the current supported environment and any installation requirement for the functions you need. An organization-managed computer may require authorized assistance with software installation. Resolve that requirement in advance so the arrival of a small USB accessory does not become an unexpected workstation setup project.

Audio processing options should be considered in relation to the task. A feature intended to change entertainment playback is not automatically a microphone improvement. Likewise, a microphone effect can alter the signal reaching speech software. Begin with the application's recommended configuration and a recorded baseline. Change a relevant option only for a stated reason, then compare the result rather than assuming more processing is always better.

Consult the Creative PLAY! 3 product information and Creative connection guide for the manufacturer's details. For a buying decision, keep the focus on compatible microphone capture, predictable selection and repeatable operation. Maximum playback resolution is not a substitute for those checks in a voice-writing workflow.

Compare the adapters using the questions that affect work

QuestionAndrea USB-SASound Blaster PLAY! 3
How does the computer connect?USB connectionUSB connection
Where does a compatible microphone connect?Dedicated pink 3.5 mm microphone inputDedicated 3.5 mm microphone input
Is listening output provided?Separate green speaker/headphone outputSeparate headphone/headset connection
What should a Stenomask buyer verify?Mask wiring, input requirements, computer support and application selectionMask wiring, input requirements, computer support and application selection
What proves the arrangement works?A saved voice sample through the intended application and settingsA saved voice sample through the intended application and settings

The table intentionally keeps compatibility ahead of headline numbers. A specification describes a supported capability under stated conditions. It does not tell you whether a particular mask, adapter, USB arrangement and application will deliver the result you need. Keep a dated record of the tested combination and the source of any compatibility confirmation.

Ask about replacement availability, support and the exact supplied model when ordering. A working setup is easier to maintain when the owner can identify its components and reproduce its settings. If you intend to keep a spare, verify that spare through the same short recording exercise. An unopened replacement is inventory; a checked replacement is part of an operating plan.

Price can help distinguish suitable options after these requirements are resolved. Compare the actual current listings and any necessary connection accessories. Do not add a claimed performance advantage or estimated time saving unless you have evidence for that claim. For many buyers, a clear, supported and repeatable input path matters more than a theoretical capability the receiving application does not use.

Keep multiple audio devices understandable

A workstation may contain a mask adapter, a room microphone, headphones, a webcam and a meeting application at the same time. Each device can add an input or output choice. Give every device a defined role and record the selected names. A diagram that identifies “mask to speech application” and “meeting participants to headphones” is easier to check than a collection of unexplained default settings.

Do not assume that selecting an input in one application changes every other application. A meeting program and a recording program may each retain their own selection. Likewise, an application following a system default may behave differently after another device is connected. Test the combination you intend to run, including reconnection and startup order when those affect your setup.

When two independent microphone paths are required, verify them independently. A dual-output mask can feed different compatible destinations under an approved arrangement, but shared components still matter. Two applications on one computer do not become independent hardware merely because they display different windows. Describe the actual dependencies when planning continuity or backup.

Label physical connections where that makes daily setup easier. Use labels that describe the role, such as “mask input adapter,” rather than an ambiguous color reference alone. Keep cable slack and strain relief sensible, especially around a laptop that may be moved. A clear layout reduces accidental unplugging and makes a support conversation easier when something changes.

Before important work, confirm the complete route with a nonconfidential rehearsal. Verify the intended input, the intended listening output and any saved result required by the workflow. This is particularly useful after adding a webcam, changing a headset or replacing the computer. The adapter can remain perfectly functional while another device changes what an application selects.

Prepare an ordering brief that gets a precise answer

An effective ordering brief describes the equipment you have and the result you need. Include the mask's exact model and plug arrangement, the computer model, Windows version, available USB connections and the application receiving the microphone. If the application has a specific supported-device or audio-setting requirement, include that requirement rather than relying on a general compatibility claim.

InformationExample of a useful description
Mask pathOne analog 3.5 mm microphone output to the Windows computer
Computer connectionThe exact available USB port and any proposed connection accessory
Receiving applicationName and version, with its microphone setup requirements
Listening requirementLater playback, remote participant audio, or a specifically required monitoring path
Existing symptomBuilt-in input unavailable, unwanted noise in saved samples, or a new computer without the needed socket

Ask which exact adapter model Martel recommends for that arrangement and what additional items, if any, are required. Confirm what is included with the purchase and what must be supplied separately. Keep the answer with the quote so that a later substitution can be checked against the original requirement.

If you are replacing an adapter that already works, explain why. A lost device, damaged connector, changed computer and unresolved recording problem are different situations. Replacing like for like may be sensible in one case, while another requires checking the rest of the signal path. Give support the useful facts without assuming the desired replacement is automatically the diagnosis.

For a spare, request the same compatibility confirmation and test it on arrival. Store it with a clear identification and the relevant setup notes. The spare should be easy to distinguish from a headphone-only accessory or a different model. This small amount of preparation can save confusion when equipment has to be replaced under time pressure.

Maintain a known working audio baseline

Once the setup is accepted, preserve a concise record of it. Include model numbers, selected device names, relevant input settings, application version and the date of the last successful test. Keep a nonconfidential sample that demonstrates the expected result if your organization permits it. The record provides a reference when a later change produces an unfamiliar symptom.

Update the record when a meaningful component changes. A replacement computer, different USB connection, driver update or application change can affect the path even when the mask is unchanged. Retest the parts affected by the change. There is no need to invent a complicated ritual, but a saved sample and selection check are useful after changes that influence recording.

Handle the adapter and connections according to their instructions. Avoid using the USB plug or microphone cable as a handle for moving equipment. Pack the small device where connectors are protected and the correct accessories remain together. Do not apply liquids or cleaning chemicals to electronic connections unless the manufacturer specifically instructs that procedure.

Keep troubleshooting changes reversible and documented. If a support session adjusts a setting, record the accepted result and why it was changed. Avoid retaining a collection of experimental settings without knowing which ones are necessary. A simple, understood configuration is easier to restore than a successful arrangement assembled through unexplained trial and error.

Review the setup when your work changes. Adding remote meetings, a second recording destination or a new speech application may introduce requirements the original purchase did not address. The existing adapter may still be suitable, but verify that conclusion against the new path. A useful baseline supports change; it does not imply that one configuration is appropriate for every future task.

Give a replacement adapter a clear handoff card

A small adapter is easy to replace physically and easy to misunderstand operationally. Put a short handoff card with a tested spare. Include its model, the compatible mask model, the microphone socket, the expected computer device name and the application whose input must be checked. Include the date of the last successful saved-sample test.

Describe the replacement procedure in the order the operator will perform it. Finish the current work according to the applicable process, connect the approved replacement, select the intended input and make a nonconfidential test recording. Reopen that recording and confirm the result before resuming work that depends on it. If the replacement produces a different device name, update the operating record rather than leaving an unexplained discrepancy.

The card should also say what to do when the test fails: stop troubleshooting by random substitution and contact the designated support person with the observed symptom. It should not contain passwords, sensitive recordings or assumptions about unattended recovery. This makes the spare useful to another operator while keeping the actual checks visible.

Stenomask USB sound card questions

Will either adapter automatically make recognition more accurate?

No specific accuracy improvement follows from the adapter name alone. A suitable input can provide the connection and capture quality the application needs, but recognition also depends on the microphone, speaking technique, settings and software. Evaluate a confirmed compatible arrangement with your own nonconfidential test material and keep conclusions limited to that test.

Does a higher playback specification mean better microphone recording?

Not necessarily. Playback and microphone recording are separate directions with separate specifications. Creative's published maximum playback and microphone recording figures differ. Choose around the receiving application's supported requirements and the quality of the saved speech sample, rather than assuming the largest number applies to every function.

Can I use the headphone socket as a microphone input?

Use the connection specified for the microphone and its wiring. A listening output is not automatically an input, and combined headset connections require the correct arrangement. Confirm the exact mask, adapter and port rather than relying on plug size or the fact that a connector fits.

Does a dual-output mask require two USB adapters?

That depends on the intended destinations and their compatible inputs. Do not assume a particular adapter count or use an arbitrary splitter. Describe both microphone paths to Martel and confirm the complete connection plan, including how each destination receives and uses its signal.

Which adapter should I order first?

Order the model confirmed for your mask, computer and application. Andrea USB-SA and Sound Blaster PLAY! 3 both deserve consideration for appropriate setups, but a verified connection plan is the deciding factor. Record and replay a sample after installation, keep the accepted settings, and check the selected input before work.

More questions about Stenomask adapter setup

Is the Andrea USB-SA a microphone?

It is an audio adapter used with a compatible analog microphone and headphones. The mask or microphone supplies the sound signal. Confirm the complete connection and application selection; buying an adapter does not include a Stenomask unless the listing expressly says so.

Is Sound Blaster PLAY! 3 a substitute for the mask?

No. It provides supported audio input and output functions for the connected equipment. The mask, adapter and computer application have separate roles. Compare the adapter's microphone input requirements with the exact mask connection before choosing it.

Why are the microphone and headphone sockets different?

They serve opposite signal directions. The microphone input receives the compatible source, while the headphone output drives listening equipment. Follow the adapter's markings and instructions instead of selecting a socket solely because the plug physically fits.

What does low-voltage microphone bias mean?

It is a supply arrangement used by compatible microphone circuitry. It is different from balanced XLR phantom power. Confirm the mask and adapter combination with the supplier; a connector adapter alone does not establish electrical compatibility.

Can I use a laptop's combined headset socket instead?

That depends on the exact laptop socket, wiring and mask requirements. A combined headset connector is not automatically equivalent to a dedicated microphone input. Describe the existing equipment and obtain a confirmed connection recommendation before comparing results.

Why does Windows show more than one microphone?

The laptop, webcam and connected adapters may each expose an input. Select the intended device in the application and verify it with a saved sample. A familiar device name is helpful, but the resulting recording is the practical check.

Does changing the adapter require another sample recording?

Yes. The input device name, levels or application settings may differ. Repeat a consistent spoken passage and check the saved result through the working program. Document the accepted combination rather than assuming the previous configuration transferred unchanged.

How should I compare two adapters fairly?

Keep the mask, passage, speaking method and application conditions as consistent as practical. Identify any setting changes. Listen to saved samples and assess the workflow you actually use; unrelated playback specifications do not settle microphone performance.

Can clipping be repaired by lowering headphone volume?

No. Lower playback volume makes the damaged recording quieter without restoring the lost waveform detail. Review the input path and level settings, then create a new sample. Distinguish captured distortion from uncomfortable listening volume.

Can an adapter fix a poorly seated foam insert?

An adapter cannot correct every physical mask issue. Check fit and accessories according to the mask's instructions, then evaluate the electrical path. Changing several components simultaneously can hide the cause of the original problem.

Should two mask outputs be joined with a simple Y-cable?

Do not assume that is an approved arrangement. Identify what each output is intended to feed and confirm the supported connections. A dual-output mask can serve distinct paths; joining them may defeat the purpose or create an unsuitable connection.

Can I connect the adapter through my docking station?

Test the actual dock, computer, mask and software together. Verify device selection after reconnecting the dock and make a saved sample. Compatibility of another USB accessory does not prove that the complete audio workflow is ready.

What should I record when asking for support?

Provide the adapter and mask models, operating system, application version, connection path and a clear symptom. Use a nonconfidential sample if sound is needed to demonstrate the issue. State whether the problem occurs during recording, recognition or playback.

Should I keep a spare adapter configured?

A spare is more useful after its device selection and supported settings have been checked on the working computer. Label it and retain a successful practice sample. Reconfirm the arrangement after changes that affect the audio workflow.

What belongs in the final adapter order?

Identify the exact adapter, mask connection, required cables and any setup assistance. Separate included hardware from software licenses and other accessories. This makes the purchase reflect the complete usable path instead of one component's headline specification.
Martel Electronics | 3 hours ago

Stenomask USB Sound Cards: Andrea USB-SA vs. Sound Blaster PLAY! 3

Match the adapter to the mask, computer and application, then verify the complete microphone path with a saved recording.

First paragraph

Use this space to develop your idea and move the story forward. Add details, examples, or observations that make your point clearer. Keep each paragraph focused around one idea. Add more sections to build your story step by step.

Martel Electronics

More Posts

How Quiet Is a Stenomask? Sound Leakage and Fit EvaluationHow Quiet Is a Stenomask? Sound Leakage and Fit Evaluation
How Quiet Is a Stenomask? Sound Leakage and Fit Evaluation

An original guide to checking what listeners and outside microphones hear. Includes room planning, fit observations, measurement limits, and practical worksheets without invented sound-reduction claims.

Stenomask Accuracy: How to Measure Speech Recognition ResultsStenomask Accuracy: How to Measure Speech Recognition Results
Stenomask Accuracy: How to Measure Speech Recognition Results

Learn how to separate microphone capture, speech-recognition errors, and correction work. Includes an original evaluation process, practice text, and worksheets for comparing complete stenomask setups.

Zoom Foot Pedal: Hands-Free Mute and Unmute for Court ReportersZoom Foot Pedal: Hands-Free Mute and Unmute for Court Reporters
Zoom Foot Pedal: Hands-Free Mute and Unmute for Court Reporters

Connect the pedal to the Windows computer running Zoom and rehearse a complete mute, unmute and recording check before your next remote deposition.

Marantz PMD661 and PMD620 Replacements for Court ReportersMarantz PMD661 and PMD620 Replacements for Court Reporters
Marantz PMD661 and PMD620 Replacements for Court Reporters

Use your existing recorder setup to decide which connections, recording functions and review controls a replacement has to support.

Phantom Power for Courtroom Microphones: A Practical 48V Setup GuidePhantom Power for Courtroom Microphones: A Practical 48V Setup Guide
Phantom Power for Courtroom Microphones: A Practical 48V Setup Guide

Identify which device powers each microphone, confirm the supported connection, and verify the complete recording path before work.

Microphone Splitter vs. Mixer: Plan the Right Court-Reporting Audio PathMicrophone Splitter vs. Mixer: Plan the Right Court-Reporting Audio Path
Microphone Splitter vs. Mixer: Plan the Right Court-Reporting Audio Path

Identify the sources, destinations and channel separation you need before choosing a splitter, mixer or USB interface.

DM4 vs. DM246: Choosing a Four-Channel Courtroom Recording SystemDM4 vs. DM246: Choosing a Four-Channel Courtroom Recording System
DM4 vs. DM246: Choosing a Four-Channel Courtroom Recording System

Choose the recording workflow that fits your team, then compare complete microphone packages and verify the saved files through transcription review.

Digital Court Reporting Equipment: A Complete Recording and Transcription SetupDigital Court Reporting Equipment: A Complete Recording and Transcription Setup
Digital Court Reporting Equipment: A Complete Recording and Transcription Setup

Build a complete recording-to-transcription workflow. Compare equipment roles, map the room, and verify the saved result before accepting a system.

Martel Video Transcriber Kit or Software Only: Choose the Right SetupMartel Video Transcriber Kit or Software Only: Choose the Right Setup
Martel Video Transcriber Kit or Software Only: Choose the Right Setup

Compare Martel SKU 1515 with pedal and headset against SKU 1527 software with two licenses. Choose the setup that matches the equipment you already own.