TIME IS RUNNING OUT FOR 2026 TAX WRITE-OFFS

Martel Electronics | 18 hours ago

Monitoring Courtroom Audio: Verify What Reaches the Saved Recording

Understand what live monitoring verifies, map each audio source, and check the saved recording. Includes practical rehearsals and 30 questions and answers.

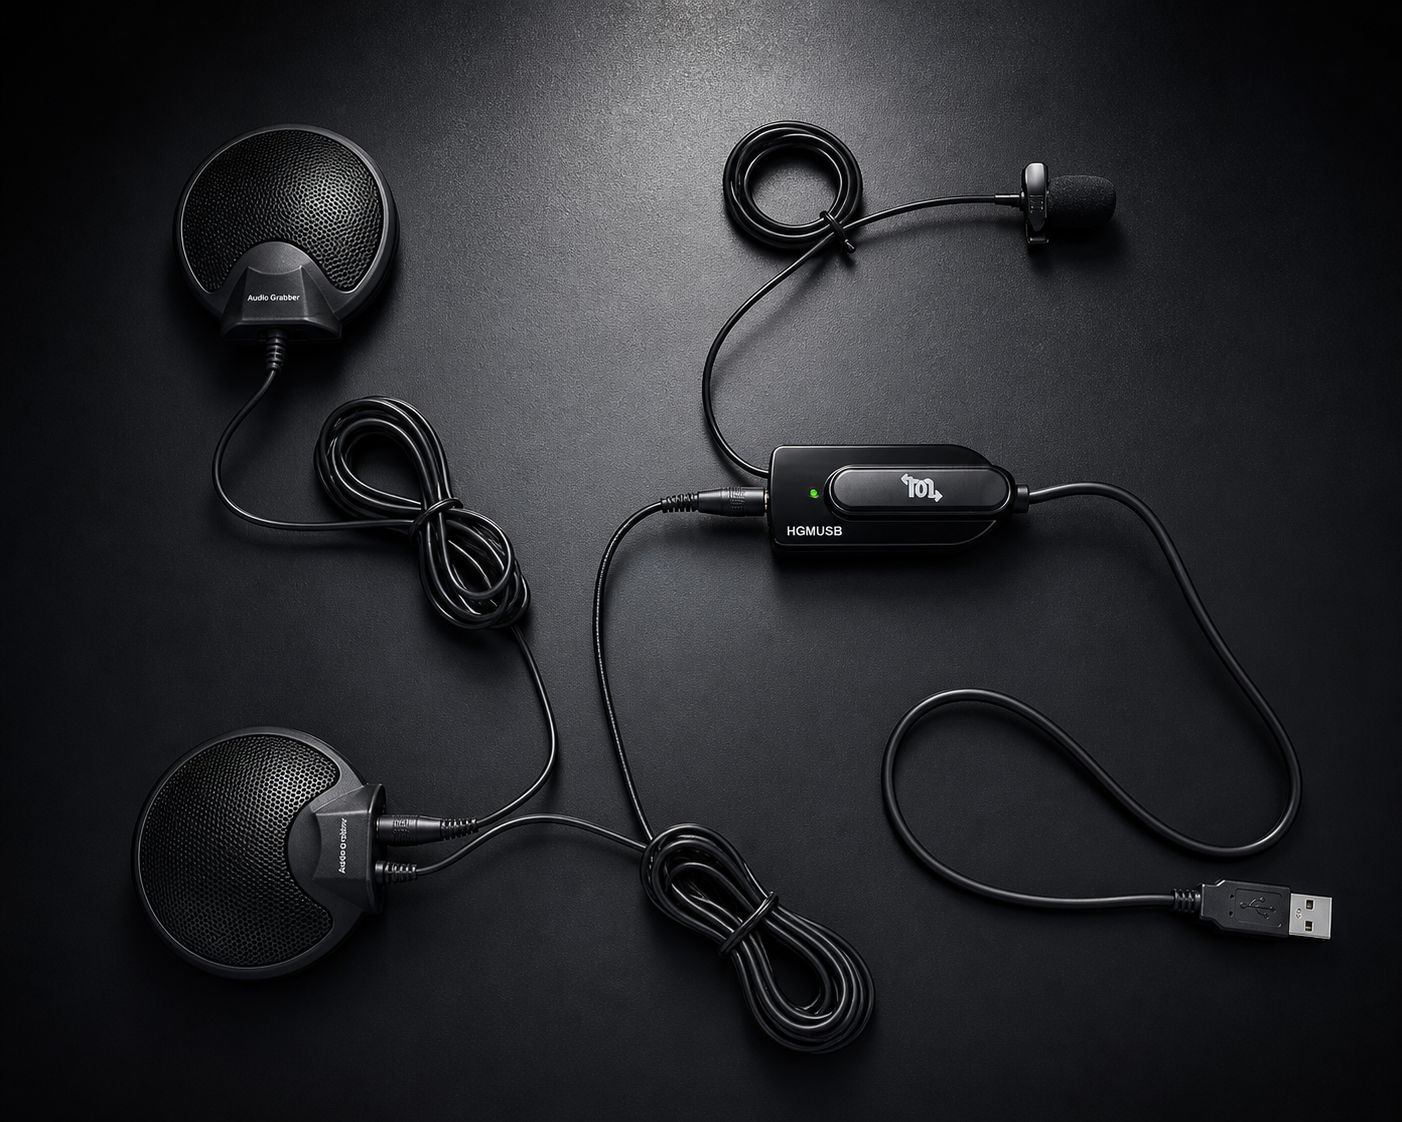
Martel HGMUSB3 package with two round microphones, a smaller microphone, USB module, and connecting cables
Martel HGMUSB3 product image. Verify the supported monitoring connection and the receiving application's saved output separately.
In this guide

Hearing a voice through headphones is useful information. It tells you that a listening path is carrying sound. It does not, by itself, tell you which input a recording application selected, whether recording started, where the file was saved, or whether every required source is present in that file. A dependable audio workflow checks the live listening path and the saved recording as separate parts of the same job.

This guide explains how to make those checks understandable. You will map the equipment, identify the listening point, record a short source-identification passage, and compare playback with what you expected to capture. You will also learn how to describe a mismatch clearly enough to troubleshoot it without changing unrelated settings. The examples are practice scenarios, not measurements or reports from an actual proceeding.

Martel's HGMUSB3 three-microphone USB package is described as supporting live headphone monitoring. The Court Reporter 5000 recorder package provides a dedicated recorder workflow to review around your backup requirements. These are different equipment arrangements. Confirm the exact connections and instructions for your version instead of assuming that every headphone socket provides the same signal.

Begin with three separate questions

Ask what you are hearing now, what the recording device is receiving, and what the saved file contains. Those questions may have matching answers in a correctly configured system, but they should not be collapsed into one assumption. The distinction is particularly useful when a computer has several microphones, playback devices, and applications available at the same time.

Write the answers in ordinary words. For example, "I am listening through headphones connected to the microphone system; the recording application is set to the external USB input; I have played the new file and heard the test passage." That statement identifies three observations. It is more complete than saying the microphone is working.

Keep the check tied to the actual workflow. A test in one application establishes what happened there. If the assignment uses another application or a separate recorder, verify that path too. You can use a simple test to isolate a problem, but successful audio in the simpler program does not automatically establish that the final recording arrangement is ready.

Draw the path from each source to its destination

List the sound sources that matter: a witness, counsel, an interpreter, a remote participant, or another permitted source for the assignment. Then identify the microphone or supported input that receives each one. Continue through the interface or controller, the recording device, and the saved file. Keep the headphone listening point on the same drawing.

The drawing can be a few labeled lines on paper. You do not need an engineering diagram. You do need to distinguish a physical microphone, a computer input selection, a monitoring output, and a file destination. When several sources share a combined recording, say so. When separate tracks are required, verify that capability in the actual recorder and software.

Use the drawing to identify unanswered questions before changing controls. If nobody knows what a particular output carries, consult the product instructions or ask Martel about the exact model. Do not fill the gap by assuming that a connector's shape determines its purpose. A useful path map records supported functions and observed behavior, with uncertainties left visible until resolved.

Identify the listening point precisely

Write where the headphones connect and which control changes their listening level. This could be a supported monitor output on the equipment, a recorder's headphone output, or a computer playback device. The location matters because it helps explain what your listening observation does and does not verify.

Avoid using the phrase "I can hear the recording" when you have only listened live. Say "I can hear the live source" until you have stopped and played the saved file. That small wording change prevents an important assumption from disappearing during a handoff or support conversation. It also helps a second operator repeat the same check.

If the documentation does not clearly identify the monitored path, treat it as an open question. You can still perform a saved-file test, but you should not claim that a monitor output proves the recording application is capturing correctly. Keep your listening level comfortable, and make any supported monitoring changes during a practice session rather than experimenting during a proceeding.

Confirm the input in the actual recording application

A connected USB microphone may appear alongside a built-in microphone, a camera microphone, or another available input. Check the selected device in the application that will make the recording. A system-level input selection can be useful context, but applications may expose their own choices. Use the supported settings for the program and version you have.

Record a short identification passage from the intended speaking position. Announce a neutral label such as "external microphone practice, position A." Stop and play the file. If the result is unclear or seems to come from another location, investigate the selected input and physical arrangement before making level changes.

Do not confirm the source by tapping or obstructing equipment during an important recording. Use ordinary speech and a practice file. If you need to compare two available inputs, make separate labeled trials with the same passage. This creates a record of the selection and result without relying on a brief meter movement or a guess based on which device is plugged in.

Establish a saved-file reference before adding complexity

Begin with the minimum supported arrangement needed to capture one local voice. Select the intended input, start a new practice recording, speak a short passage, stop, and locate the saved item. Play it back through a known listening device. Confirm the beginning, the spoken details, and the ending.

Use original, non-confidential practice content. For example: "This is the local microphone reference. Avery placed fourteen blue folders beside the door. The next appointment starts at ten twenty." Include a pause and a short response. The exact wording is less important than using it consistently and knowing what should be present in playback.

Keep this first file unchanged. It becomes the reference when you add another microphone position, open another application, or include a remote source. If a later trial fails, the earlier success helps narrow the change that deserves attention. It does not prove that the new arrangement is correct, but it gives the investigation a concrete starting point.

Check the beginning and ending of the file

The middle of a practice passage can sound good while the first words or final response are missing. Listen from the actual beginning of the saved recording, not only from a convenient point after speech has started. Include a clear spoken opening label and a final sentence so you know what the complete sample should contain.

Allow the equipment and application to follow their normal supported start and stop process. Do not assume that a button press and audible speech occur at exactly the same moment in every arrangement. Your practice check should establish the sequence you need to use with the specific setup, without inventing a universal delay or timing allowance.

If a sample is incomplete, describe which part is missing and what the display showed. Check whether recording had started, whether the intended input was active, and whether you opened the correct saved item. Preserve the practice file while investigating. A precise description of a missing opening is more useful than a general report that the microphone sometimes skips words.

Treat the recording meter as one observation

A moving meter can help show that a device or application is receiving some signal. It is not a substitute for listening to the saved file. A meter alone does not tell you whether the correct speaker is understandable, whether another source is absent, or whether the recording has been saved where you expect.

Use the display alongside an ordinary speech trial. Note which meter belongs to which application or device. In a computer workflow, a system input display and an application's recording display may be different observations. Keep their roles clear in your notes rather than describing every moving bar as evidence of the final recording.

If the display moves but playback is silent, investigate the full path calmly. Confirm the selected file, playback device, listening level, and recorded source. If the display does not move, confirm the intended input and supported connection before changing several settings. The aim is to locate the point where the expected observation disappears.

Separate listening level from recording level

A headphone volume control normally concerns what you hear at that listening point, while recording controls concern the captured signal. The exact controls and interactions depend on the equipment. Consult the instructions for your model and avoid assuming that turning the headphones up makes the saved recording stronger.

When a voice sounds quiet, first identify which part of the path you are evaluating. Play a known practice file through the same listening device. If that reference is comfortable while the new recording is difficult, the capture arrangement deserves attention. If both are unexpectedly quiet, the playback path may also need checking. This comparison helps organize the investigation without declaring a diagnosis prematurely.

Make supported changes one at a time and label the resulting samples. After a recording-level adjustment, check both the quiet participant and a stronger nearby voice. After a listening-level adjustment, remember that the original saved audio has not necessarily changed. Keeping these actions separate prevents a comfortable headphone experience from being mistaken for a corrected capture problem.

Verify each microphone position, then the complete arrangement

With a supported multiple-microphone system, identify the pickup locations before testing. Ask a practice speaker to announce a position label and read a short sentence at each required location. Play the saved sequence and confirm that every position is represented. This can reveal a missing or poorly placed source without relying on a general group conversation.

Then test ordinary turn-taking with the intended arrangement active. Several microphones can receive some of the same speech and room sound. Listen to the combined result or the supported individual tracks, according to the actual system. Do not infer the number of saved channels from the number of microphones on the table.

For the HGMUSB3 package, discuss the supported USB and monitoring arrangement using the current product information and your receiving application. The product's three pickup positions and its live monitoring capability answer different questions. Your saved-file trial must still establish what the application captured and how the required voices will be reviewed later.

Add remote voices as a separate verification step

A remote participant may be heard through the computer's playback path while local speech enters through an external microphone. Hearing both during a meeting does not establish that your chosen recording path contains both. Identify the supported route for each source and verify it in a practice session with the permissions appropriate to the work.

Ask the local and remote practice participants to use different neutral labels. Record a short exchange, stop, and play the saved result. Check the local opening, the remote response, and a second local reply. This sequence makes a missing side easier to recognize than an unstructured conversation in which memory supplies the absent part.

Avoid solving an uncertain route by simply increasing loudspeaker volume or activating several unverified listening features. That can change the room sound without answering the recording question. Use the supported application and equipment workflow, then confirm the saved result. If the required combination is not supported, describe the requirement to Martel before assuming an accessory will provide it.

Investigate doubled or delayed listening carefully

If a voice seems doubled or delayed through headphones, note whether the saved file has the same problem. The live listening arrangement may include more than one audible path, but you should verify the actual setup before assigning a cause. Identify every active monitoring or playback route that the equipment and software expose.

Return to the simplest previously verified practice arrangement where that is supported. Add the additional application or listening route one step at a time, making a short sample after each change. Keep the observations separate: what the operator heard live and what the saved file contained. They may lead to different next steps.

Do not use an uncomfortable delayed listening experience as a reason to disable unrelated audio or security settings broadly. Follow the relevant product and application instructions. If the behavior remains unclear, provide support with the path map, device selections, and the point at which the additional sound appeared. That record is more useful than a list of random settings already changed.

Verify the recorder as an independent workflow

A dedicated recorder can have its own input, recording mode, file storage, and playback controls. Check those elements directly. Do not assume a recorder is creating a usable backup simply because a nearby computer is recording successfully or because headphones connected elsewhere carry the conversation.

For a Court Reporter 5000 arrangement, review the current package and instructions for your version. Make a practice file using the supported input and recording process, then confirm playback on the recorder or through the supported review workflow. If file transfer is part of your work, verify a transferred practice copy as a separate step.

Describe the relationship between the recorder and the other equipment accurately. A second device may still share a microphone, power source, or other dependency. That does not make it useless, but it affects what kind of interruption it can help address. A meaningful backup plan identifies those dependencies instead of relying only on the fact that two devices are present.

Confirm where the recording is stored

Know how to locate the new recording using the application's normal saved-file or library view. Record the relevant folder or item name in your setup notes. If a program manages recordings inside a project, identify the project and supported export process. Do not move or rename application-managed files outside the supported workflow merely to make them look more organized.

After the short practice trial, open the saved item deliberately rather than relying on a recently played file. Confirm the identifying phrase and approximate duration. This helps avoid mistaking yesterday's successful sample for today's new recording, especially when several files have similar names or the application reopens the last item automatically.

If a separate review computer or recorder is involved, test the transfer with a non-confidential sample. Keep the original intact and use the supported copy or export method. Successful playback on the capture device is useful evidence; successful playback of the intended review copy answers the next part of the workflow.

Keep source identity separate from speaker identity

A label such as "microphone position B" describes a tested pickup location. It does not prove that every later voice on that recording belongs to the person who occupied that seat during practice. People move, microphones receive nearby sound, and several voices may share one recording path.

Use the source-identification exercise to verify equipment routing and coverage. Continue to follow the professional methods required for identifying speakers and preparing the record. Do not present a microphone count, channel label, or saved filename as an automatic guarantee of who spoke a particular phrase.

This distinction also matters when discussing equipment with Martel. Explain whether you need several physical pickup points, independently saved tracks, or a particular review control. Those are different requirements. A clear description helps avoid selecting a package based on a feature name that sounds related but does not establish the function your work actually needs.

Make a short mismatch record

When live listening and saved playback disagree, record five things: the expected source, where the headphones connected, the selected recording input, the saved item you opened, and the specific difference. A useful example is "remote practice response audible live, absent from the new file; local response present." This is a sample description, not a reported product failure.

Add what changed since the last successful test. A newly connected device, a different application selection, or a revised meeting arrangement can be relevant. Avoid changing several controls before writing down the original condition. The first clear observation is often the most useful part of the support request.

Include a suitable practice sample and screenshots of relevant device selections when appropriate. Keep unrelated personal or proceeding information out of the materials. Use the Martel contact page to explain the configuration and goal. The record should help someone understand the path without needing to reconstruct it from a vague statement that monitoring worked but recording did not.

Use a handoff that another operator can verify

A handoff should name the microphone arrangement, the receiving application or recorder, the selected input, the listening connection, and the location of the practice file. Include the source labels used in that file. The next operator can then repeat a short reference check instead of relying on your memory of what sounded correct.

Keep the handoff concise enough to use at the equipment. A photograph of connections and a short written path can be more useful than pages of general instructions. Identify any open question, such as a remote source that has not yet been verified. Do not mark the entire arrangement ready when an essential path remains untested.

Repeat the relevant check after a material change. That might include a different microphone, USB connection, recorder input, application, or meeting arrangement. The purpose is not to create unnecessary work around a stable system. It is to make sure that the evidence supporting the setup still matches the equipment and workflow now being used.

A practical rehearsal from connection to playback

Start with the supported equipment connected and the actual recording application open. Write the selected input and headphone connection on the practice note. Record the opening label and one local passage, stop, and play the new file. Confirm the words and ending before adding more sources.

Next, include each additional pickup position with a different spoken label. If remote audio is part of the supported workflow, add a short local-and-remote exchange. Verify the saved result after each meaningful addition. Keep the files distinct so you can return to the last successful arrangement if a new step introduces uncertainty.

Finish by locating the sample through the normal review process and confirming any required transfer. Document the equipment, selections, and limitations. This rehearsal does not certify a proceeding or guarantee every future recording. It gives you concrete evidence that the described configuration captured and played the practice material through the path you intend to use.

Follow one spoken marker from headphones to the transferred file

Have a helper speak an invented session name followed by two numbers, for example “Cedar session, fourteen, forty.” Listen through the monitoring connection you actually plan to use. Stop the recording through the normal control and play that same phrase at the recording device. If the job includes transferring a file, open the transferred copy at the review workstation and listen for Cedar and both numbers again. Use two columns in your notes, one for the listening point and one for what you heard there. A row that says only “audio good” leaves the next operator guessing which stage was checked.

Suppose Cedar is clear in the headphones and on the recorder, but the workstation plays an older phrase. Look at which item was transferred, where the player opened it, and which version is selected before disturbing microphone placement. If the recorder itself lacks the last number, go back to the recording start and stop sequence before investigating the transfer. These branches give two operators a common reference while they look at different equipment.

30 questions and answers about monitoring and saved audio

1. Does hearing myself through headphones prove recording has started?

No. It proves that the listening path is carrying your voice at that moment. Confirm the recording state in the actual application or recorder, then stop and play a short saved sample. Identify the opening phrase and ending so you know you are checking the newly recorded item rather than another file or a live source.

2. What is the simplest useful monitoring check?

Record a clearly labeled practice sentence through the intended input, stop, locate the new saved item, and play it back. Note where the headphones connect and what application or recorder created the file. This short sequence checks more of the workflow than listening live or watching a meter alone, while keeping the investigation manageable.

3. Why can a computer record the wrong microphone?

A computer may offer several input devices, and the recording application can have its own selection. A connected external microphone is not proof that the application is using it. Check the selected device in the program you will use, make a source-identification sample, and verify the saved result before treating the arrangement as ready.

4. Should I check Windows settings or the recording program first?

Know the intended system input, then verify the selection in the actual recording application. The relevant controls depend on the supported software and version. Keep the check focused on the path that creates your file. A successful system-level meter response is useful context, but it does not replace the program's saved-recording test.

5. Is a headphone socket always a recording monitor output?

No universal assumption is safe. Identify the socket's function from the instructions for the exact equipment and configuration. It may provide a listening path whose relationship to the saved file needs verification. Write where the headphones connect, then use playback of a newly recorded sample to establish what the recording device actually saved.

6. Does turning up the headphones increase the recorded level?

Do not assume that it does. Listening controls and recording controls serve different roles, with exact behavior defined by the equipment. Identify which control you are changing and consult the supported instructions. After a capture adjustment, make another sample. After a listening adjustment, remember that the original file may be entirely unchanged.

7. Why listen to the first and last words?

An otherwise clear sample may be incomplete at its boundaries. Checking a known opening and ending helps confirm the start and stop sequence for your actual setup. If something is missing, record that observation and inspect the supported workflow. Do not infer a universal timing rule or hardware fault from one incomplete trial.

8. What does a moving recording meter prove?

It can indicate that a signal is reaching the point represented by that display. It does not establish every required source, speech intelligibility, successful saving, or correct later playback. Identify which device or application owns the meter and use it alongside a labeled saved-file test. Keep each observation's scope clear in your setup notes.

9. What if the meter moves but playback is silent?

Confirm that you opened the new file, selected the intended playback device, and used a comfortable listening level. Then review the recording source and supported connection. Change one element at a time and preserve the practice sample. The observation identifies a mismatch to investigate; it does not by itself establish which component caused it.

10. What if live monitoring sounds clear but the file is distorted?

Treat the live path and saved path as separate observations. Confirm the recording input and supported level controls, then make a new practice sample with normal and stronger speech. Keep the originals and note the control changes. If the relationship between the monitor and capture path is unclear, ask for model-specific guidance before assuming they are identical.

11. Can live sound be delayed while the file is fine?

The listening and recording experiences can differ, so check the saved sample rather than assuming the same issue exists in both. Identify active monitoring and playback paths in the supported arrangement. Return to a known practice configuration if appropriate, then add complexity one step at a time. Record what changed and where the delay was heard.

12. How do I check three microphone positions?

Give each position a label and record a short passage from each required location through the complete supported system. Play the saved sequence and confirm every label and sentence. Then test ordinary turn-taking. Keep microphone count separate from saved channel count, and evaluate the actual combined recording or supported tracks that your review workflow will use.

13. Does the HGMUSB3 package create three separate recorded tracks?

Do not infer that from the product's three microphones. The recording path and receiving software determine what is saved and available for review. Verify the exact configuration with current product instructions and a sample file. Describe separate-track requirements explicitly when discussing equipment, rather than relying on the number of physical pickup positions.

14. Why test the complete microphone arrangement after individual positions?

Individual passages help identify coverage or connection problems, while a complete trial shows the result with the intended arrangement active. Several pickups can receive overlapping speech and room sound. Listen to ordinary turn-taking in the actual saved output. A successful isolated source check is useful, but it does not answer every question about the combined workflow.

15. Does hearing a remote participant mean that voice is being recorded?

No. Remote playback and local microphone capture may use different paths. Identify the supported route for each and make a permitted practice recording with distinct local and remote phrases. Play the new file and verify both sides. Do not substitute loudspeaker volume for a clear understanding of how remote audio reaches the recording destination.

16. How should a remote practice exchange be labeled?

Martel Electronics

Use different neutral source labels and a short sequence that includes local speech, a remote response, and another local reply. Keep the wording non-confidential. This makes an absent side easier to identify during playback and supports a precise support description. Record the application and device selections used for that particular trial.

17. Should I activate every available monitoring option?

Use only the listening arrangement supported for your equipment and workflow. Additional active paths can complicate what you hear and make a mismatch harder to interpret. Start from a verified simple arrangement, then add a needed function deliberately. Check live listening and the saved file after the change, and document the purpose of each active path.

18. Can I test in a simpler recording program?

A simpler supported program can help isolate basic capture, but it does not replace verification in the application used for the assignment. Keep the two results separate. If the simple trial succeeds and the final workflow fails, note the input selections and added components. That comparison can help focus the next investigation without overstating compatibility.

19. What should I verify on a dedicated recorder?

Check the supported input, recording state, saved item, playback, and any required transfer process. Make a clearly labeled practice file and listen to it directly through the intended review path. Do not treat a successful computer recording or a separate live monitor as evidence that the dedicated recorder created its own usable file.

20. Is a second recording device automatically an independent backup?

Not necessarily. It may share a microphone, power source, connection, or another dependency with the main arrangement. Identify those relationships and verify its own saved file. A second device can still be useful, but the backup plan should describe what it actually provides rather than assuming that two devices eliminate every possible interruption.

21. How should I evaluate the Court Reporter 5000 for this workflow?

Review the current recorder package and the instructions for your version, then test the supported input and playback sequence with practice material. If your workflow includes transferring files or using a foot pedal, verify those steps separately. Match the package to the tasks you need instead of assuming that every accessory or connection applies to every version.

22. Why does the saved-file location matter?

You need to know which item contains the new recording and how it will be accessed later. Similar filenames or an application reopening an older item can confuse a quick check. Confirm the spoken label and approximate duration through the program's normal saved-file or project view, then document the supported review or export route.

23. Should I rename application-managed audio files manually?

Use the application's supported naming, copying, and export functions. Moving or renaming managed files outside that workflow can separate them from their project or references. Test organization and transfer with non-confidential practice material first. Keep the original intact and confirm that the intended review copy opens correctly before applying the method to important work.

24. Does successful playback on the recorder prove a transfer worked?

It proves the source file can be played there, not that the intended transferred copy is complete and accessible elsewhere. Use the supported transfer method, then open the copied practice item in the actual review workflow. Confirm its identifying passage and duration. Treat capture, source playback, and transferred-copy playback as related but distinct checks.

25. What information should I record when monitoring and playback disagree?

Note the expected source, headphone connection, selected recording input, saved item, and exact difference. Add what changed since the last successful trial. A concise source-specific observation is more useful than saying audio failed. Include an appropriate practice sample and relevant device-selection screenshots when they help explain the path without exposing unrelated information.

26. How can I avoid checking yesterday's successful sample by mistake?

Use a distinct spoken opening label and a consistent practice-file name. Open the saved item deliberately through the normal application view, then listen for that label and the expected ending. Confirm the approximate duration as well. These simple habits make the result easier to trust without relying only on which file happens to be selected.

27. Is a full-length rehearsal necessary every time?

A stable arrangement may need a short reference check, while a meaningful change deserves a more focused trial of the affected path. Include the important sources and saved-file playback. The appropriate scope depends on the workflow and its requirements. Do not skip an essential unverified source simply because the local microphone sample sounded clear.

28. What belongs in an operator handoff?

Include the equipment arrangement, selected input, recording application or recorder, headphone connection, and practice-file location. State the source labels and any unresolved limitation. A connection photograph can help. The next operator should be able to repeat the relevant check without guessing what you monitored or assuming that a different playback route was already verified.

29. When should I repeat the monitoring comparison?

Repeat the affected check after changing the microphone, connection, recorder input, recording application, listening arrangement, or remote-meeting path. Use the same practice material where possible. A new successful result should describe the configuration now in use. An older reference remains useful context, but it cannot establish behavior after a material change by itself.

30. How can Martel help with an unclear signal path?

Provide the exact product models, receiving equipment, application, intended sources, and headphone connection. Explain what you can hear live and what is present in a suitable saved practice sample. State whether separate tracks or remote audio are required. This gives Martel a concrete configuration to discuss and helps identify the appropriate supported equipment or next check.